Understanding Hierarchy of SOLIDWORKS Appearances
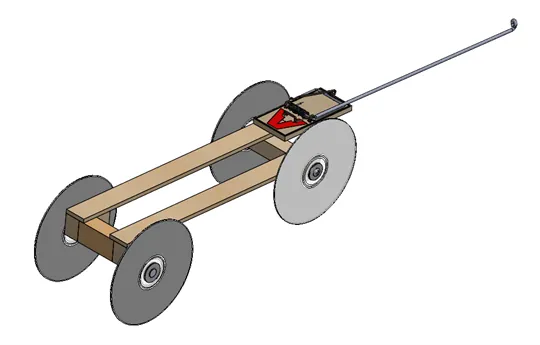
When working with SOLIDWORKS appearances, it is important to understand the order in which appearances are applied to the model. Let’s explore the appearances for this Mouse Trap Race Car.
Existing Appearances
Existing appearances can be found in the FeatureManager Design Tree or DisplayManager. Here is an explanation of the appearance icons.
Related >> SOLIDWORKS FeatureManager: Hidden/Forgotten Commands
![]() A ball icon indicates that a Color has been applied
A ball icon indicates that a Color has been applied
![]() A square indicates that an image has been applied
A square indicates that an image has been applied
![]() The Parts color/appearance is being used at the assembly level
The Parts color/appearance is being used at the assembly level
![]() An appearance has been applied to the part at the assembly level
An appearance has been applied to the part at the assembly level
 An appearance has been applied to the subassembly at the assembly level.
We’ll start by exploring the FeatureManager Design Tree, which have I expanded to view the appearances within my assembly.
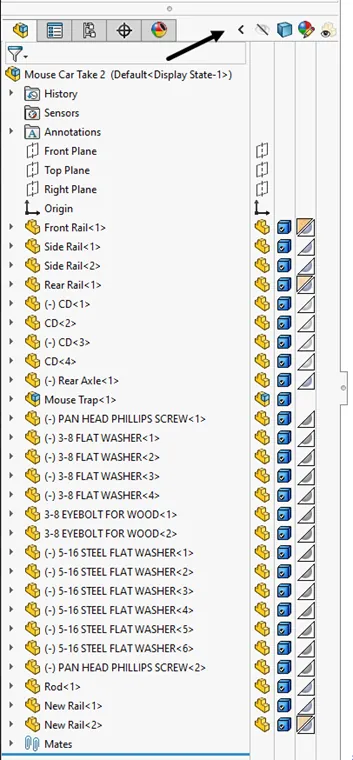
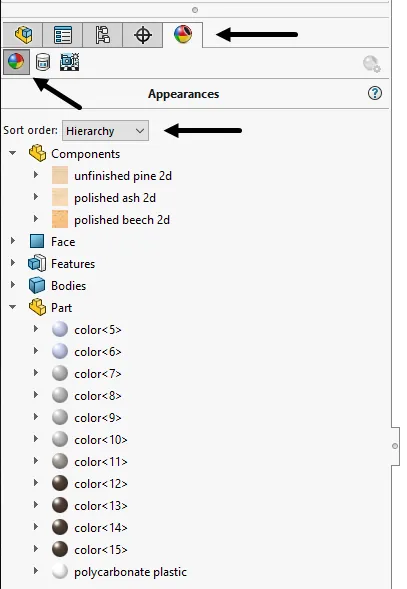
To view the hierarchy of appearances, choose Hierarchy as the sort order. Components indicates appearances added at the assembly level.
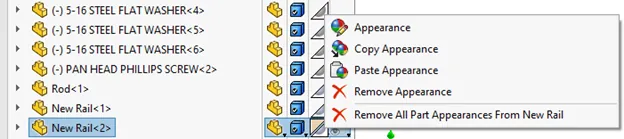
Let’s take a closer look at the part 'New Rail'. Notice the appearances are different at the assembly level for each of the two instances of New Rail. The tree indicates there is an appearance applied at both the part and assembly level for the second instance, which is indicated with the split square icon. Assembly level appearances take precedence over all other component appearances in the assembly.

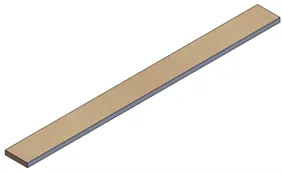
The icon indicates that my part has an appearance of some type of wood at the assembly level, and a grey appearance at the part level.
When I open the part, it does not appear grey, but rather wood, with a single grey face. Let’s explore further to discover why.
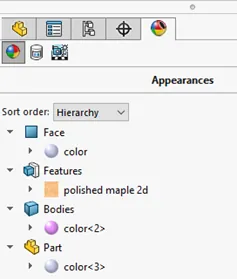
Looking at the DisplayManager for New Rail, there are four appearances applied to the part at different levels. The Hierarchy of this application is Assembly, Face, Feature, Body, Part.
Applying Appearances
When adding appearances, it is important to recognize what the appearance is being applied to. To add an appearance, select the desired appearance in the appearance tab of the TaskManager. Left drag onto the model and hover over what you would like to apply the appearance to.
Select Face, Feature, Body, Part or Assembly from the selection bar.

You can also double-click on appearance to apply it to the part. If you are in an assembly, double-clicking on an appearance overrides all other appearances in the assembly. This is indicated with an icon next to the Assembly Icon, as seen here.
![]()
Removing Appearances
To remove the New Rail Appearance override at the assembly level, left click on the appearance in the FeatureManager Design Tree and choose Remove Appearance.
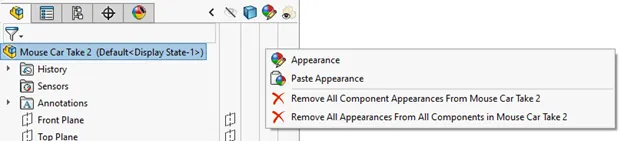
To remove all appearance overrides in the assembly, left-click in the Appearance column, next to the assembly name. Select Remove All Component Appearances. If you would like to remove all Appearances from all levels of this assembly, choose Remove All Appearances.
Note: This will remove Appearances at all file levels.
SOLIDWORKS appearances are a great way to differentiate parts in an assemly, or to identify key features. Now you know how to navigate them efficiently.
Expand Your SOLIDWORKS Skillset
SOLIDWORKS Cosmetic Thread View Options
Best Workstation for SOLIDWORKS: Hardware Configurations

About Heather McHale
Heather McHale is a SOLIDWORKS Technical Support Engineer, Instructor, and Certified SOLIDWORKS Expert. Heather has over 13 years of design experience since earning her degree in Computer Aided Drafting from Kellogg Community College. Heather joined the VAR channel in 2017 first with DASI and now GoEngineer. Based out of western Michigan, Heather enjoys camping, hiking, and scrapbooking in her free time.
Get our wide array of technical resources delivered right to your inbox.
Unsubscribe at any time.