SOLIDWORKS Fill Pattern Tool Explained
Fill Pattern is a useful tool in SOLIDWORKS used to create patterns covering desired faces and surfaces. In this guide, we will introduce how to use Fill Pattern and the different settings and parameters that can be used.
Learn More About Fill Pattern >> SOLIDWORKS Fill Property PropertyManager Guide
Fill Pattern uses different parameters and relations than a linear pattern, allowing changes and adjustments to be made without breaking the pattern. A Fill Pattern can be applied to a specific face or Surface Body.

How to Use the SOLIDWORKS Fill Pattern Tool
Access the Fill Pattern tool under the Patterns drop-down menu on the Command bar. (Optionally, Fill Pattern can be found via Insert > Pattern/Mirror.
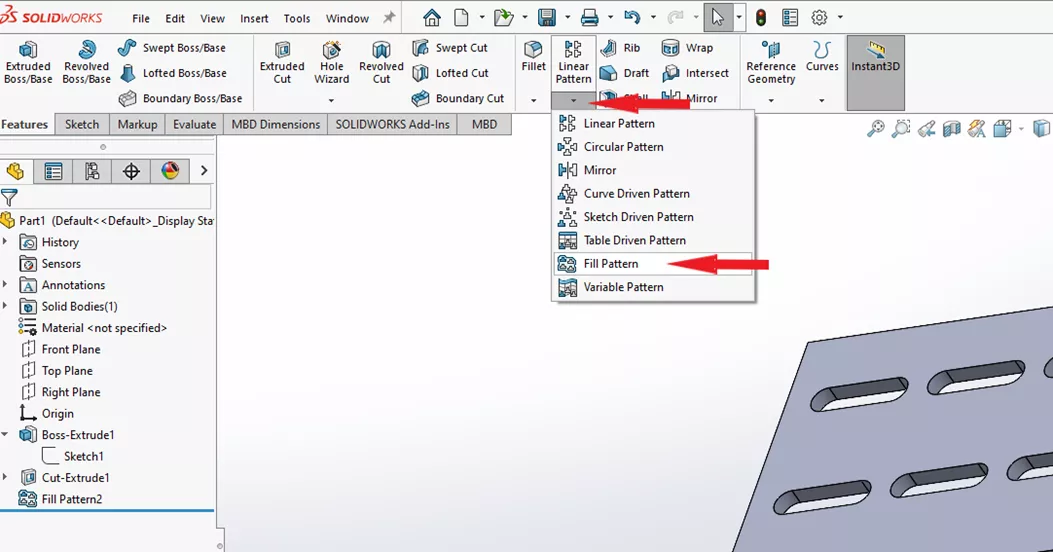
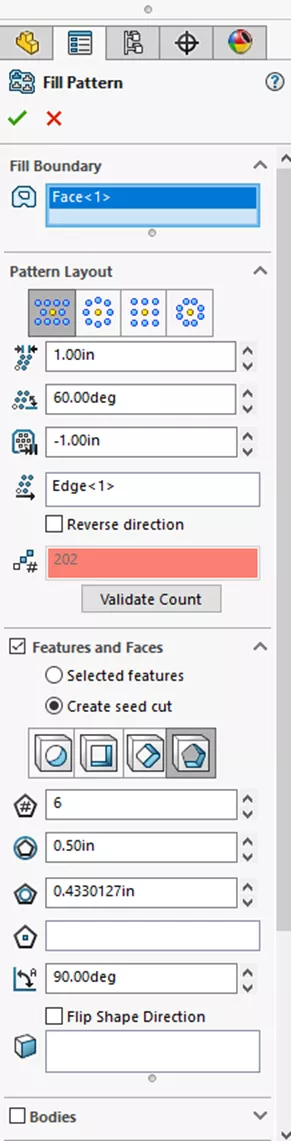
Fill Boundary
The Fill Boundary box shows which faces or contours have been selected to apply the Fill Pattern.
Pattern Layout
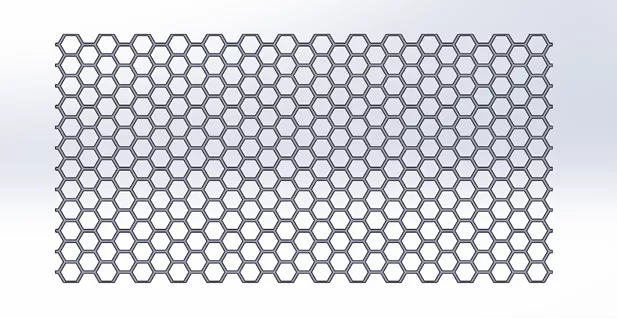
Here, the layout of the Pattern is selected. Available layouts are Perforation, Circular, Square, and Polygon. Each layout has its own parameters that need to be set and calculated. In this example, we're creating a honeycomb pattern, so the instance spacing has been set to 1 inch and the margins have been set to -1 so that the pattern overhangs the edge of the face.
Features and Faces
Selected Features
Here the selected features and faces to be patterned are shown in their respective boxes. Features such as cuts and extrudes can be used to pattern.
Create Seed Cut
A seed can be created in the Fill Pattern tool instead of using an existing feature to pattern. The option to create a circle, square, diamond, or polygon is given within the create seed cut function. In this example, a polygon with six sides that are .5" wide has been created for the honeycomb pattern.
Bodies
Check this option if bodies are to be patterned. Selected bodies are displayed in the selected entities box.
Instances to Skip
If certain copies within the pattern are not needed, they can be turned off (skipped) by selecting them with the Instances to Skip option.
Adjusting the Fill Pattern
Adjusting the Fill Pattern can be simpler than adjusting a linear pattern. If the overall size of the pattern is to be changed, a simple adjustment to the selected Fill Boundary face or contour is all that's needed.
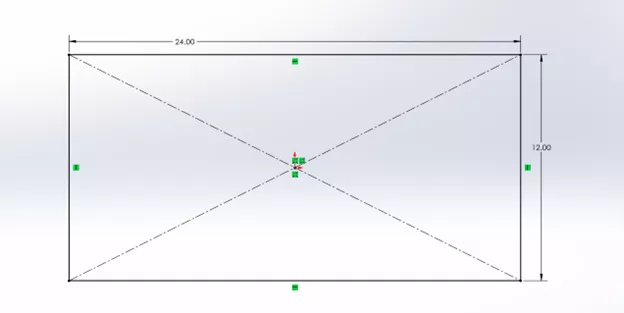
SOLIDWORKS will calculate the pattern to fit the new size of the Fill Boundary, but depending on the pattern, these calculations can take some time.
![]() Want to learn more? Check out this YouTube video for a demonstration of these tips, tricks, and best practices.
Want to learn more? Check out this YouTube video for a demonstration of these tips, tricks, and best practices.
More SOLIDWORKS Tutorials
How to Use SOLIDWORKS Envelope Mode
Improve SOLIDWORKS Decal Image with Mask
SOLIDWORKS Design Checker Tool Explained
Check Tool SOLIDWORKS Tutorial
![]()
About Kaden Sumsion
Kaden is a SOLIDWORKS Technical Support Engineer at GoEngineer.
Get our wide array of technical resources delivered right to your inbox.
Unsubscribe at any time.