SOLIDWORKS Fixed vs Floating Components
In this article, we’ll discuss the difference between fixed and floating components in a SOLIDWORKS assembly. We will also look at a tool that will allow us to temporarily move between these two component states.
Fixed Components
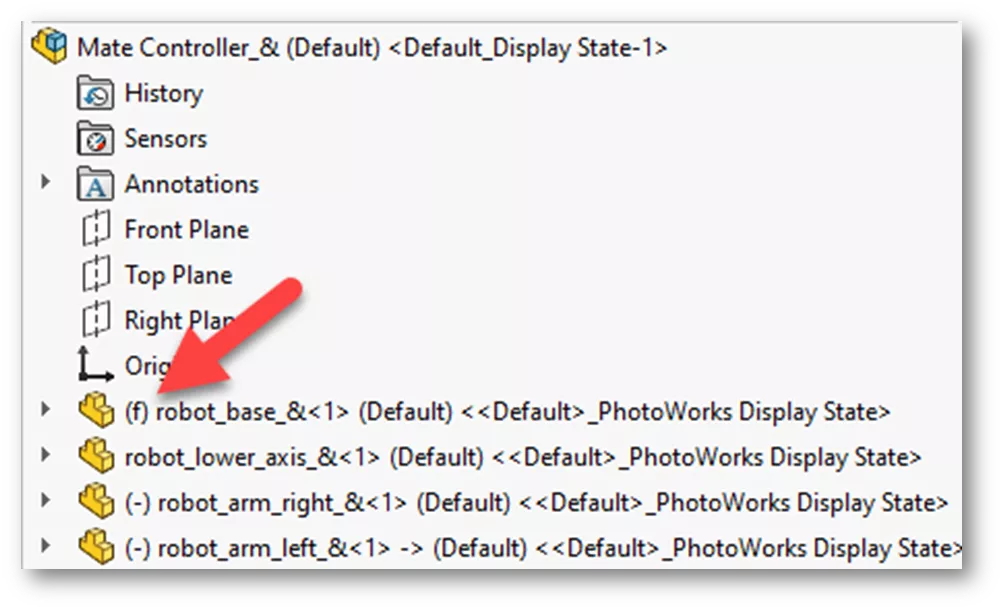
In SOLIDWORKS, a fixed component is locked down in all six degrees of freedom, meaning the component’s position is fixed in space and cannot be moved. To indicate a component is fixed, SOLIDWORKS places an (f) next to the component name in the FeatureManager Design Tree.
Note: By default, the first component inserted into an assembly will become fixed. When inserting additional components, clicking the green check mark in the Insert Component PropertyManager will also fix the component at the assembly origin. If you intend to mate the component, drop the component into the graphics area; do not click the green check mark.
A component that is not fixed can be set this way by right-clicking the component in the FeatureManager Design Tree and choosing Fix.
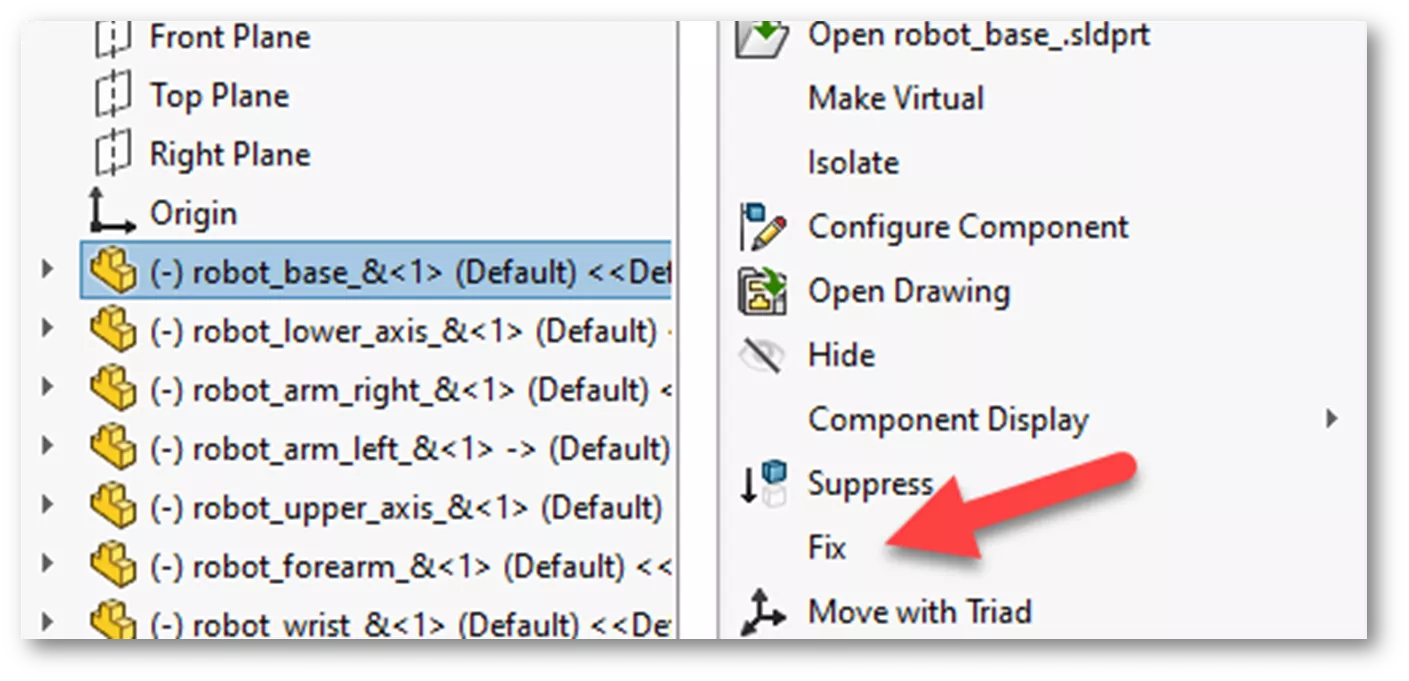
Note: If the component has existing mates, fixing the component will result in mate errors. If you want the component fixed, first delete the mates that lock the component down.
Floating a Component
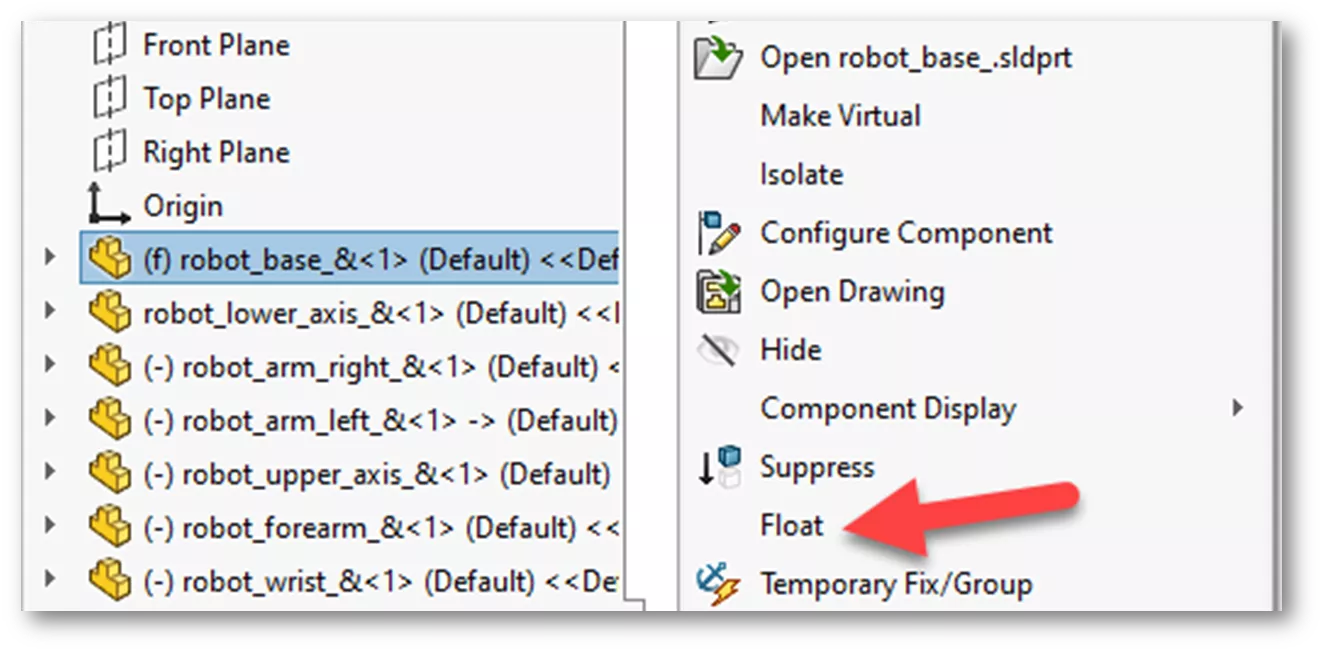
When a component is fixed in the FeatureManager Design Tree, it can be changed to a floating state, meaning the component can be moved in all degrees of freedom again. To float a component, right-click on the component in the FeatureManager Design Tree and choose Float.
Temporary Fix/Group
When working with assemblies that have several degrees of freedom, or many moving parts, it is sometimes difficult to move a component without affecting the position of others.
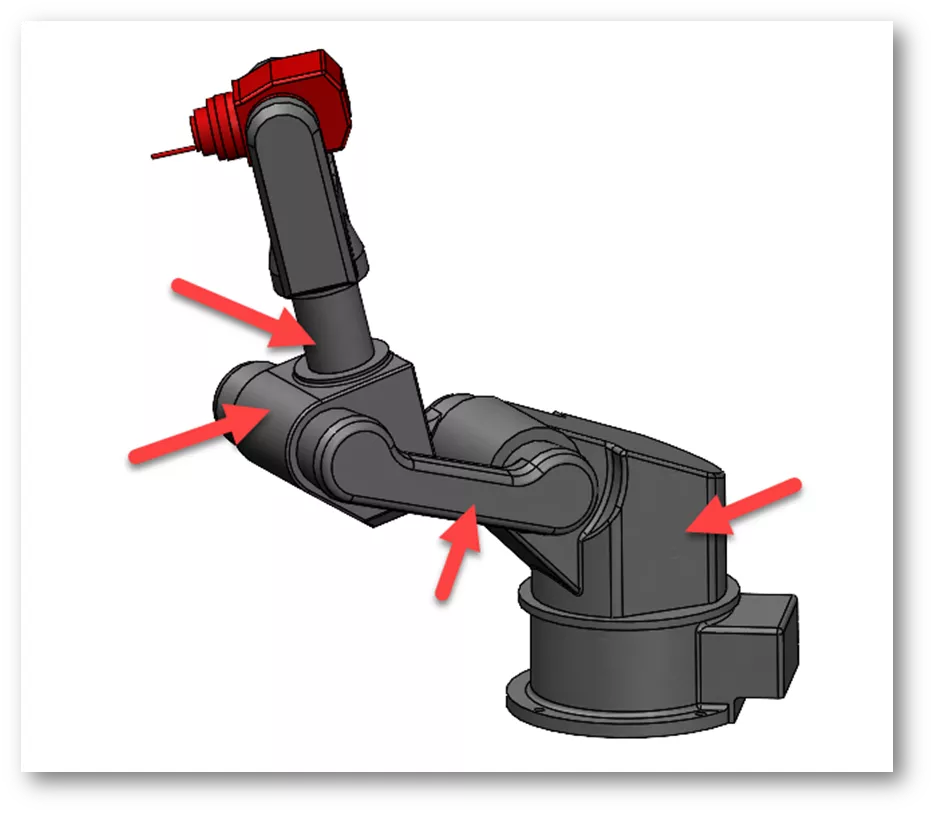
For example, this robotic arm assembly has several degrees of freedom. Moving the robot wrist (red component), affects the position of all other components with multiple degrees of freedom.
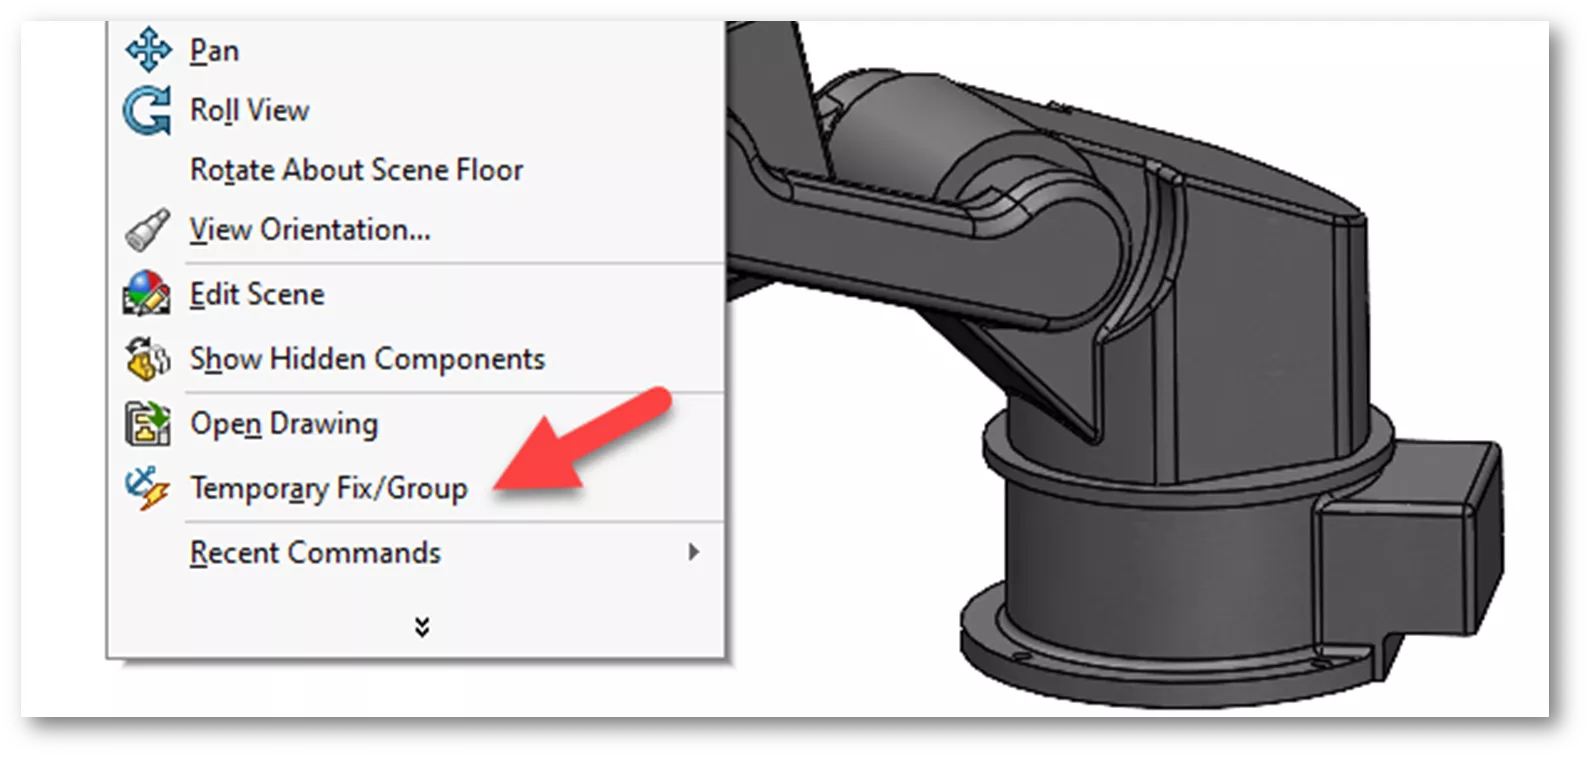
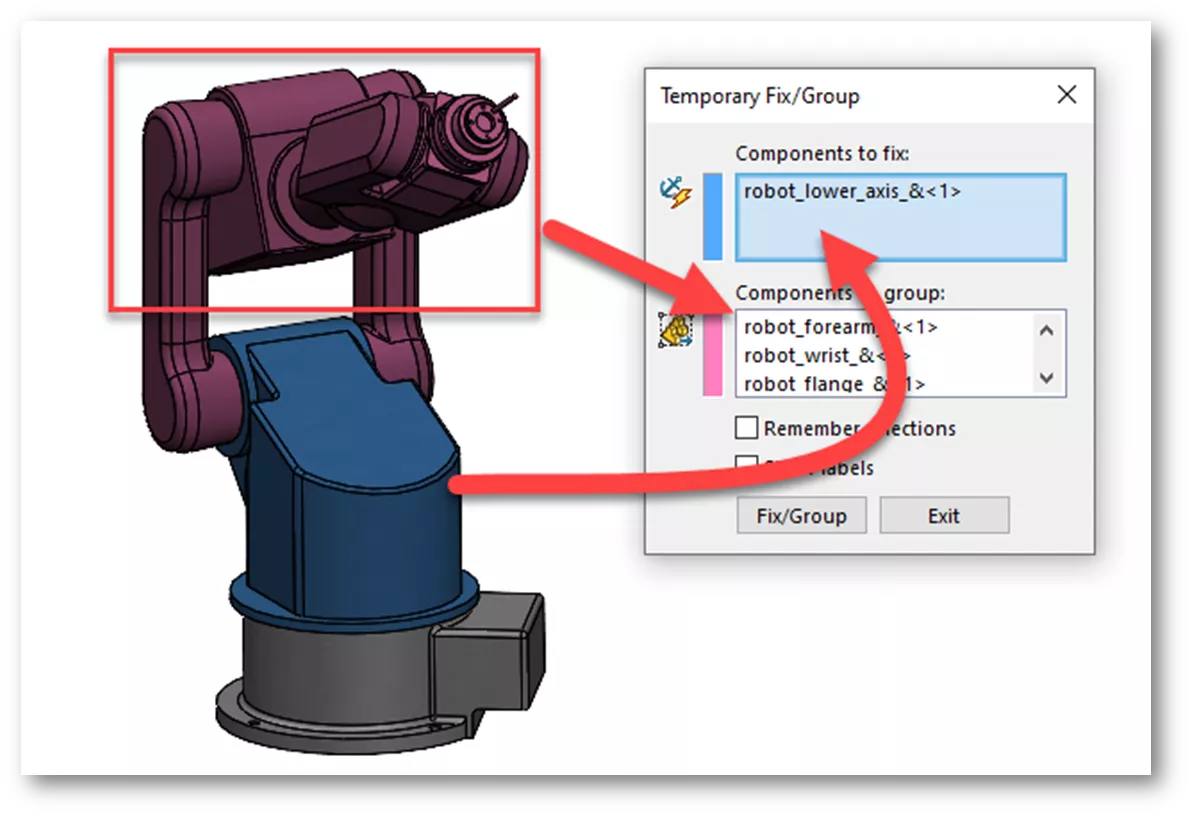
For occasions like this, SOLIDWORKS has a feature called Temporary Fix/Group. To access this command, right-click in a blank space of the graphics area and choose Temporary Fix/Group.
In the Components to fix selection box, select the robot forearm component that is mated to the robotic wrist, then click the Fix/Group button.
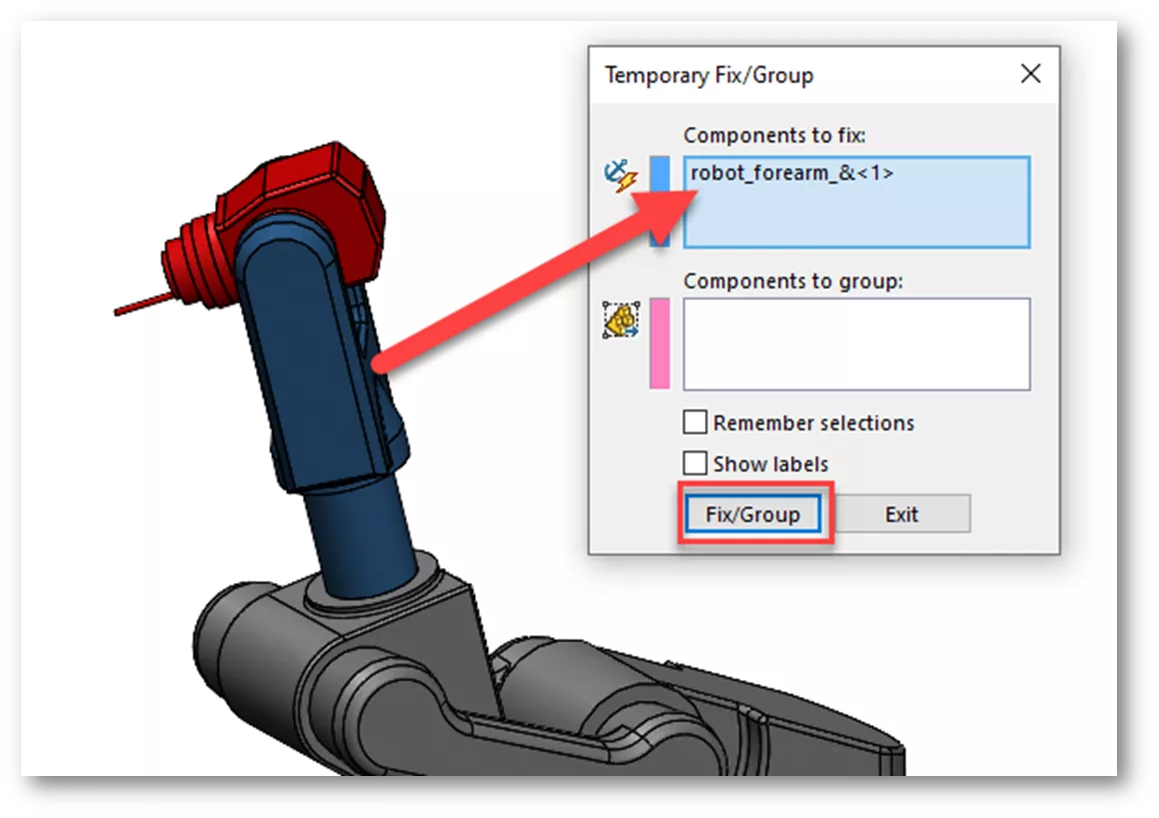
This will allow us to move the robot wrist angle without affecting the position/rotation of the forearm. When the component is in the desired position, click Exit to escape the command. The component stays in the place it was moved to.
We can also group components together using the Components to group field. This basically treats all select components like a subassembly, meaning they all move together as one part.
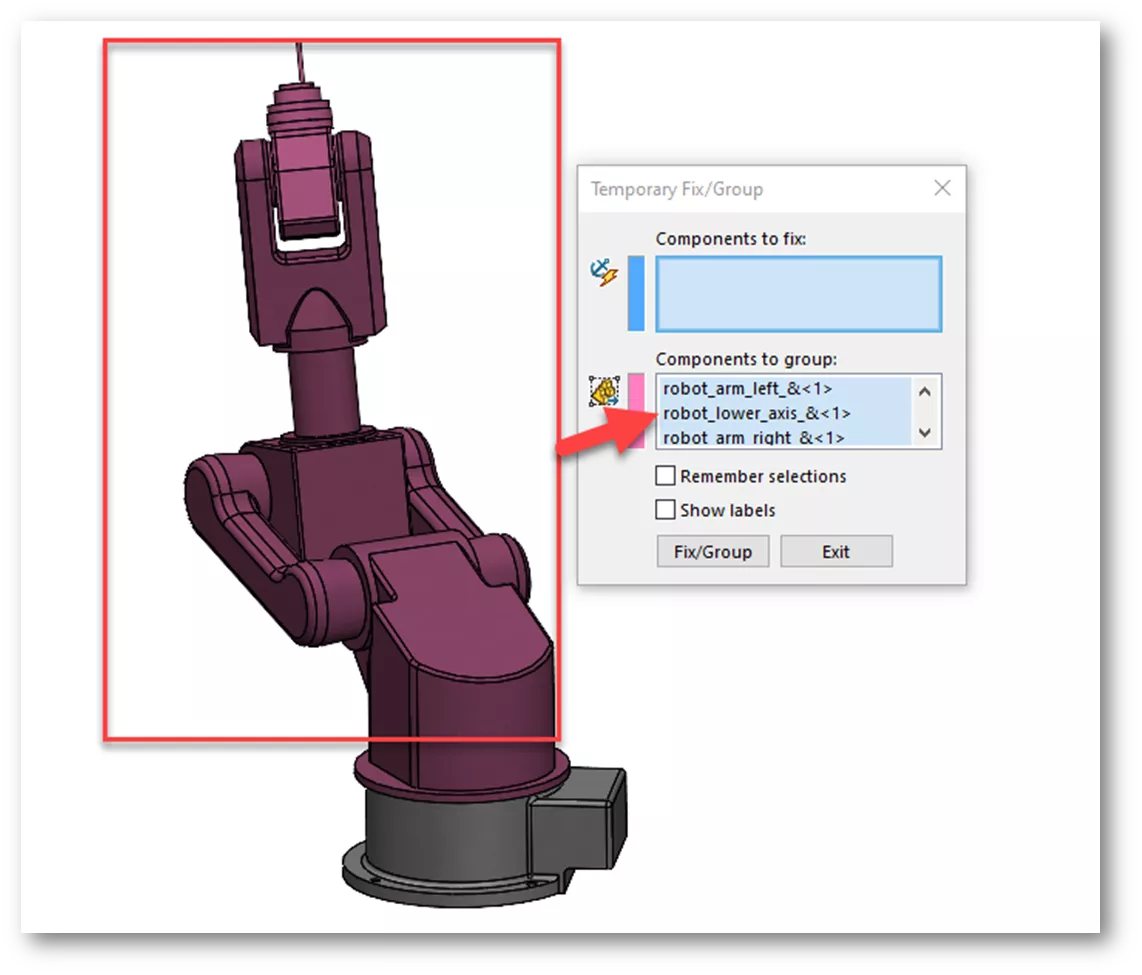
We can also use a combination of Components to fix and Components to group.
In this example, we want the robot arms, forearms, and wrist to move as a group, but the shoulder to be fixed so that it cannot rotate. Select the robot shoulder as the fixed component, and set the arms, forearm, and wrist as the components to group. We can now move those components as a group without affecting the rotation of the robot shoulder.
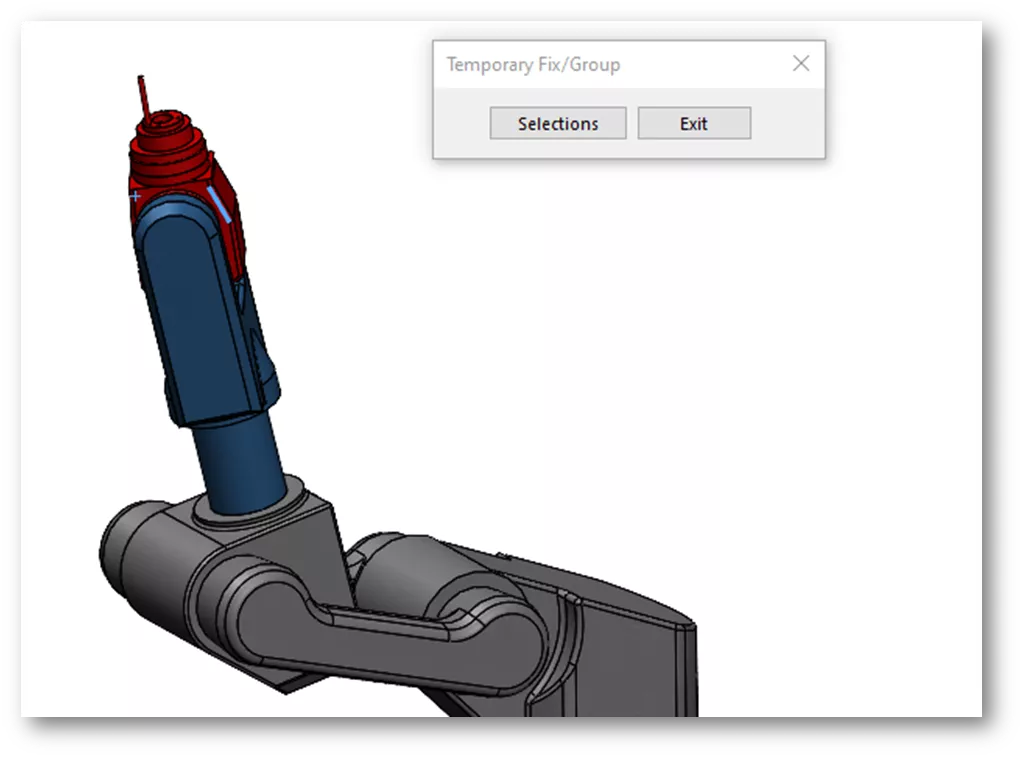
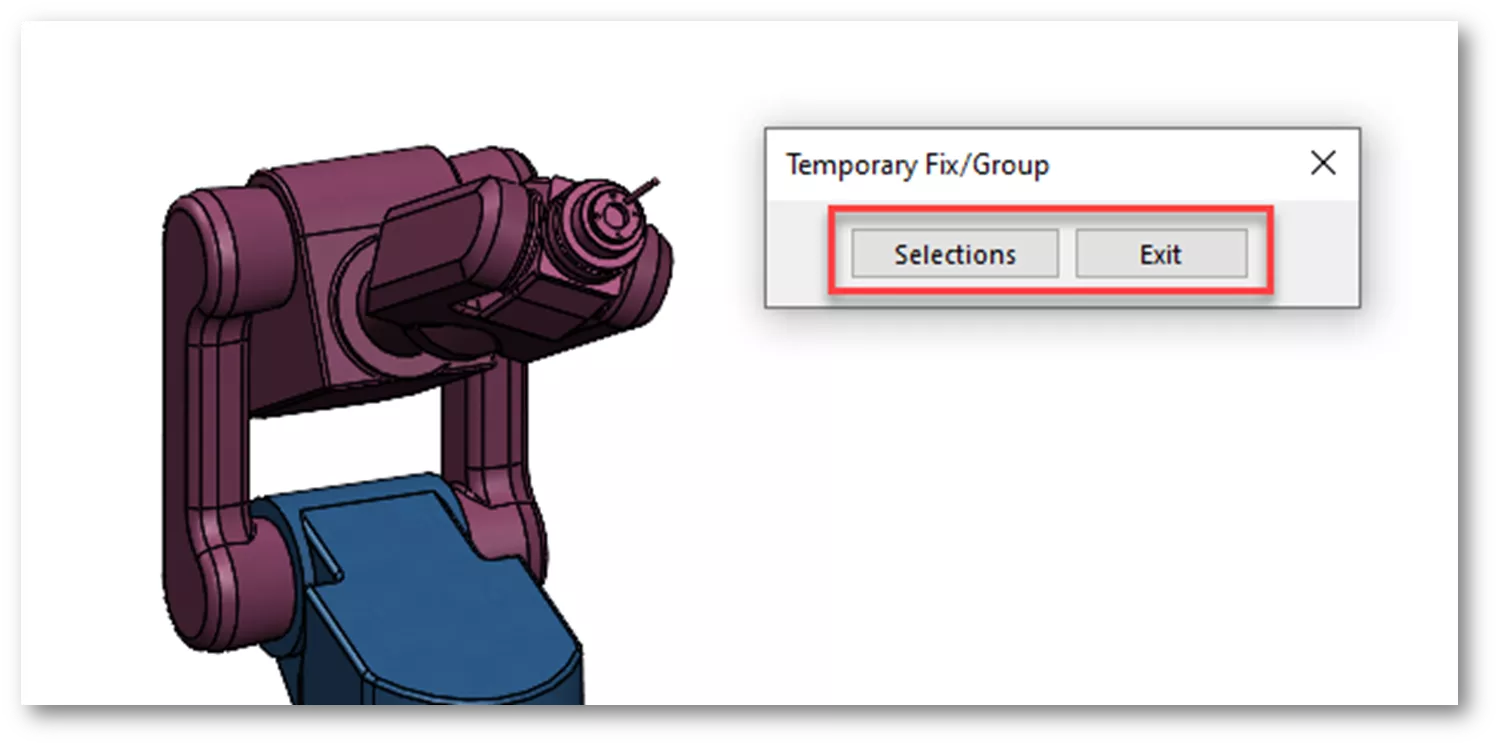
Note: Always click Fix/Group before moving a component. To see the selections again, and to choose different component groupings, choose Selections. To exit the command, choose Exit.
Want to Learn More?
Take your SOLIDWORKS skills to the next level and enroll in the official SOLIDWORKS Essentials training course . Both online and in-person classes are available.

I hope you found this article explaining Fixed vs Floating components in SOLIDWORKS helpful. Check out more tips and tricks listed below. Additionally, join the GoEngineer Community to participate in the conversation, create forum posts, and answer questions from other SOLIDWORKS users.

SOLIDWORKS CAD Cheat Sheet
SHORTCUTS ⋅ MOUSE GESTURES ⋅ HOT KEYS
Our SOLIDWORKS CAD Cheat Sheet, featuring over 90 tips and tricks, will help speed up your process.
More SOLIDWORKS Tutorials
How to Create Text Around a Circle in SOLIDWORKS
Work Smart with SOLIDWORKS Smart Components
SOLIDWORKS Costing: Sheet Metal Parts
SOLIDWORKS Unabsorb Sketches Explained
Ultimate Guide to SOLIDWORKS Blocks: Toolbar Options, Block Creation, Walkthrough, and More

About Zach Brown
Zach Brown is a certified SOLIDWORKS Expert and a Technical Support Engineer. Prior to working at GoEngineer, he spent 15 years as a mechanical designer, CAD support tech, and instructor using SOLIDWORKS. His hobbies include playing guitar, riding motorcycles, and skiing.
Get our wide array of technical resources delivered right to your inbox.
Unsubscribe at any time.