Ultimate Guide to SOLIDWORKS Blocks: Toolbar Options, Block Creation, Walkthrough, and More
In SOLIDWORKS, Blocks are a collection of sketch entities and even notes that can be saved for use in multiple parts, assemblies, and drawings. This can be a valuable time saver, especially for those entities used frequently. Think about sketches or notes that you may be using cut and paste for. Those can be saved as blocks in the design library, or other convenient location, for ready access without the need to open a previous file. In this guide, we'll demonstrate creating a block in SOLIDWORKS and how to reuse it.
Help files
For general references, use SOLIDWORKS help through the CommandManager “?“ icon or visit help.solidworks.com to view help contents online. The help option inside the PropertyManager "?" in the upper right corner will also take you to the appropriate help subject. This is a great way to get a refresh of feature requirements and inputs.
SOLIDWORKS Blocks Toolbar
The Blocks toolbar contains all the tools for working with Sketch Blocks.
To create blocks in a part or assembly, you must be in sketch mode.
How to Create Blocks in SOLIDWORKS
A block can be created from any single or combination of multiple sketch entities.
To make blocks:
- Create a sketch.
- Click Make Block.
 (Blocks toolbar) or Tools > Block > Make.
 - Block tools are also available by right-clicking Block
 in the FeatureManager Design Tree. Select the sketch entities you want to make as a block for Block Entities.
 - Click

- Repeat steps 2-4 for each of the remaining sketch entities.
- With the sketch in edit mode, add the necessary relations.
- Save the part. When making a block, you can specify an Insertion Point to use when inserting the block.
To save blocks:
- Select the block and click Save Block
 (Blocks toolbar) or Tools > Block > Save.
Other Block Toolbar options
Editing Blocks
When editing a block, you can add, remove, or modify sketch entities, as well as change existing relations and dimensions.
To edit a block:
- Right-click the sketch and select Edit Sketch.
- Expand the folder to display the blocks.
- Select a block and click Edit Block
 (Blocks toolbar) or Tools > Block > Edit) The block is identified by in the FeatureManager Design Tree.
 - Make changes to the block and click the block confirmation corner
 to close the edit.
 - To save the block, select the block in the FeatureManager Design Tree, and click Save Block (Blocks toolbar) or Tools > Block > Save. If the block was previously saved and you save the edits to the block using the same name, the change propagates to all other instances of the block.
Editing Blocks that are Linked to External Files
To edit the block, do one of the following:
- Clear link to file.
This enables you to edit only instances of the block in the current sketch. - Edit the external file.
This propagates changes to all instances of the block.
When editing blocks linked to external files, the sketch relations between the blocks are maintained if the geometry used to define the sketch relations remain identical.
Inserting Blocks
To insert a block:
- In the Edit Sketch mode, click Insert Block
 (Blocks toolbar) or Tools > Blocks > Insert.
 - In the PropertyManager, under Blocks to Insert, either:
- Select an item from Open Blocks to insert an additional instance of a current block.
- Click Browse to locate a previously saved block.
If the block is in current sketch, do this:
If the block was previously saved, do this:
- Drag the block and click to position it in the graphics area.
- Do one of the following:
- Repeat step a to add another instance.
- Select another item from Open Blocks.
- In the dialog box, select the block and click Open.
If you select Create external reference to file, changes made to the original file propagate to all instances of the block. You cannot edit the block in the current document. - Drag the block and click to position.
In the PropertyManager, under Blocks to Insert, you can select Link to file. The result is identical to selecting Create external reference to file in the dialog box.
- Add any relations required to ensure that movement is correctly constrained.
- In the PropertyManager, under Parameters, set values for
- Block Scale
 The default value 1 is the size of the original block.
 - Block Rotation
 The default value 0 is the angle at which the original block was created.
- Block Scale
- Click
Adding and Removing Sketch Entities in Blocks
Sketch entities can be added or removed. When removing sketch entities from a block, those sketch entities are promoted from the block level to the immediate next level. Add a block reverses the process.
Add/Remove Block is useful with complex sketches, for instance, an imported file, and you want to use selected entities from the sketch as blocks.
To add/remove a block:
- In Edit Sketch mode, select a Block in the FeatureManager Design Tree.
- Click Edit Block (Blocks toolbar) or Tools > Blocks > Edit.
- Click Add/Remove
 (Blocks toolbar) or Tools > Blocks > Add/Remove Entities.
 - In the PropertyManager, under Block Entities, select the entities to add or remove. The sketch entities that are marked will be removed from the block.
- Click , click the block confirmation corner , and close the sketch.
The entities that were selected are still part of the sketch, but were promoted to the sketch level.
Exploding Blocks
Dissolve blocks from any sketch entity by exploding the block.
To explode a block:
- Select the Sketch block in the FeatureManager Design Tree.
- Click Explode Block
 (Blocks toolbar) or Tools > Blocks > Explode to dissolve the block.
Rebuilding Blocks
Rebuild Block enables us to refresh sketch entities without exiting the Edit Sketch mode. For example, a sketch entity in the upper sketch is constrained to a block with a coincident relation.
- Click Edit Block (Blocks toolbar) or Tools > Blocks > Edit to move the position of the sketch entity. The result is that the block is no longer coincident with the entity in the upper-level sketch.
- Click Rebuild Block
 (Blocks toolbar) or Tools > Blocks > Rebuild to re-establish the coincident relation again.
This refreshes the entities while still in sketch block editing mode.
Using Traction and Belts for Layout Sketches
The Traction ![]() relation and the Belt/Chain tool
relation and the Belt/Chain tool ![]() (Blocks toolbar) enable us to use layout sketches to create these mechanisms:
(Blocks toolbar) enable us to use layout sketches to create these mechanisms:
- Multiple gear sets
- Cable and belt pulleys
- Chain sprocket systems
Traction
The Traction relation creates relative rotation constraints between sketch entities by adding a tangent relation between blocks that represent pulleys or sprockets.
Adding Traction Relations:
- Sketch multiple circular or linear entities to represent gears, rack and pinion mechanisms, etc.
- Make each entity a separate block.
- Add relations and dimensions to eliminate motion not related to the mechanism.
Note: Limit the use of the Fix relation, for example, to the center of one circle. Use horizontal and vertical relations, dimensions, or construction geometry to locate the centers of additional circles or sketch entities. Adding multiple fix relations potentially restricts the model's degrees of freedom. - In the graphics area, select two sketch entities to add relative rotation constraints.
Using the Belt/Chain Tool:
- Sketch multiple circular entities to represent belt members.
- Make each sketch entity into a block.
- Click Belt/Chain
 (Blocks toolbar) or Tools > Sketch Entities > Belt/Chain.
 - Add relations and dimensions to eliminate motion not related to the mechanism.
- Add belt members and belt to create the mechanism.
Walkthrough
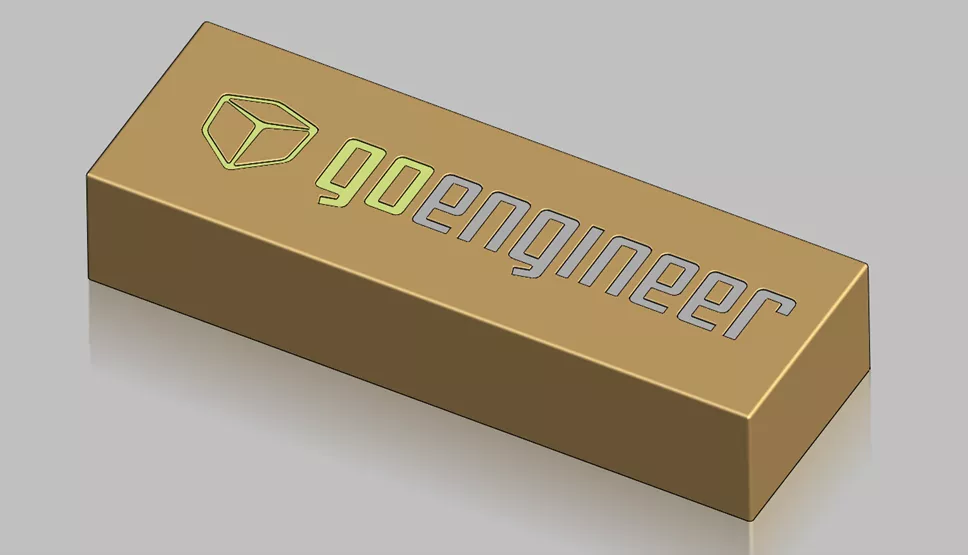
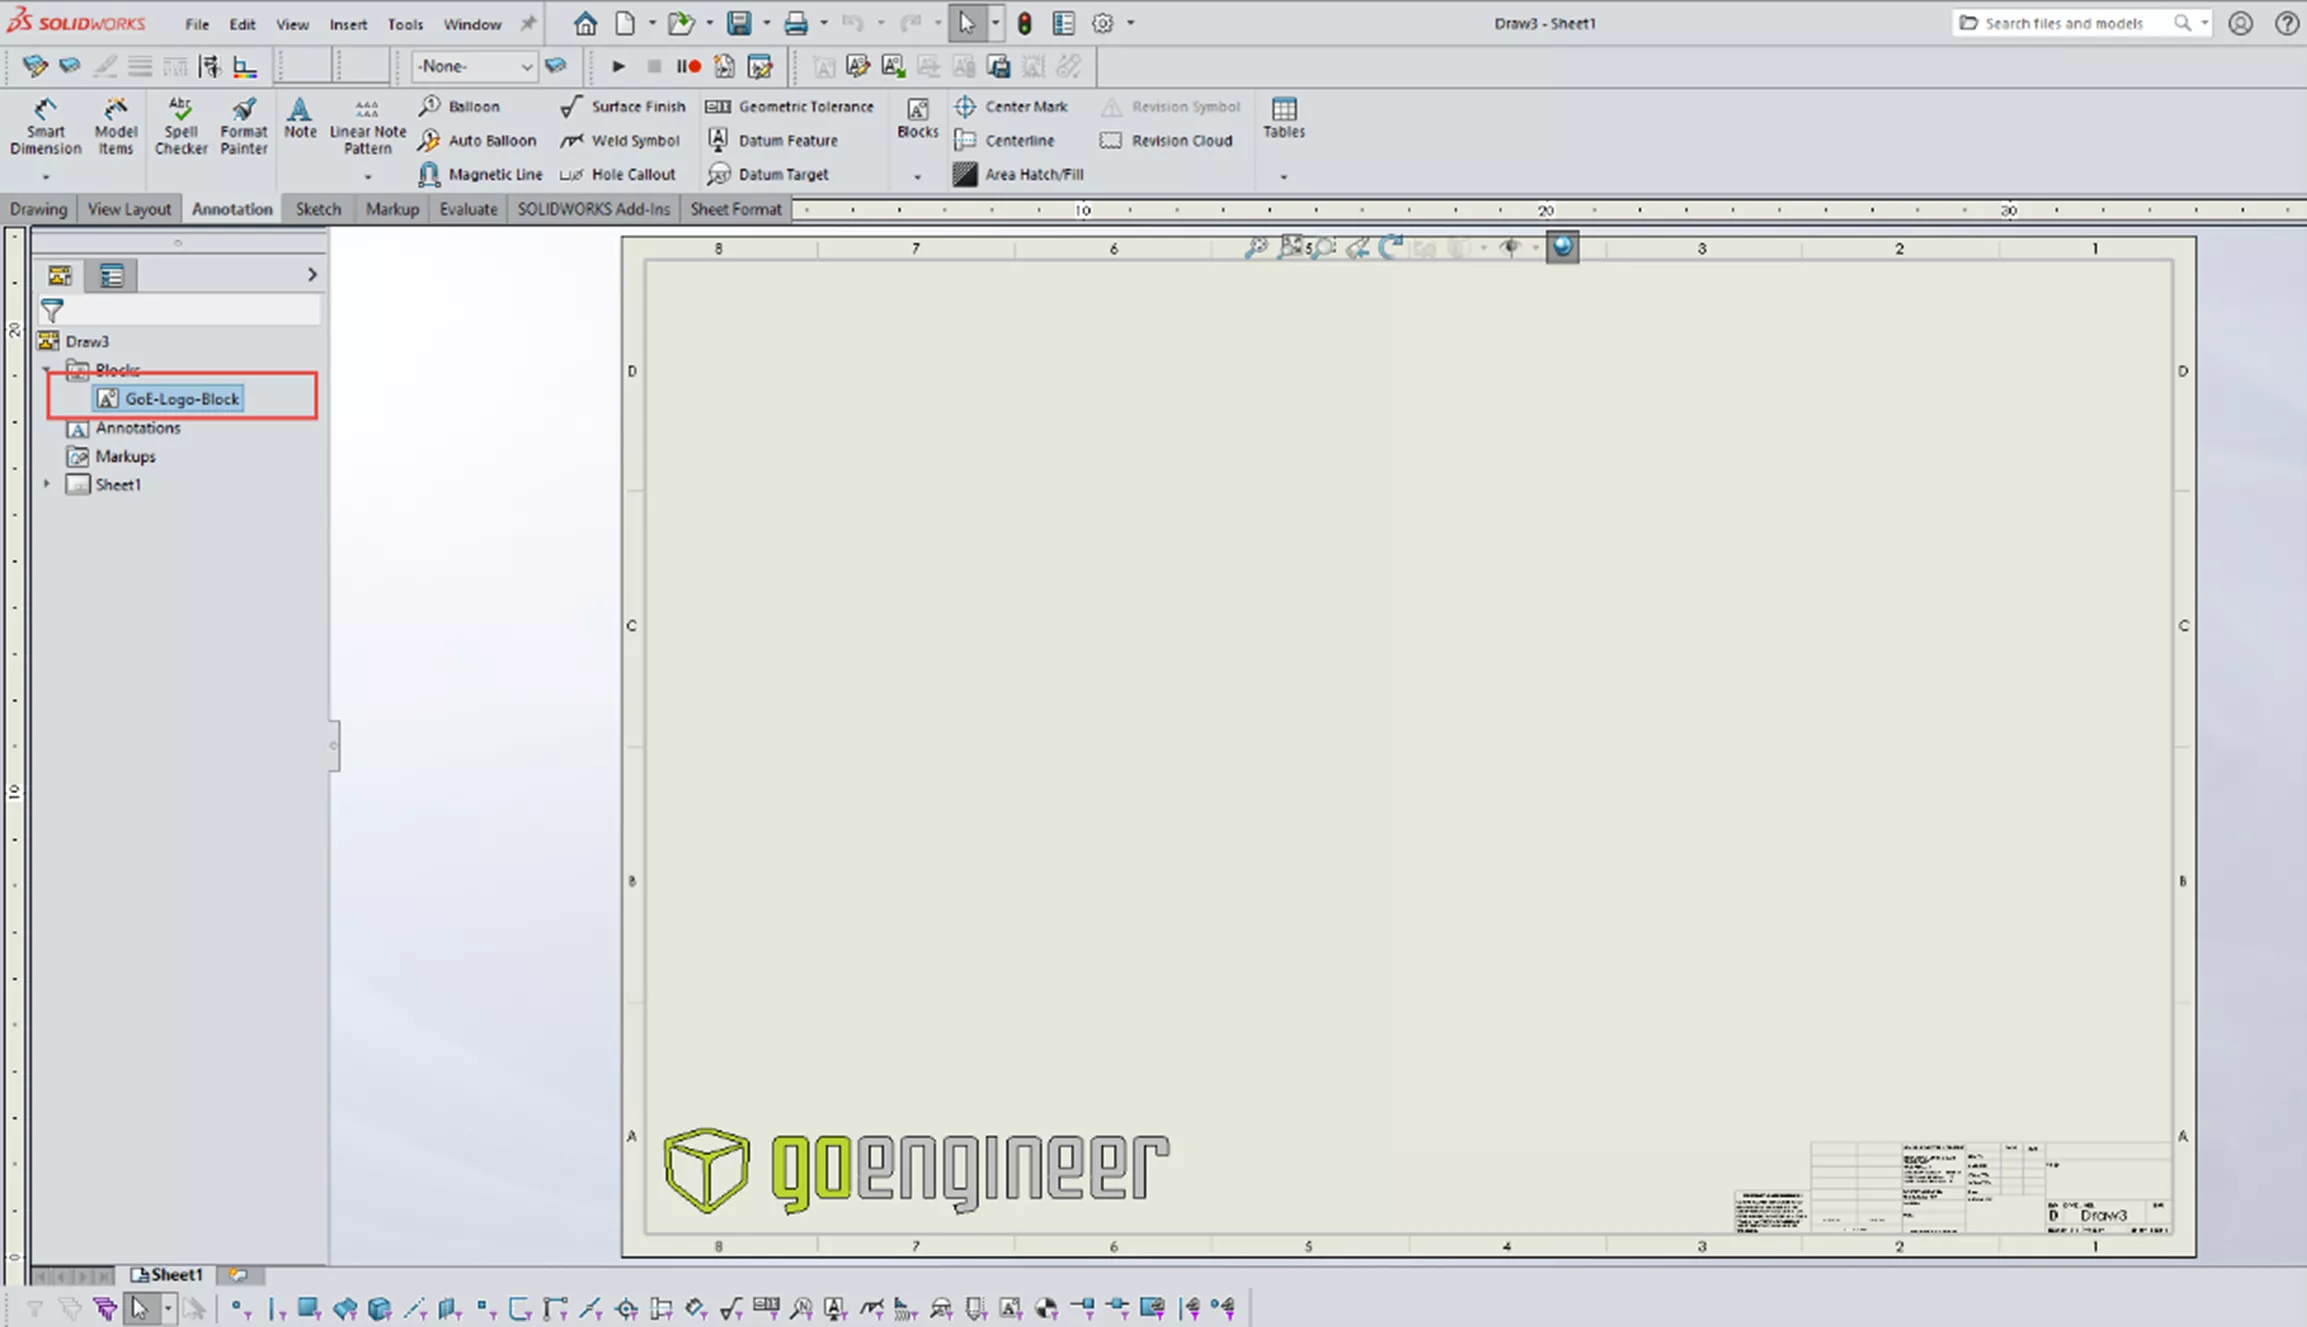
In this example, I have a picture of a logo that I want to turn into sketch entities for use in my models and drawings. I have created a new part and started a new sketch. I then inserted the picture using the sketch tools and insert picture.
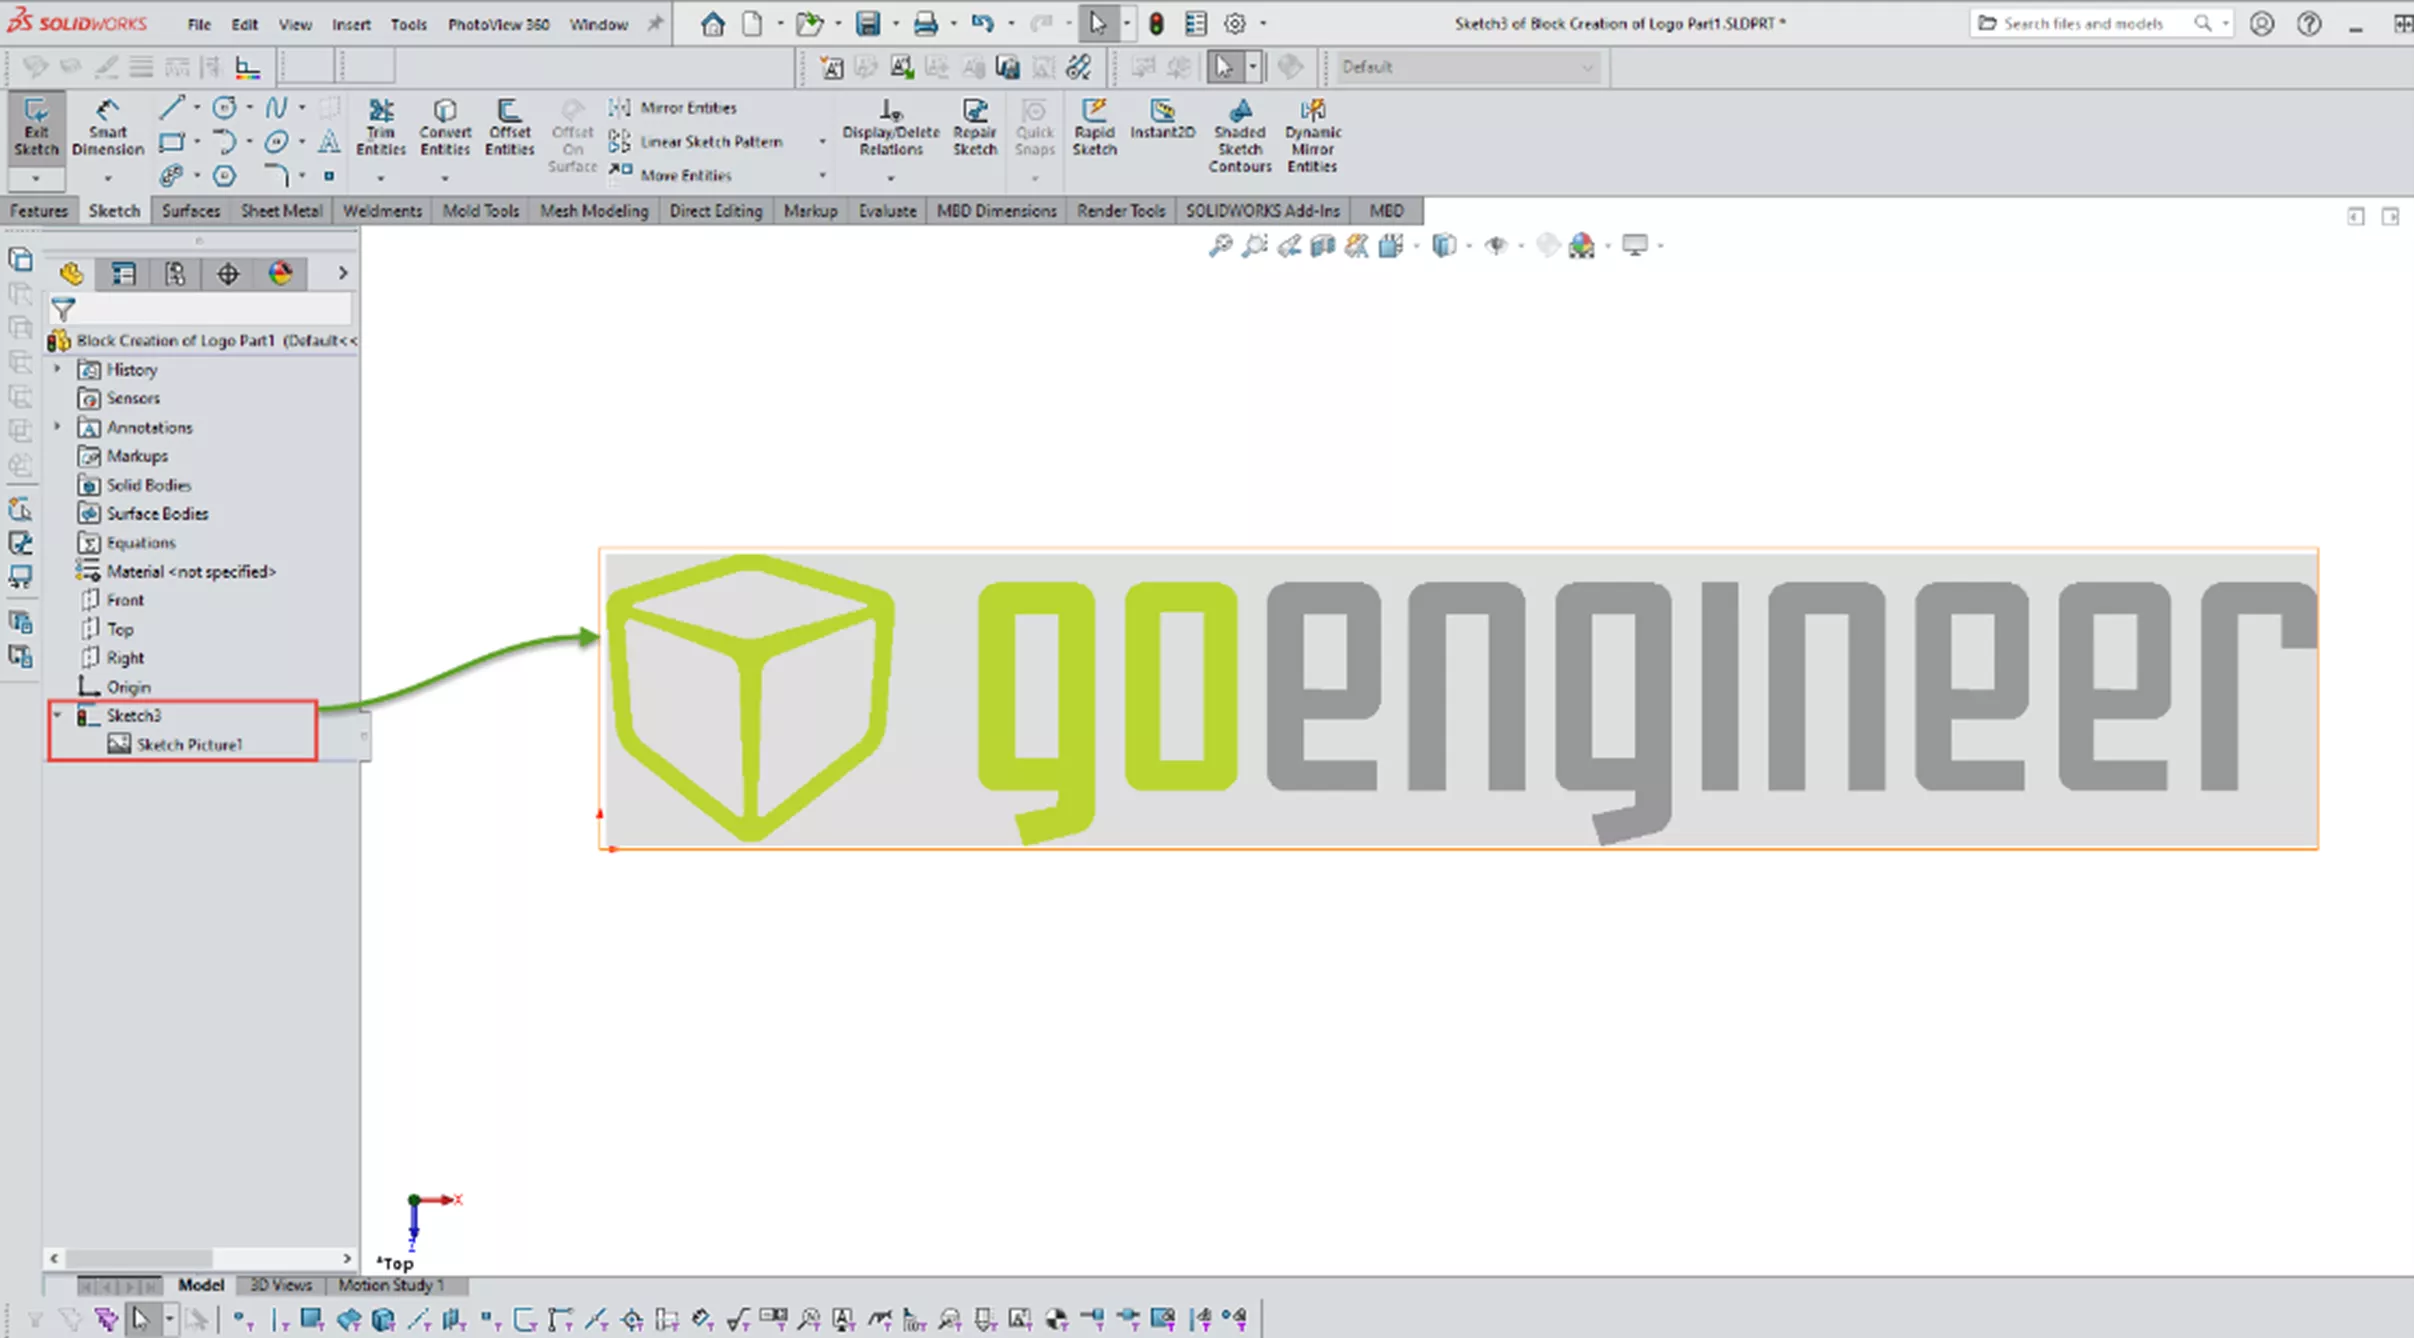
I then created sketch entities to conform to the picture. (Shown in blue)
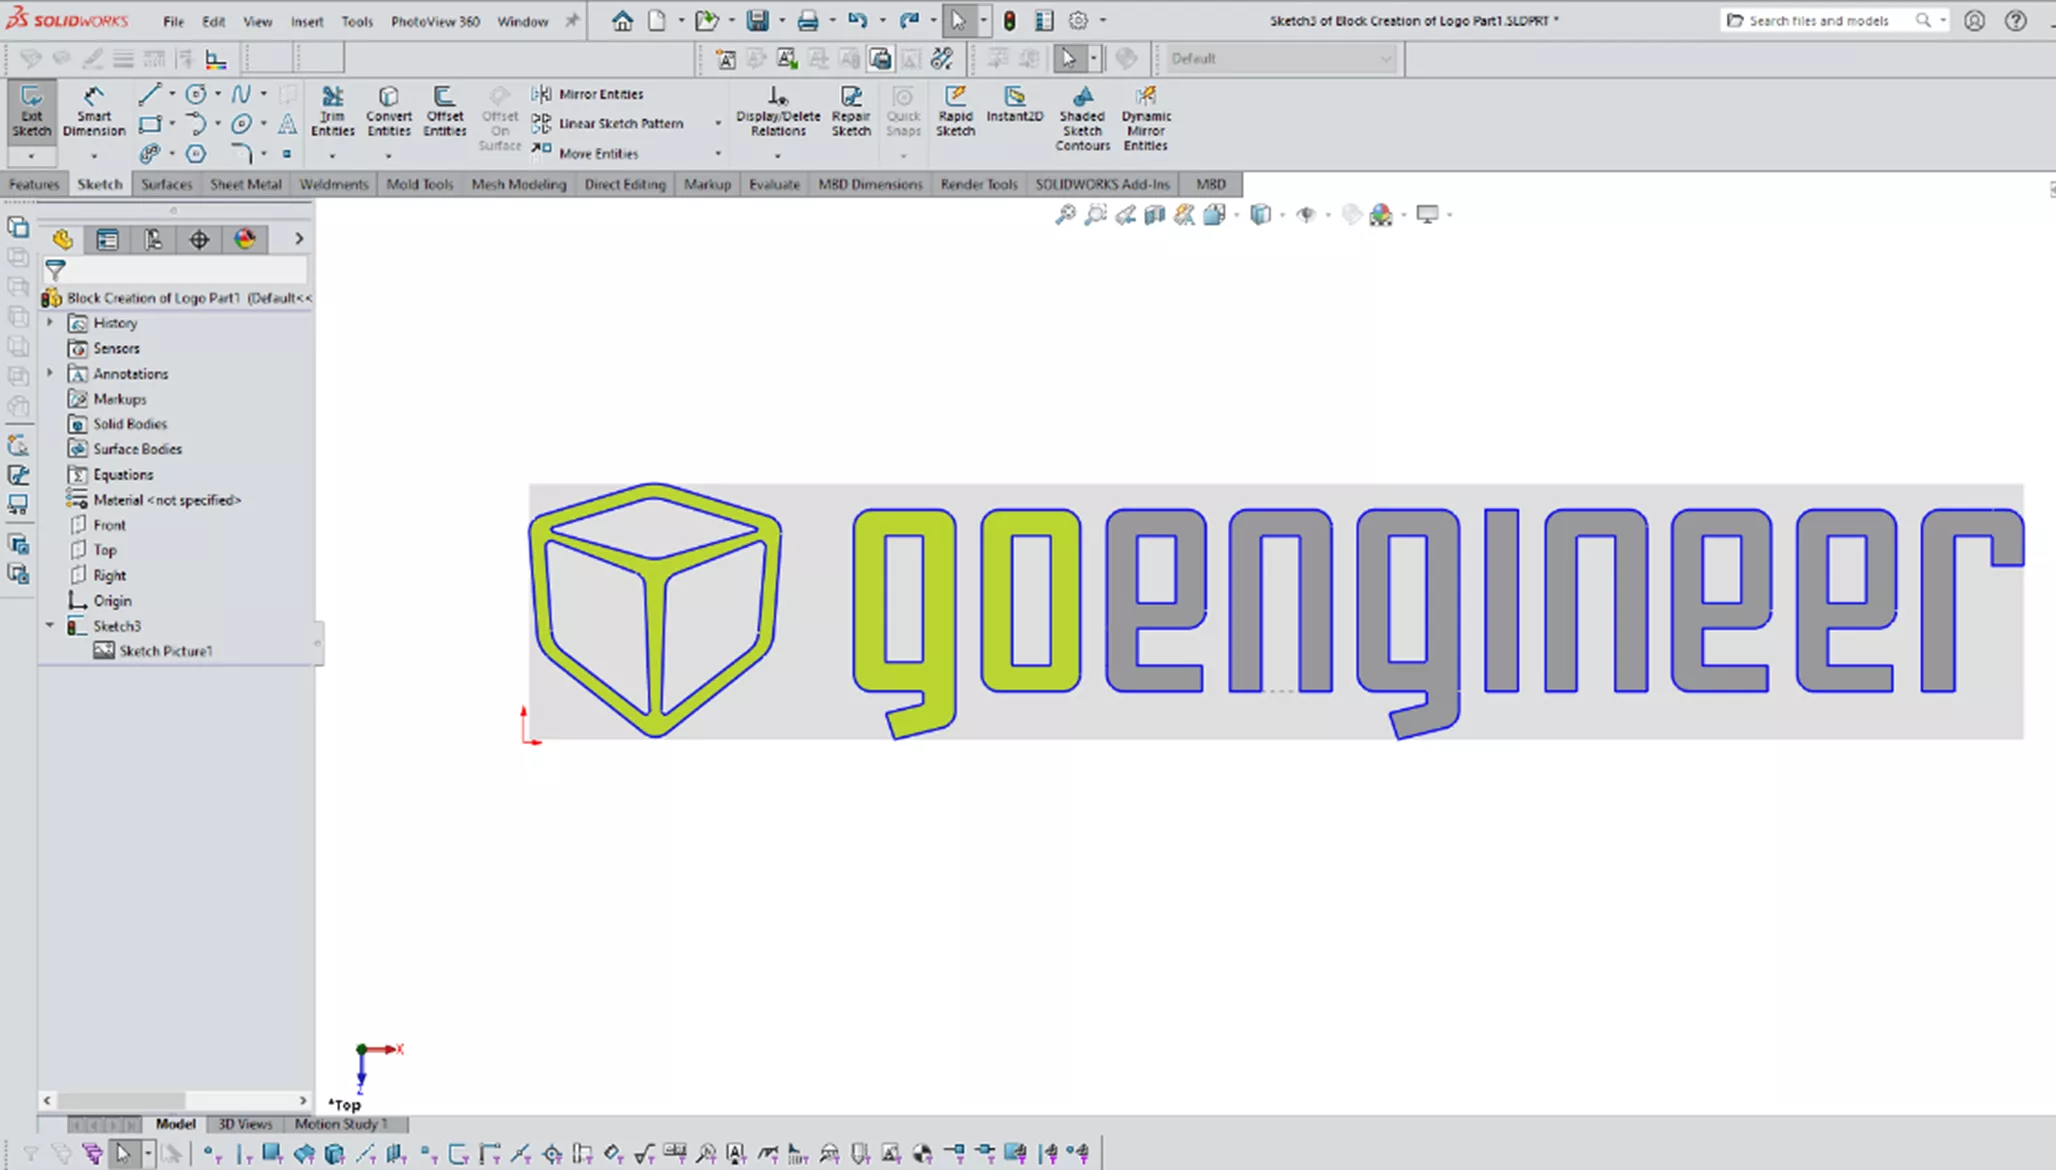
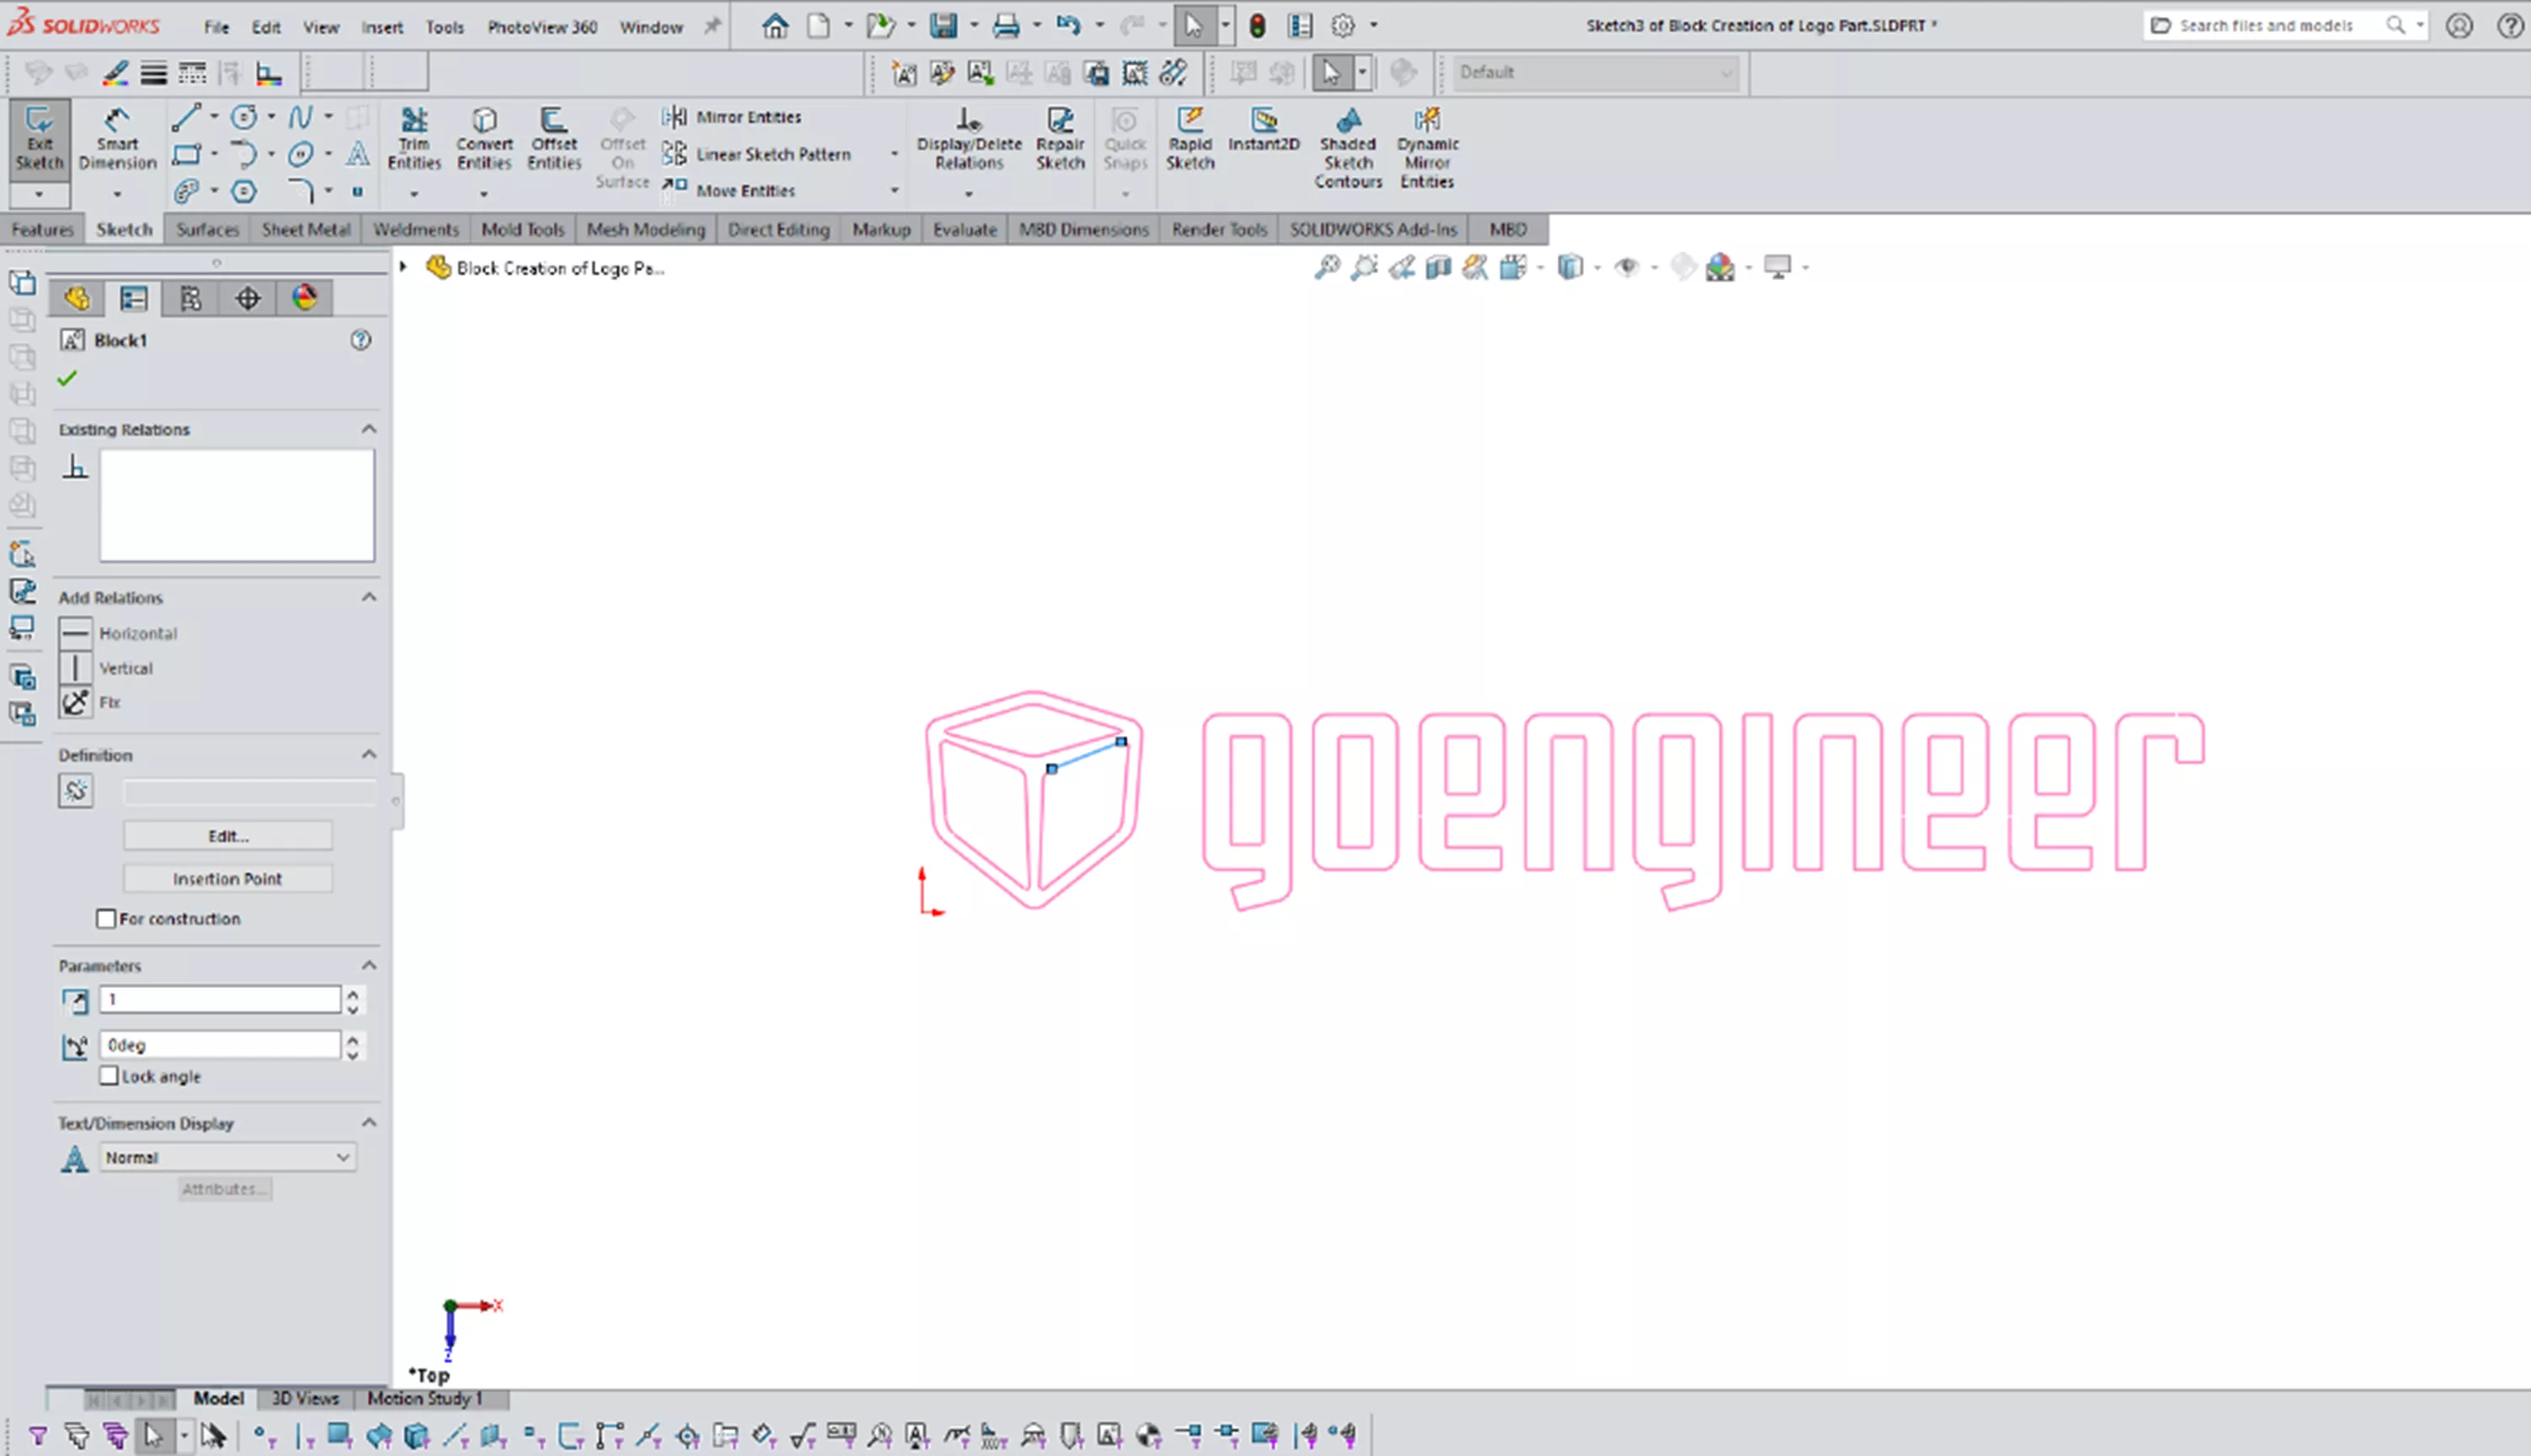
Once satisfied with the sketch contents, I used make block to group the entities into a block.
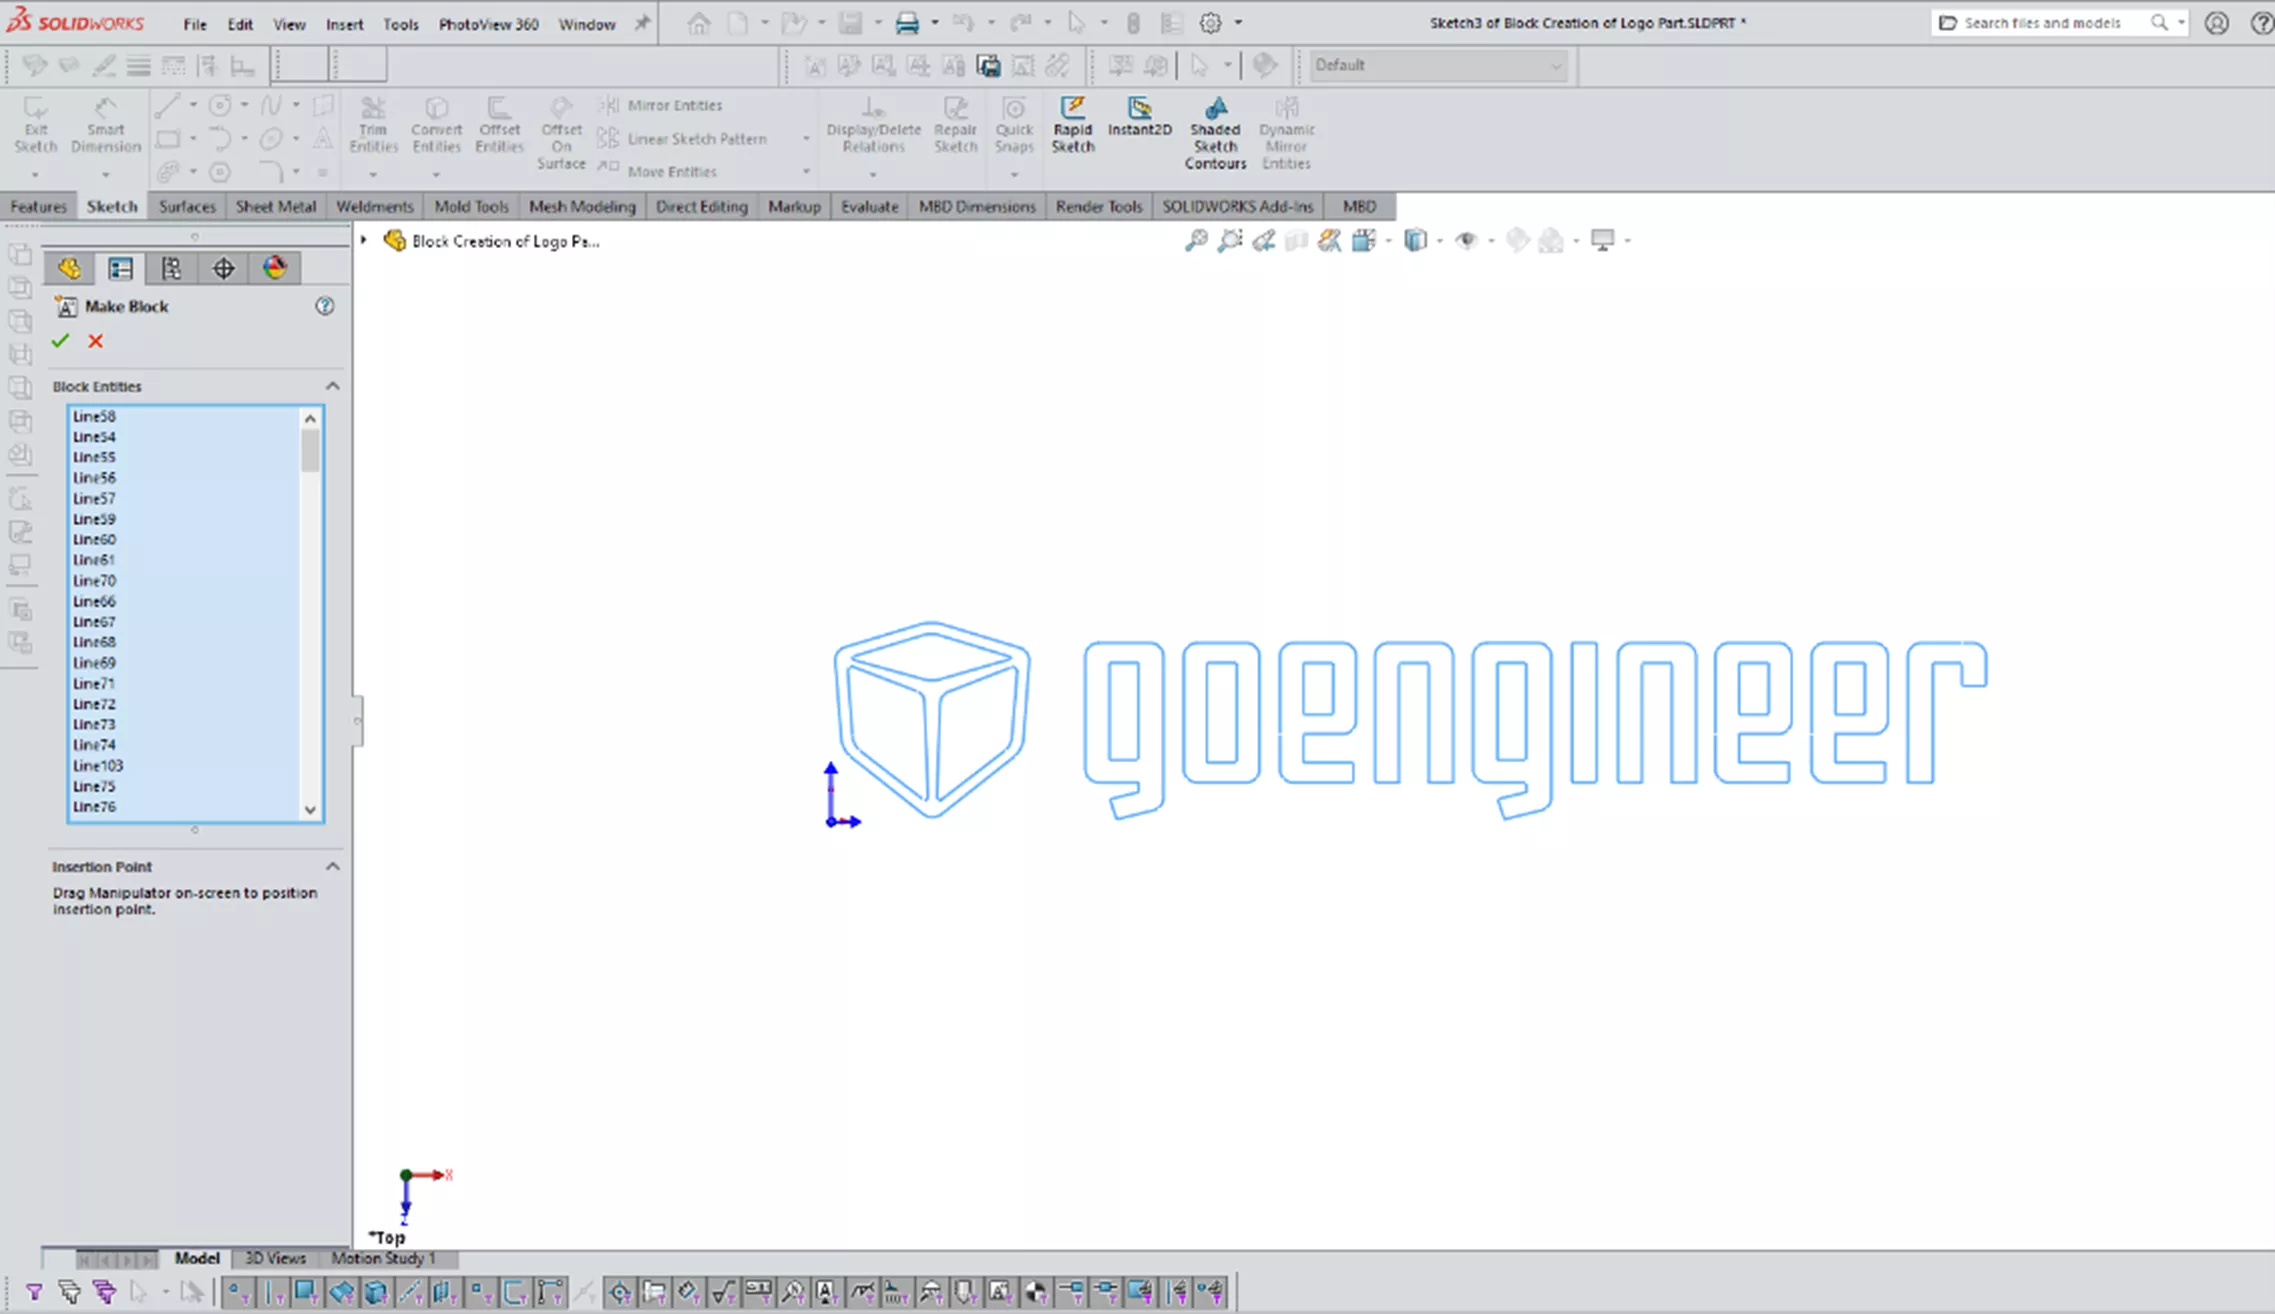
At this point, the block only exists inside the sketch contained in the new part.
Note: Once the block is created, selecting any portion of the block selects the whole block.
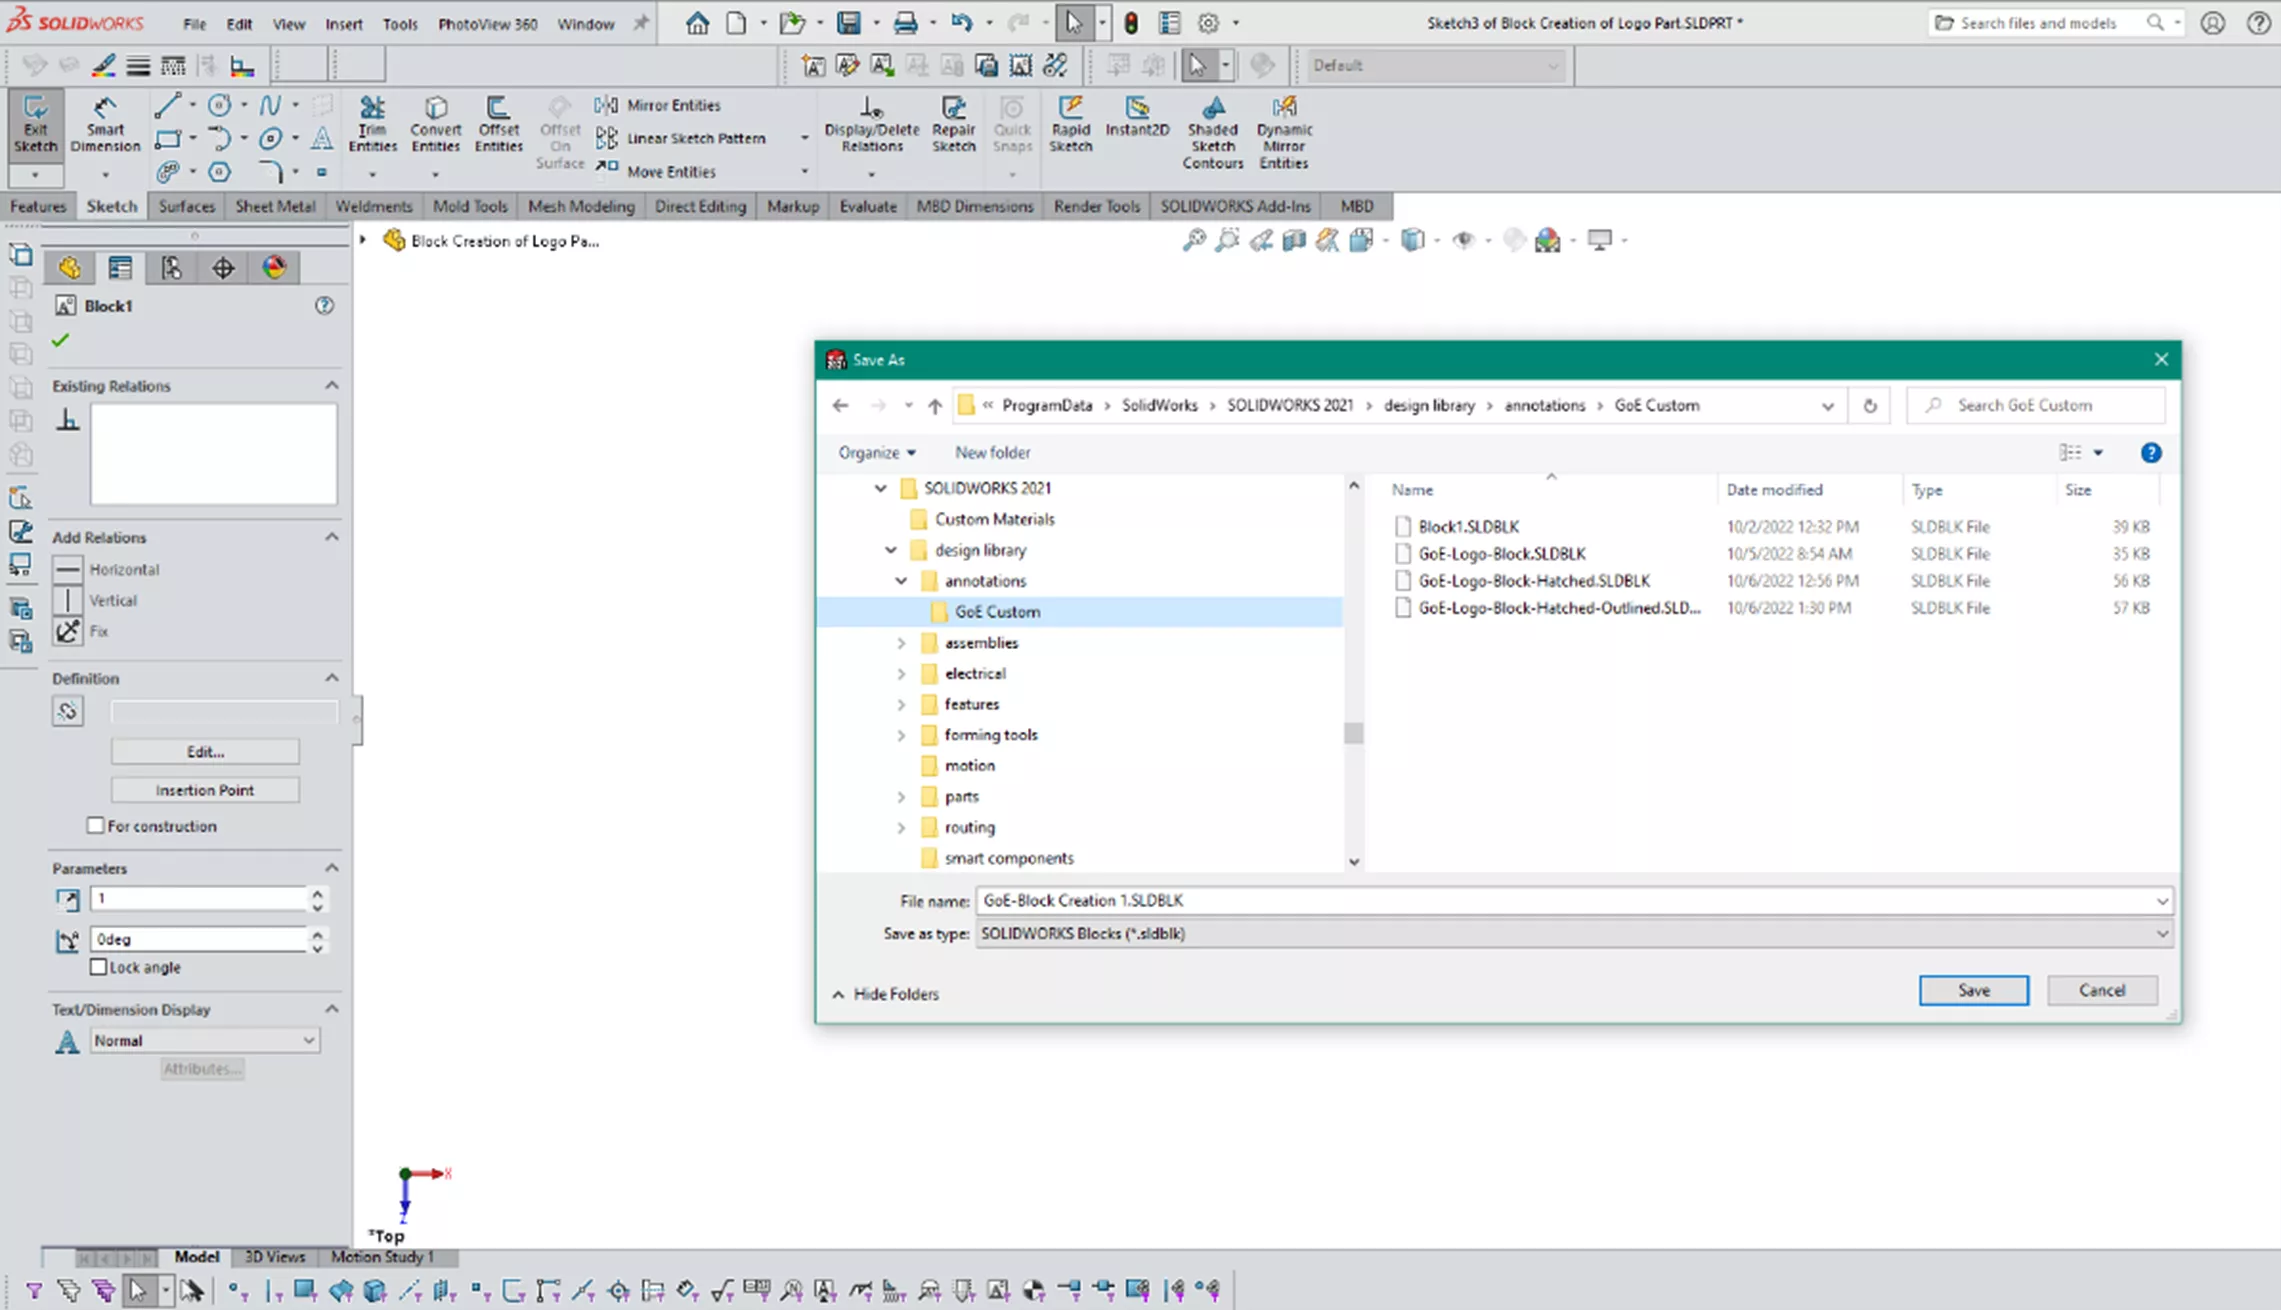
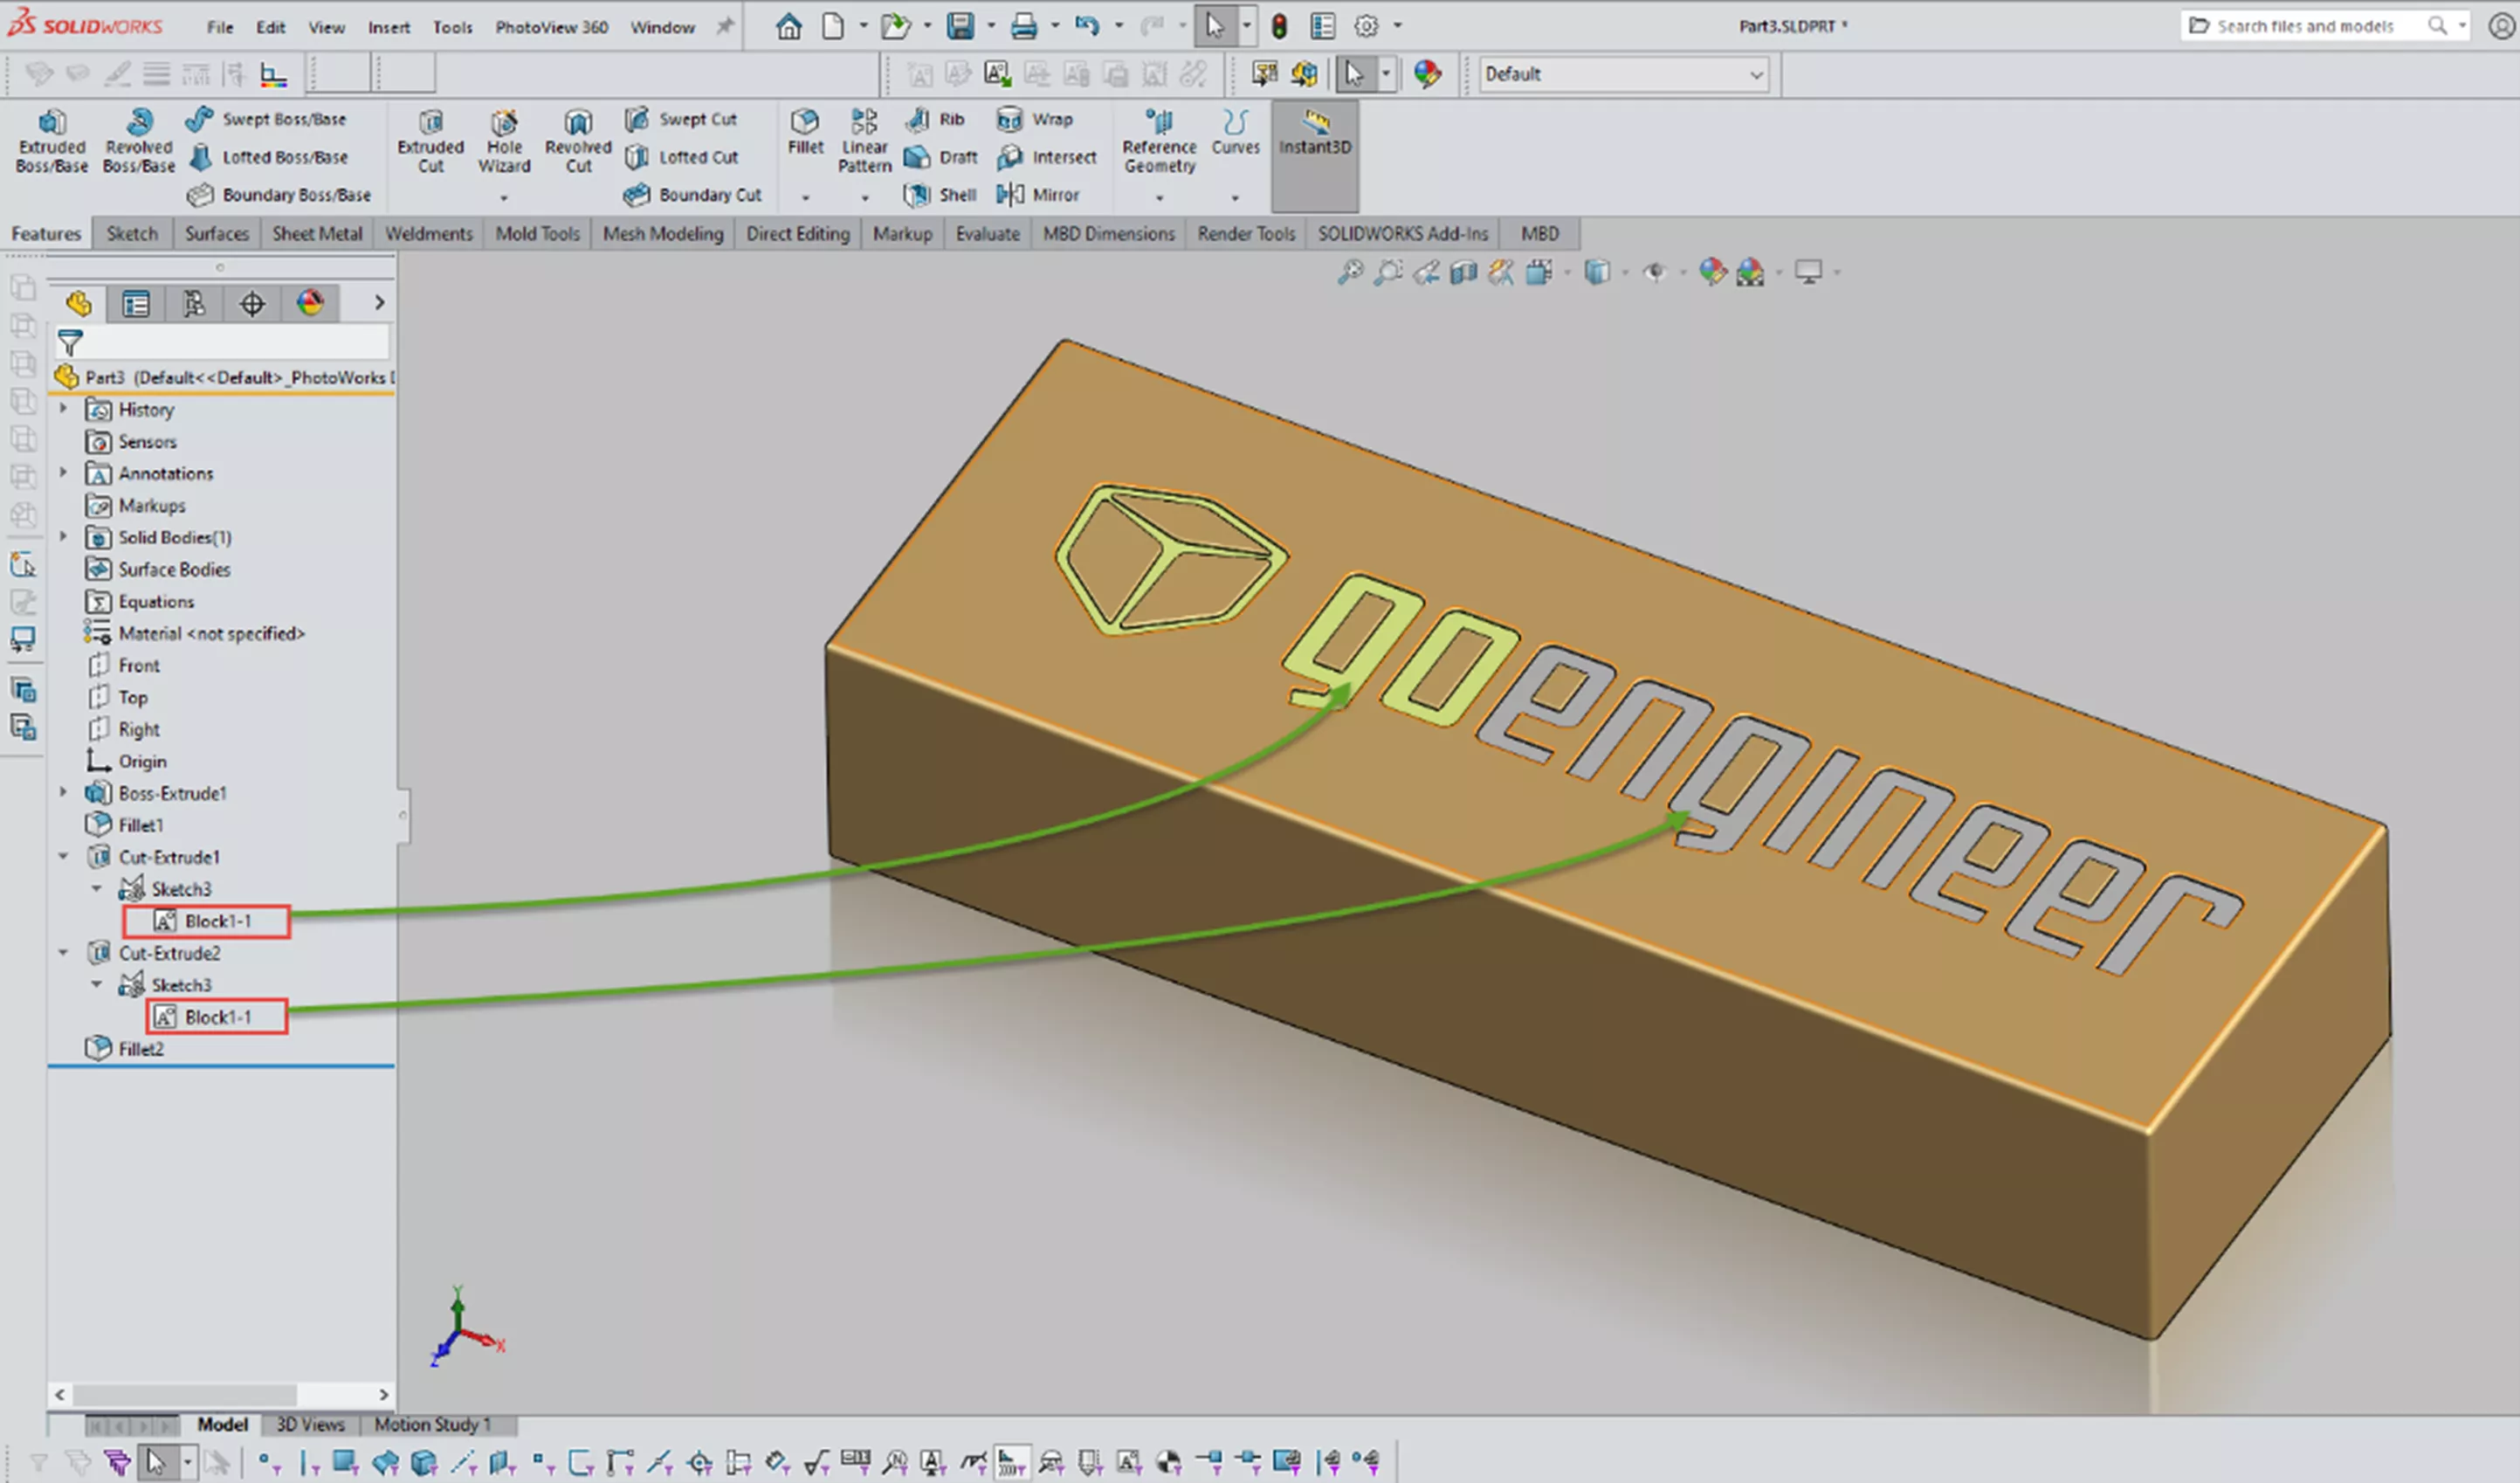
Save block was used to add the block to the design library, where it can be accessed easily at any time. With the block created, I can now use it for part features. Here, I want to use it for a Cut-Extrude feature. Since I want to assign appearances for the color, I have used two features but reference the same block. One feature for the green and one for the gray.
This block technique is also useful in drawings. Here, I have edited a drawing sheet format and inserted my block. Since I want a color version, I will add hatching and apply my desired color from the line format toolbar. To do this, I'll use the edit block function, apply the hatch using solid fill, apply the color, and exit the edit block mode.
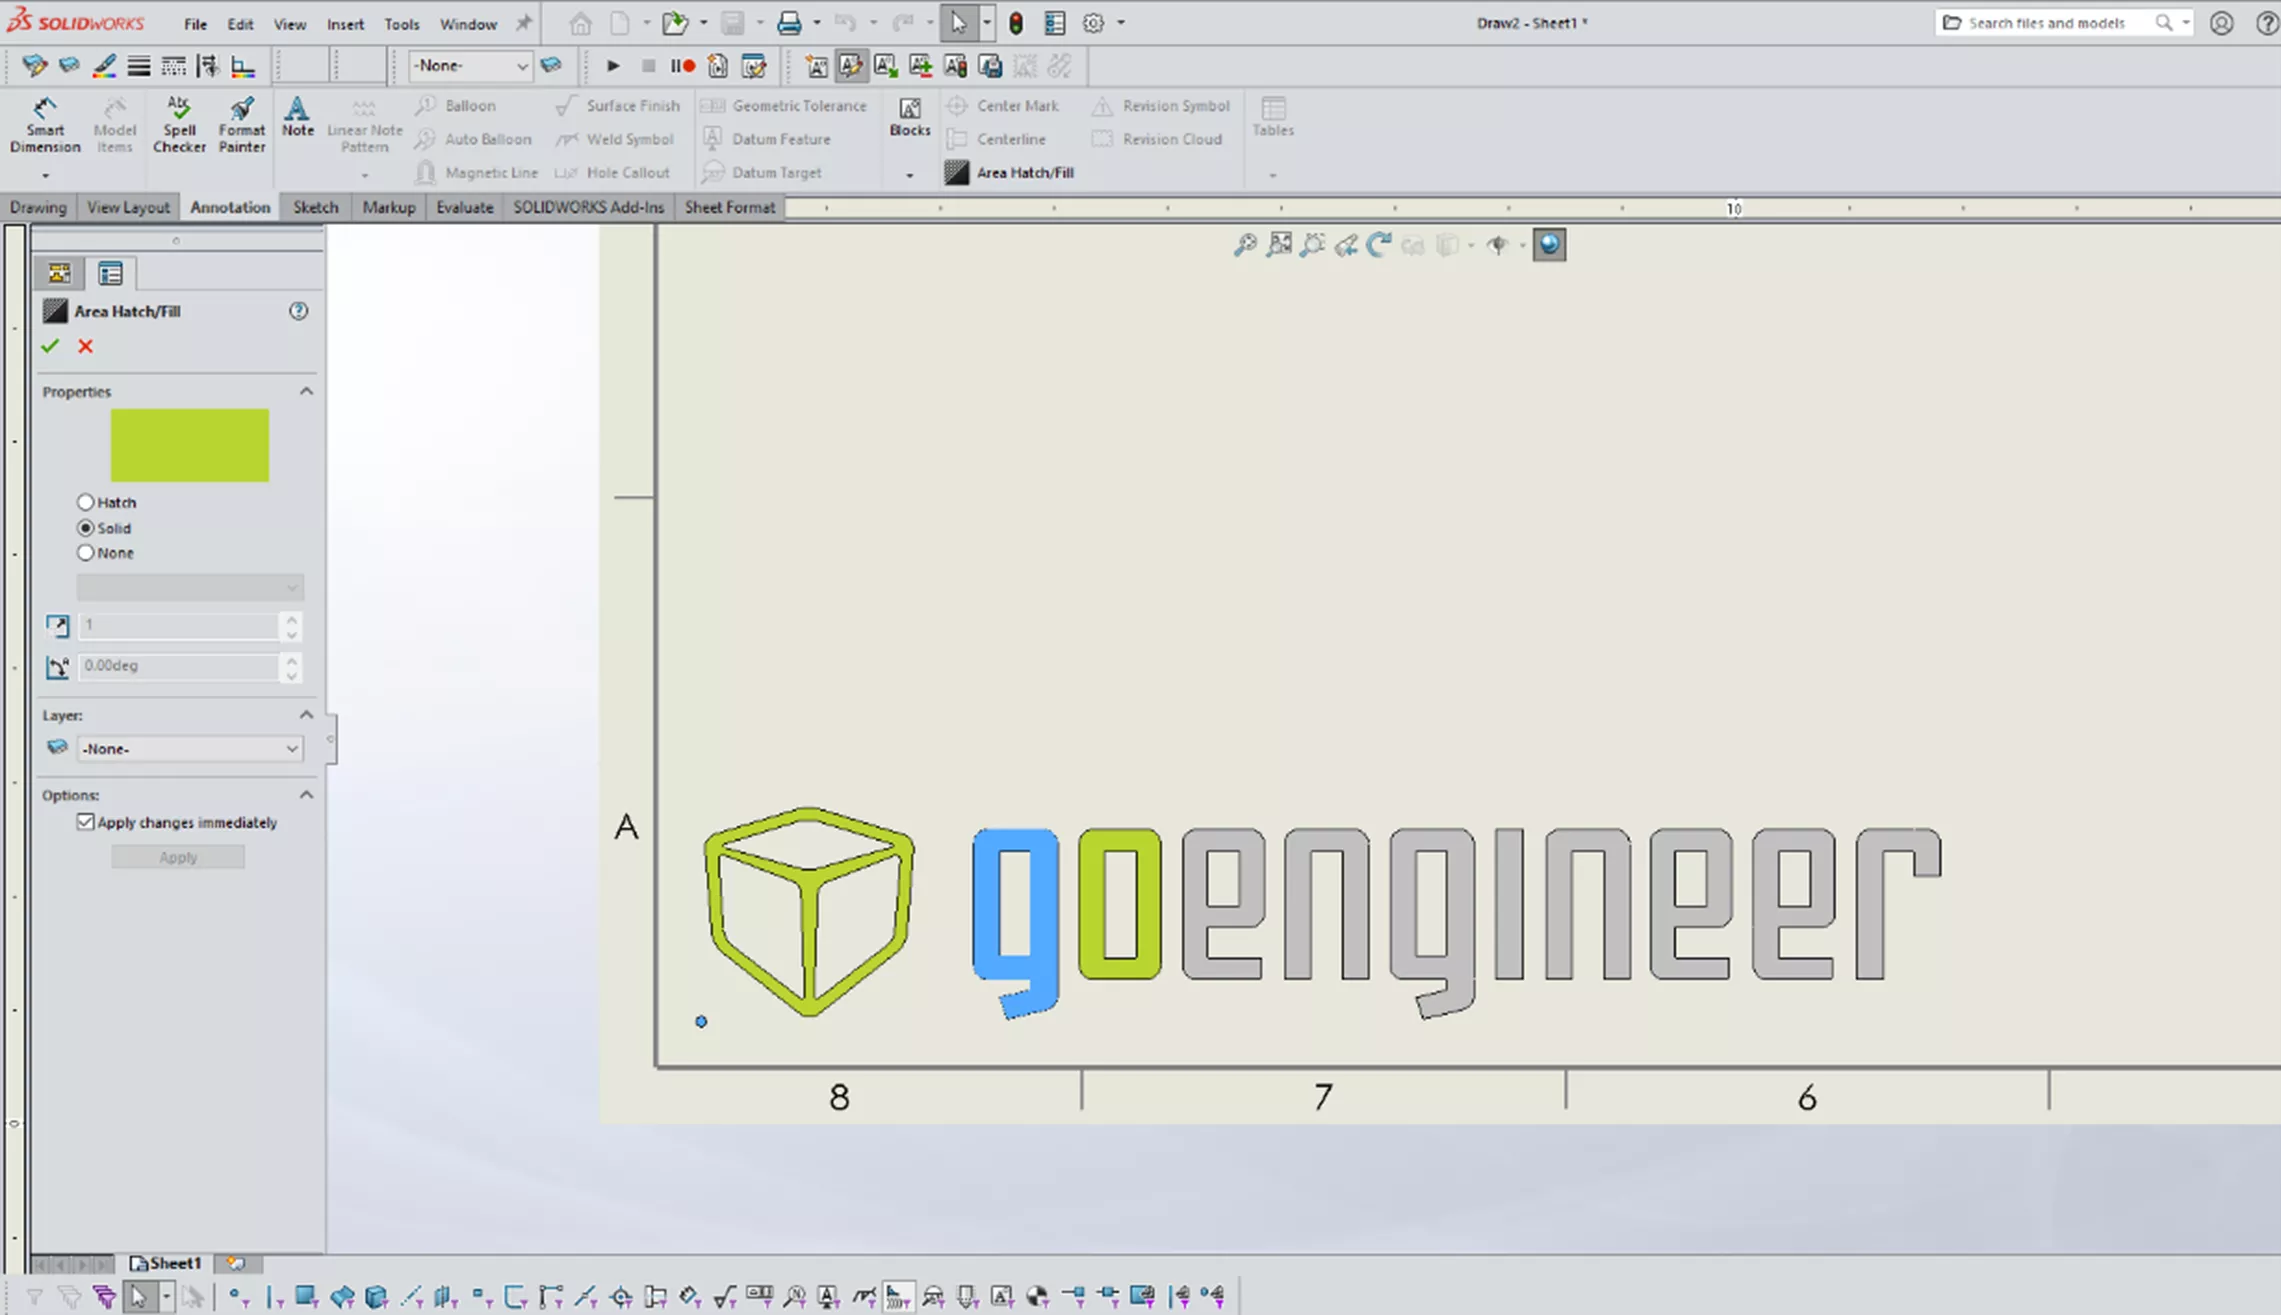
Since this will be useful in other drawings, I saved the modified block to my design library.
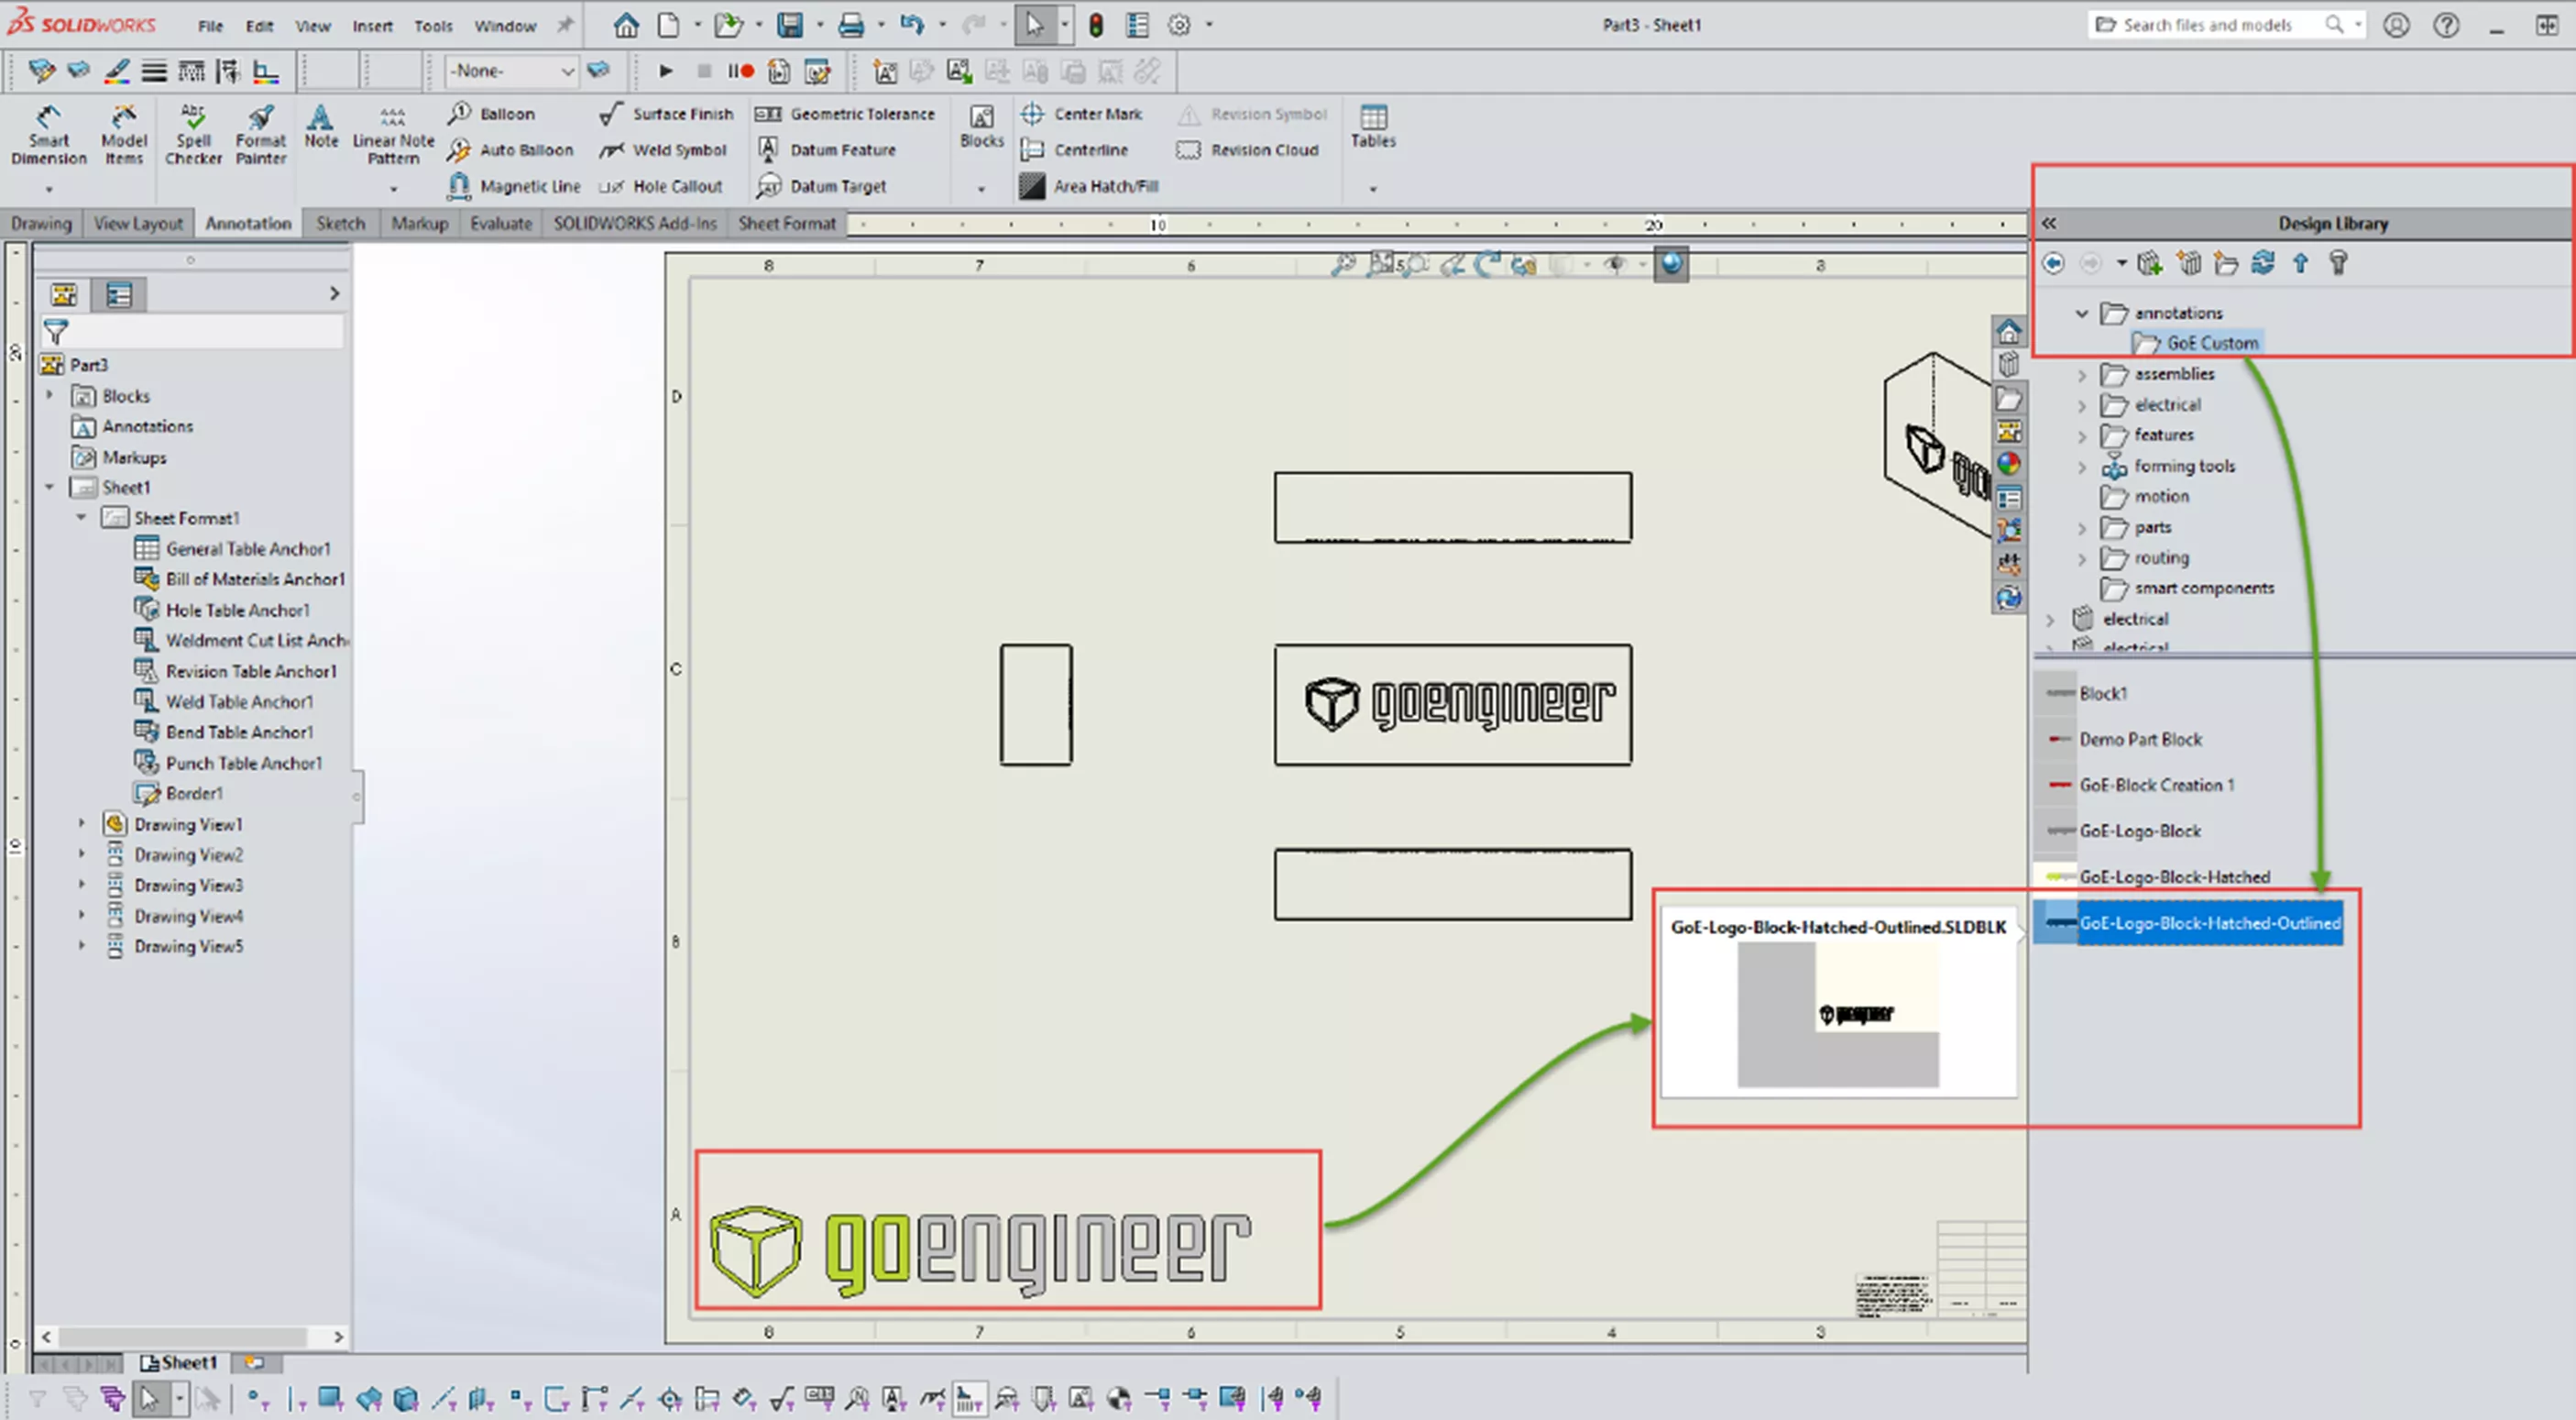
Saving the drawing template will include the hatch-filled block in the new drawings inside the sheet format. Saving the sheet format will also allow for updates to previous drawings by updating through the sheet properties.
Taking a minute to create a block for sets of entities that will be used again is worth the effort. If you find yourself creating a set of entities or annotations, creating a block will save hours of your time.
Additional Resources
As mentioned at the top of this article, context-sensitive help access is always there for you. Use it rather than struggle with the inputs and how they work.
We hope you found our ultimate guide to SOLIDWORKS blocks helpful. Check out more SOLIDWORKS tips and tricks listed below. Additionally, join the GoEngineer Community to participate in the conversation, create forum posts, and answer questions from other SOLIDWORKS users.

SOLIDWORKS CAD Cheat Sheet
SHORTCUTS ⋅ MOUSE GESTURES ⋅ HOT KEYS
Our SOLIDWORKS CAD Cheat Sheet, featuring over 90 tips and tricks, will help speed up your process.
More SOLIDWORKS Tutorials
Mastering SOLIDWORKS Bill of Materials Equations
Use SOLIDWORKS Indent Feature in an Assembly
Top 10 SOLIDWORKS Tutorials of 2023
![]()
About Martin Adams
Martin Adams is a Senior Technical Support Engineer at GoEngineer supporting SOLIDWORKS CAD and SOLIDWORKS Electrical products. In addition to a CSWE certification, he has a Bachelor's degree in Industrial Engineering and an Electrical Associate's degree. Prior to joining GoEngineer in 2019, he worked for almost twenty years on prototype automotive instrumentation. He also served as an Electrician's Mate in the US Navy. His favorite activities are fishing and spending time around a campfire with friends.
Get our wide array of technical resources delivered right to your inbox.
Unsubscribe at any time.