SOLIDWORKS Flow Simulation Fluid Mixing Tutorial
The mixing of fluids is a phenomenon that needs to be accurately modeled in order to understand the behavior of the different fluids involved, as well as understanding the rate that the mixing happens. SOLIDWORKS Flow Simulation allows the use of non-newtonian fluids, gases, real gases, and liquids. For fluid mixing, all of the fluids being mixed must be in the same state.
This fluid mixing tutorial, we are going to test a helium tank getting air pumped into one side and look at how the volume fraction changes as a function of time.
Wizard Setup
Launch the Flow Simulation Wizard to get the analysis started. Below are the selections for this example analysis.
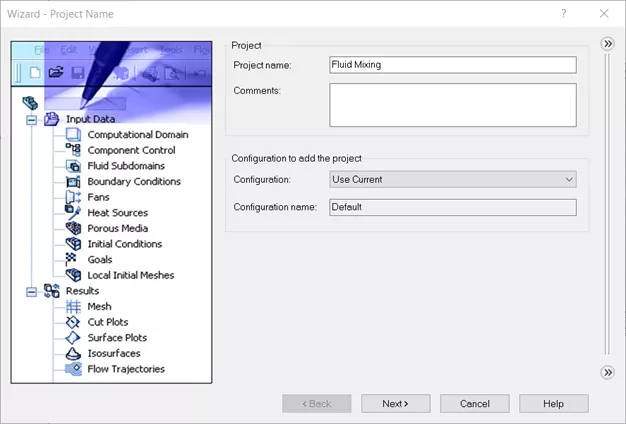
Page 1 – Give the analysis a name
-
Fluid Mixing
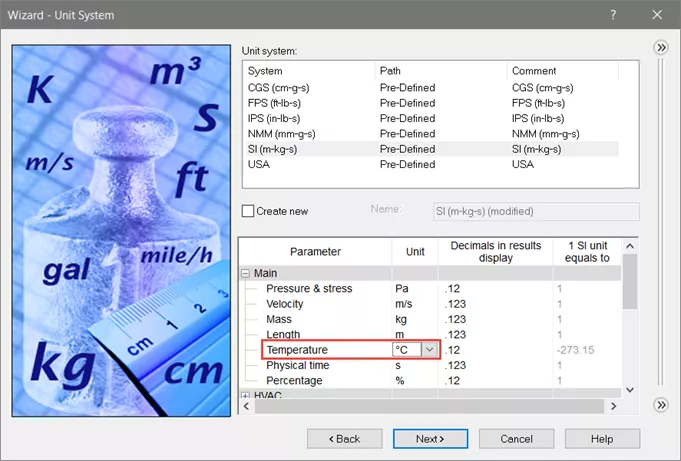
Page 2 – Set the units
-
SI unit system, the only thing we will be changing is the Temperature parameter from K to ºC.
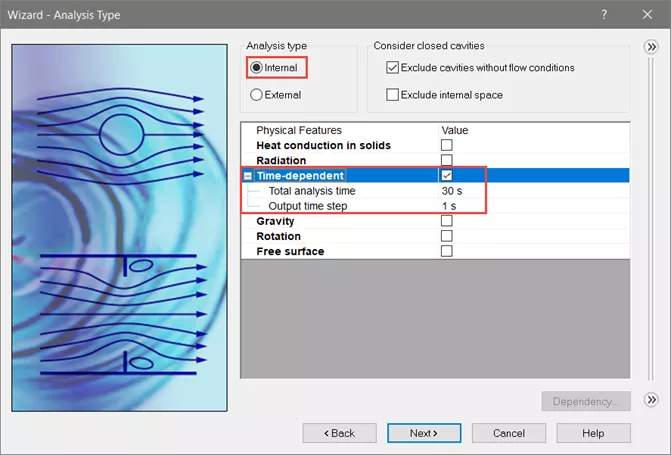
Page 3 – Choose analysis type
-
Internal study that is time-dependant. Total analysis time, 30 s. Output time step, 1 s.
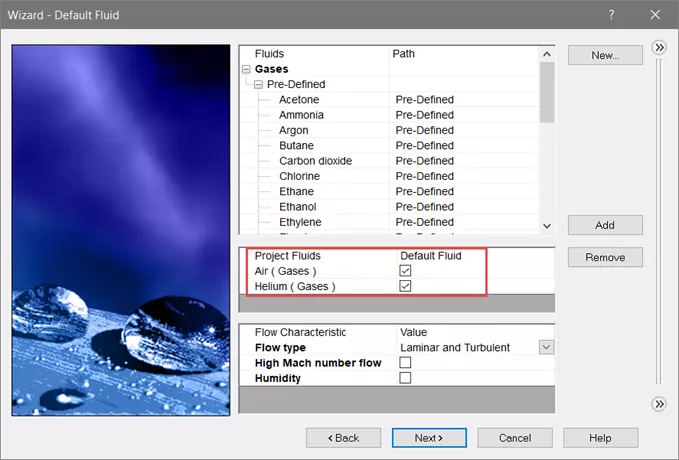
Page 4 – Select fluids. Make sure all fluids used are the same type of fluid (i.e., Gases, Liquids, Non-Newtonian Liquids, Compressible Liquids, Real Gases, or Steam).
-
Gases – Air & Helium
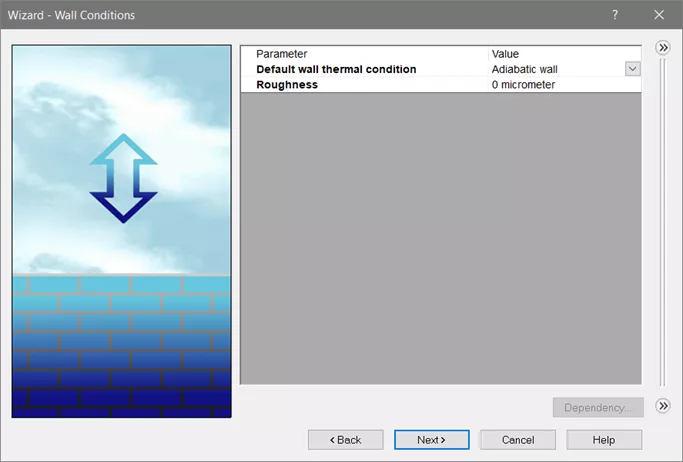
Page 5 – Wall Conditions
-
Leave defaults (Adiabatic wall and 0 micrometer roughness)
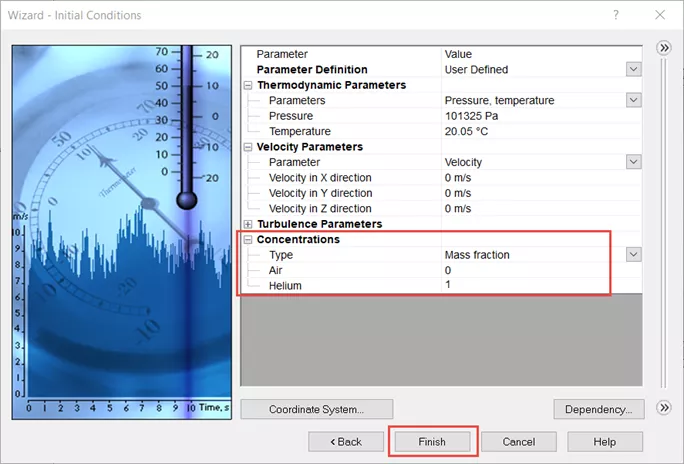
Page 6 – Initial Conditions
- Start tank of being filled with heat. Concentrations, change Air to 0, and Helium to 1.
-
Select Finish
Adding Boundary Conditions and Settings Goals
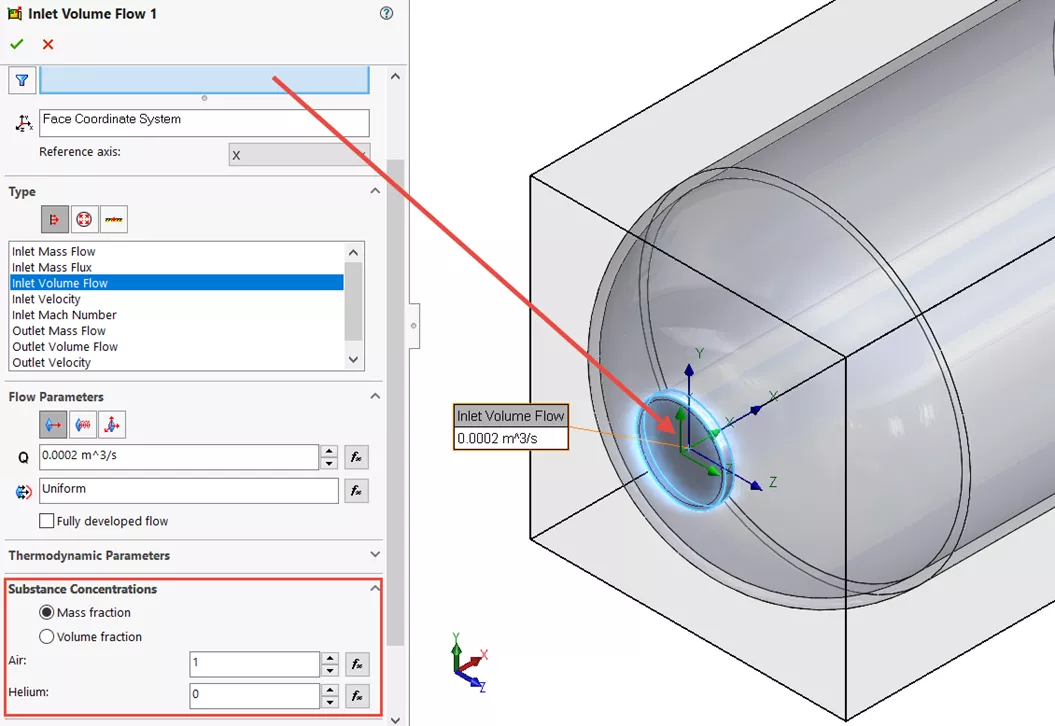
Boundary Conditions
Add an Inlet Volume Flow to the inner face of one of the lids.
- Expand Substance Concentrations , leave it on Mass fraction and set Air = 1, Helium = 0
-
Leave the rest of the defaults
Add an Environmental Pressure to the inner face of the other lid.
- Change Type to Pressure Openings and select Environment Pressure
-
Leave the rest of the defaults

Goals
Goal - to reach convergence as it solves for fluid behavior inside the tank.
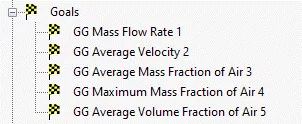
Set the goals that you would like. For this example we will be looking at:
- GG Mass Flow Rate
- GG Average Velocity
- GG Average Mass Fraction of Air
- GG Maximum Mass Fraction of Air
-
GG Average Volume Fraction of Air
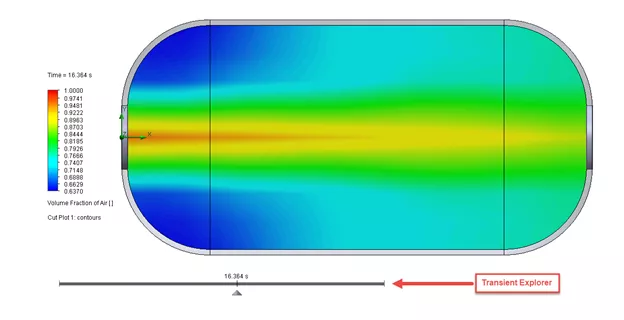
Looking At Results
Cut Plot – Volume Fraction of Air
-
To see how the results change as a function of time, right click on
Results
and select
Transient Explorer
. That will place a time bar in your graphics area that you can play, or select certain times to look at.
I hope you found this SOLIDWORKS Flow Simulation tutorial helpful. Check out more fluid studies below.
Fluid Mixing Demo
SOLIDWORKS Flow Simulation Tutorials & Studies
Understanding the Tesla Valve Using SOLIDWORKS Flow Simulation
Customizing SOLIDWORKS Flow Simulation Feature Tree Categories
Different Pressures in SOLIDWORKS Flow Simulation
Pressure Potential in SOLIDWORKS Flow Simulation Explained
Backspin is Important to Your Basketball Free Throw! A SOLIDWORKS Simulation Study

About Tashayla Openshaw
Tashayla Openshaw is a SOLIDWORKS Technical Support Engineer based out of our Headquarters in Salt Lake City, Utah. She earned her Bachelor’s degree in Mechanical Engineering from the University of Utah in 2018 and has been part of the GoEngineer family since February 2019.
Get our wide array of technical resources delivered right to your inbox.
Unsubscribe at any time.