Mastering Basic Part Modeling in SOLIDWORKS: A Step-by-Step Guide
Proper SOLIDWORKS training can transform your ability to design precise, professional models, whether you’re working on simple parts or intricate assemblies. In this article, we’ll provide insights and recommendations for effectively modeling basic parts, presenting foundational techniques and tools in SOLIDWORKS that you can start applying today.
Creating and Setting Up a New Part
Starting a new design begins with navigating to the SOLIDWORKS document screen via the New Page icon located in the menu bar. This simple selection unlocks a host of powerful tools, enabling you to interact with your part throughout its development process. From this screen, you can choose to design new parts, create assemblies, or initiate drawings.
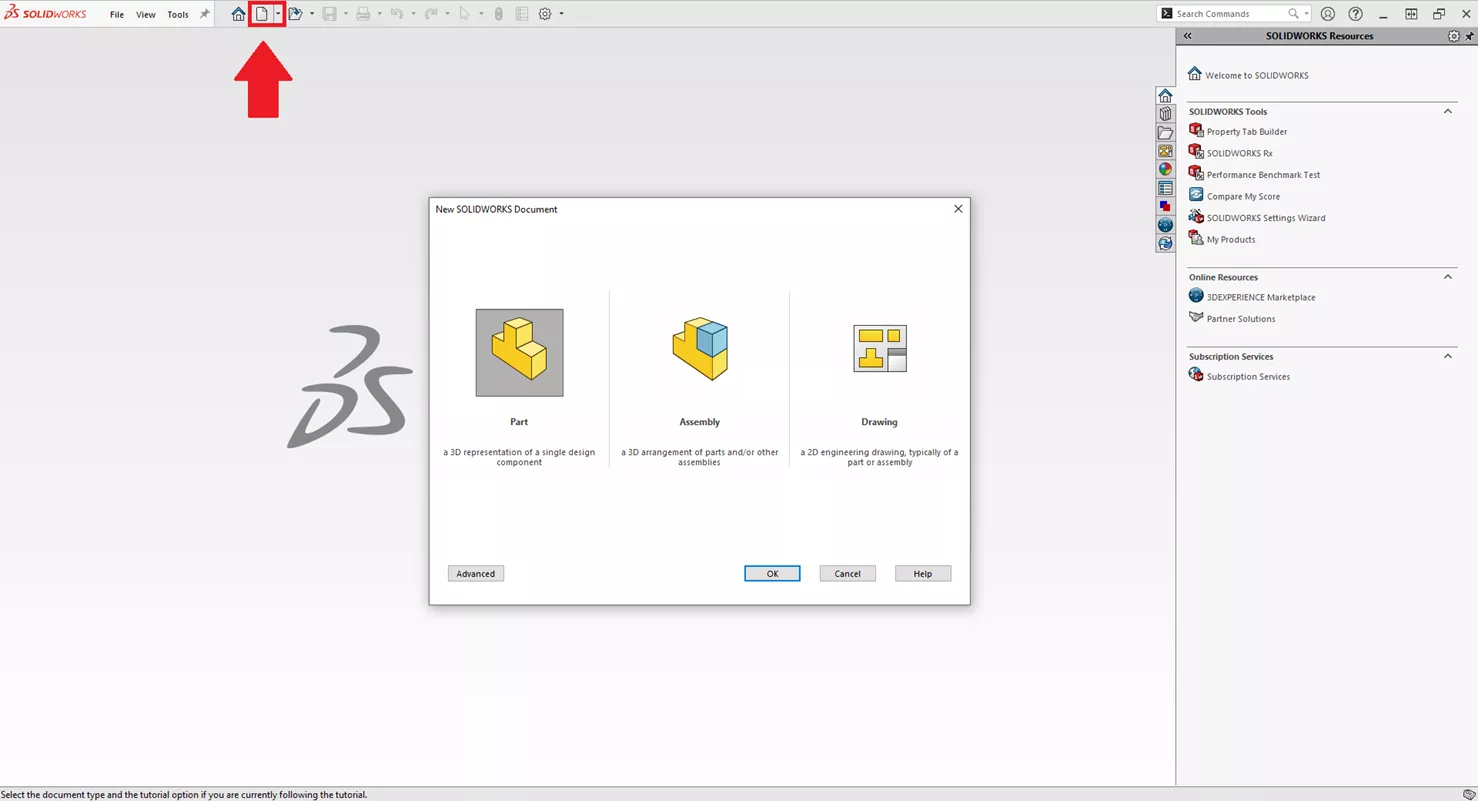
You can explore more advanced options by clicking Advanced and selecting from various part, assembly, and drawing templates.
Sketching in SOLIDWORKS: The Two-Dimensional Foundation
Sketches are the starting point for all 3D models in SOLIDWORKS. Think of them as the blueprints that dictate how your design will take shape. We suggest focusing on making your sketches fully defined before turning them into features. This ensures every dimension, constraint, and relationship is accounted for, leaving little room for error or ambiguity in the next design stage.
Using tools like Smart Dimension, you can add precise measurements and check constraints to fully define each sketch. If the status reads Fully Defined, you can confidently move forward knowing your sketch is ready for advanced features.
Adding Shape: Extrusions and Extruded Cuts
Once you have a fully defined sketch, you can leverage features like Extruded Boss/Base to create a three-dimensional model. This function adds material to the sketch by specifying a depth or distance for extrusion. You can also extrude up to reference geometry, giving you flexibility to match your design intent.
- Suggested Article >> Work Smart with SOLIDWORKS Smart Components
Conversely, the Extruded Cut feature allows you to remove areas of material, creating cavities, holes, or fine details. Both operations follow a similar workflow, only differing in their addition or subtraction of material.
When using extrusions, keep in mind that precise planning of cuts saves time and ensures smoother edits later in the modeling process. These tools are ideal for creating foundational shapes and adding functional features, making them essential for effective part design.
Enhancing Features: Offset Entities, Circular Patterns, and Fillets
Designing details often involves more than basic extrusions. Incorporating advanced features like Offset Entities makes it simple to duplicate or offset sketch elements, ensuring consistency and control across your design.
Circular patterns, on the other hand, save time by automating repetitive features like holes or extrusions rotated around a center axis.
One key piece of advice here is to carefully monitor the order in which features are applied. Each model within SOLIDWORKS is built chronologically, step-by-step. If issues occur later in the design process, tools like the Rollback Bar allow you to rewind your design history and pinpoint areas for correction. This forward-and-backward timeline approach makes troubleshooting efficient and intuitive.
Adding finishing touches, like fillets, elevates your design with smooth edges and enhanced detail. When applying fillets, check options such as Tangent Propagation, which creates seamless transitions between curved edges for a polished look.
Communicating Your Design: Drawing Views and Dimensions
Once your 3D model is complete, you need to translate it into a 2D drawing for manufacturing or presentation purposes. SOLIDWORKS includes tools that allow you to display your model from multiple angles using various display styles (shaded, wireframe, etc.). Within these drawings, Smart Dimension makes it effortless to annotate critical measurements directly, which aids stakeholders in understanding the design intent.
For customization, we recommend exploring the display options to ensure your drawings effectively communicate the necessary details without overloading visual information. Tailoring styles for each view, whether focused on geometry or aesthetics, makes your drawing professional and clear.
When finished, your completed drawing can be saved in a variety of formats, including PDF, DXF, and DWG, enabling seamless sharing across different platforms and with collaborators who may use other software.
Key Tips for Building Models Efficiently
Here are a few of the key takeaways for how you can build effective and precise SOLIDWORKS models:
- Fully Define Your Sketches
- Start off strong by ensuring each plane, dimension, and constraint is accounted for before proceeding to 3D features.
- Think Chronologically
- SOLIDWORKS builds every model step by step. Use tools like the Rollback Bar to fix errors or proactively plan the order of features to minimize issues.
- Use Advanced Features as Needed
- While tools like Circular Patterns and Tangent Propagation are powerful, know when and where to use them. Don’t overwhelm your model with unnecessary details.
- Customize Your Drawings
- Communicate ideas clearly by adjusting view styles, adding dimensions, and selecting an appropriate file format to share your design with collaborators.
Conclusion
Mastering part modeling requires attention to detail, understanding feature workflows, and utilizing the vast array of tools SOLIDWORKS offers. By focusing on fully defining sketches, organizing your model’s build order, and refining details with features like fillets, you can create professional, manufacturable designs.
At GoEngineer, we advocate ongoing education to improve your efficiency and creativity as a designer. The more you explore and master SOLIDWORKS tools and techniques, the closer you’ll get to realizing your design goals with speed and precision.
We’re here to support you on your learning journey. Check out our course catalog to enhance your SOLIDWORKS expertise. Whether you are a student, hobbyist, or professional user, having the right guidance will help you get the most out of every project.
Related Articles
How to Add a SOLIDWORKS Certification Verification on LinkedIn
Learn SOLIDWORKS Online: Virtual Classroom vs. Self-Paced Training
14 States That Will Fund Your SOLIDWORKS Training
Free SOLIDWORKS Training for Veterans
![]()
About GoEngineer
GoEngineer delivers software, technology, and expertise that enable companies to unlock design innovation and deliver better products faster. With more than 40 years of experience and tens of thousands of customers in high tech, medical, machine design, energy and other industries, GoEngineer provides best-in-class design solutions from SOLIDWORKS CAD, Stratasys 3D printing, Creaform & Artec 3D scanning, CAMWorks, PLM, and more
Get our wide array of technical resources delivered right to your inbox.
Unsubscribe at any time.