Design and Manufacture a Custom Hat Using LPBF & FDM 3D Printing Technology
Laser Powder Bed Fusion (LPBF) is a 3D printing technology that utilizes fiber optic lasers to micro-weld fine metal powder to generate a solid metal part. This method, used in many industries (e.g., oil & gas, nuclear, automotive, and aviation), allows manufacturers to produce parts for research and development. LPBF technology enables the production of field-ready parts, reducing lead times and supply chain issues. In this article, see how I created a custom hat using 316 Stainless Steel on an XM200G Xact Metal 3D printer and a custom press die to aid in the process. This project was completed in five hours, including printing the parts and assembly.
The Designing Process
First, using SOLIDWORKS, I designed the GoEngineer logo in a single sketch and extruded the outline to two millimeters forming a solid digital part. (Figure 1)
![]()
Figure 1: Design Logo
When outlining the logo, it was important to be mindful of the size; the goal was for it to be placed on the front of the hat. I measured the front face with calipers and decided 50 millimeters (about 1.97 in) of width for this project. (Figure 2)
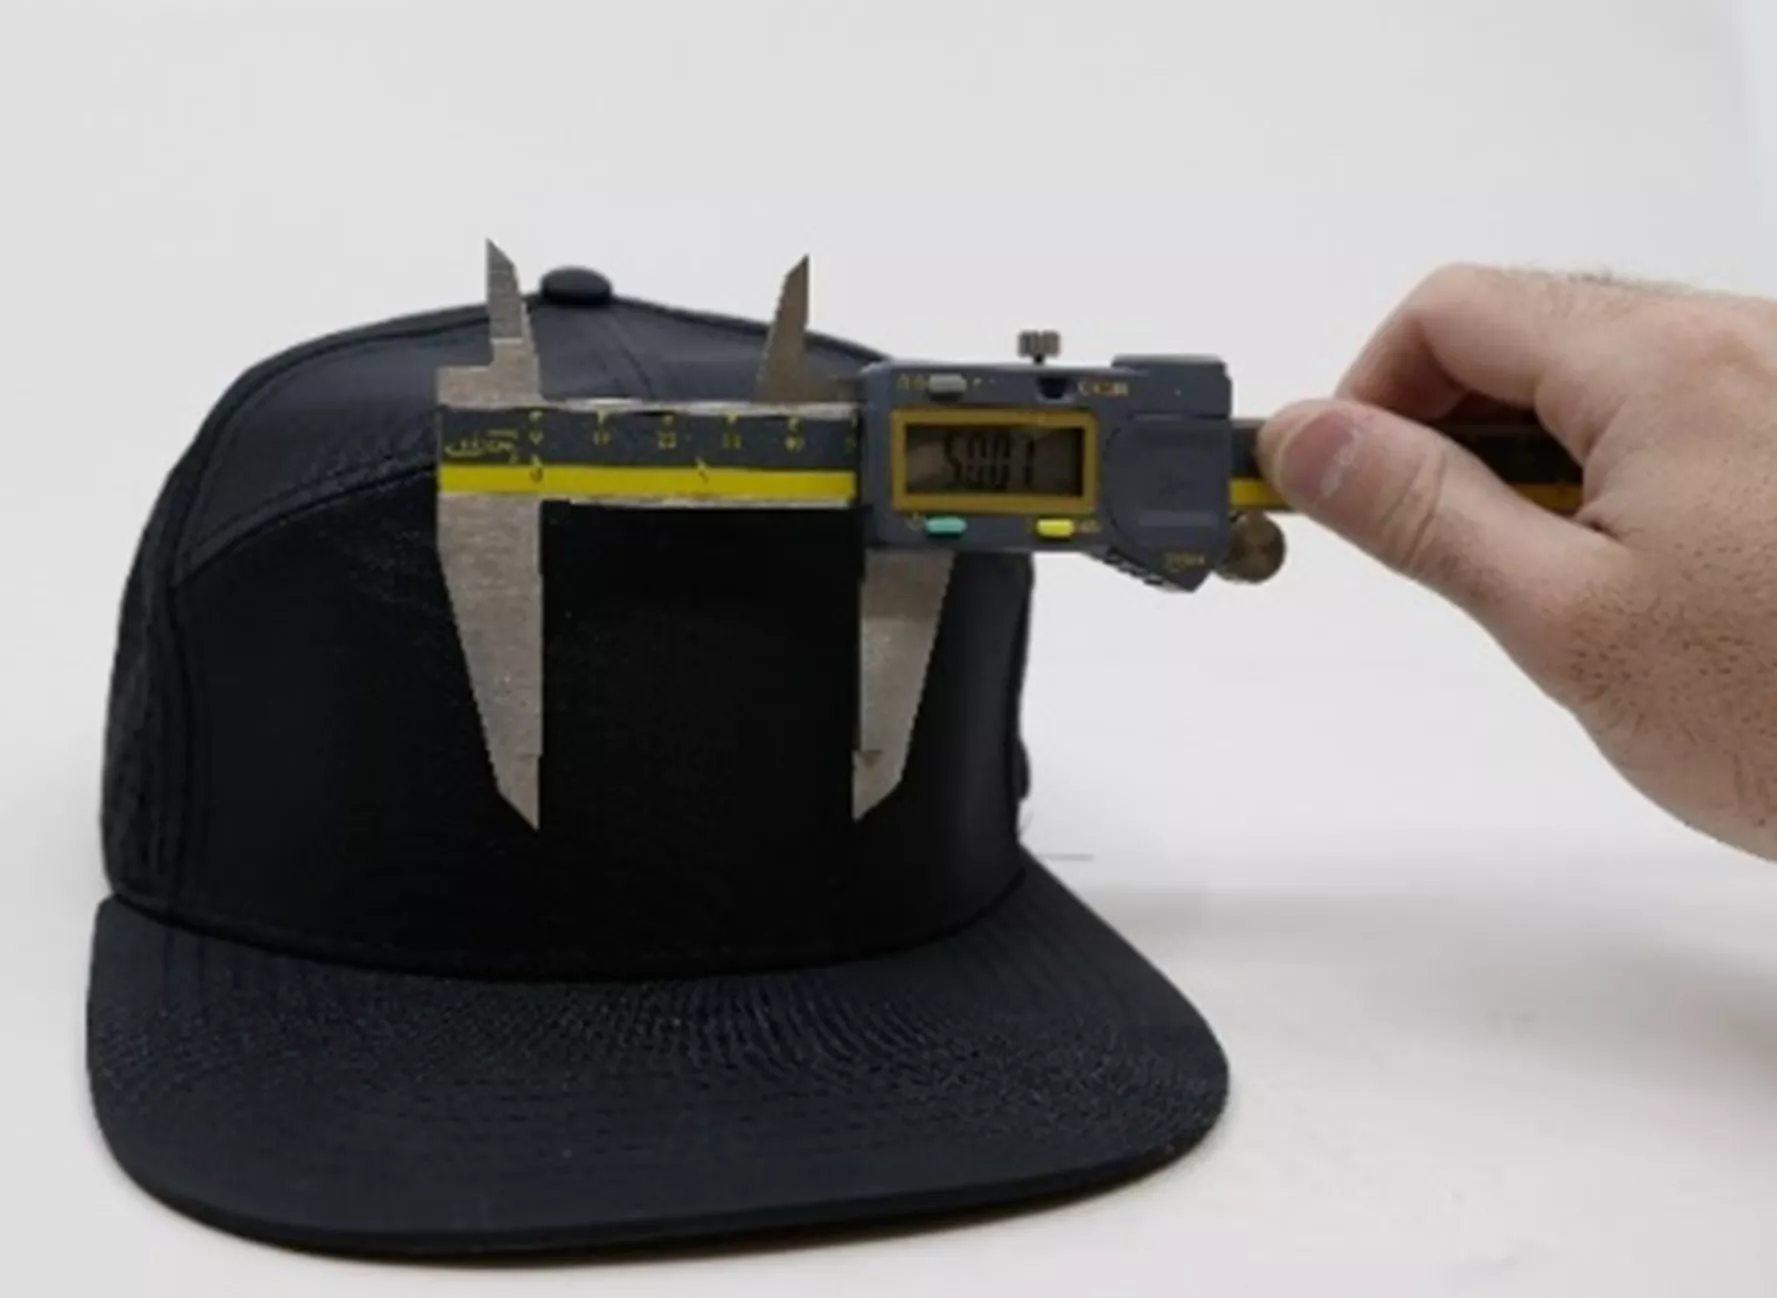
Figure 2: Hat with Calipers
With this information and my part designed, I started working on the press die. The main function of a press die is to mold the shape to the natural curve of the hat. This is a two-part assembly where the logo is placed inside the die to control the bending. (Figure 3)
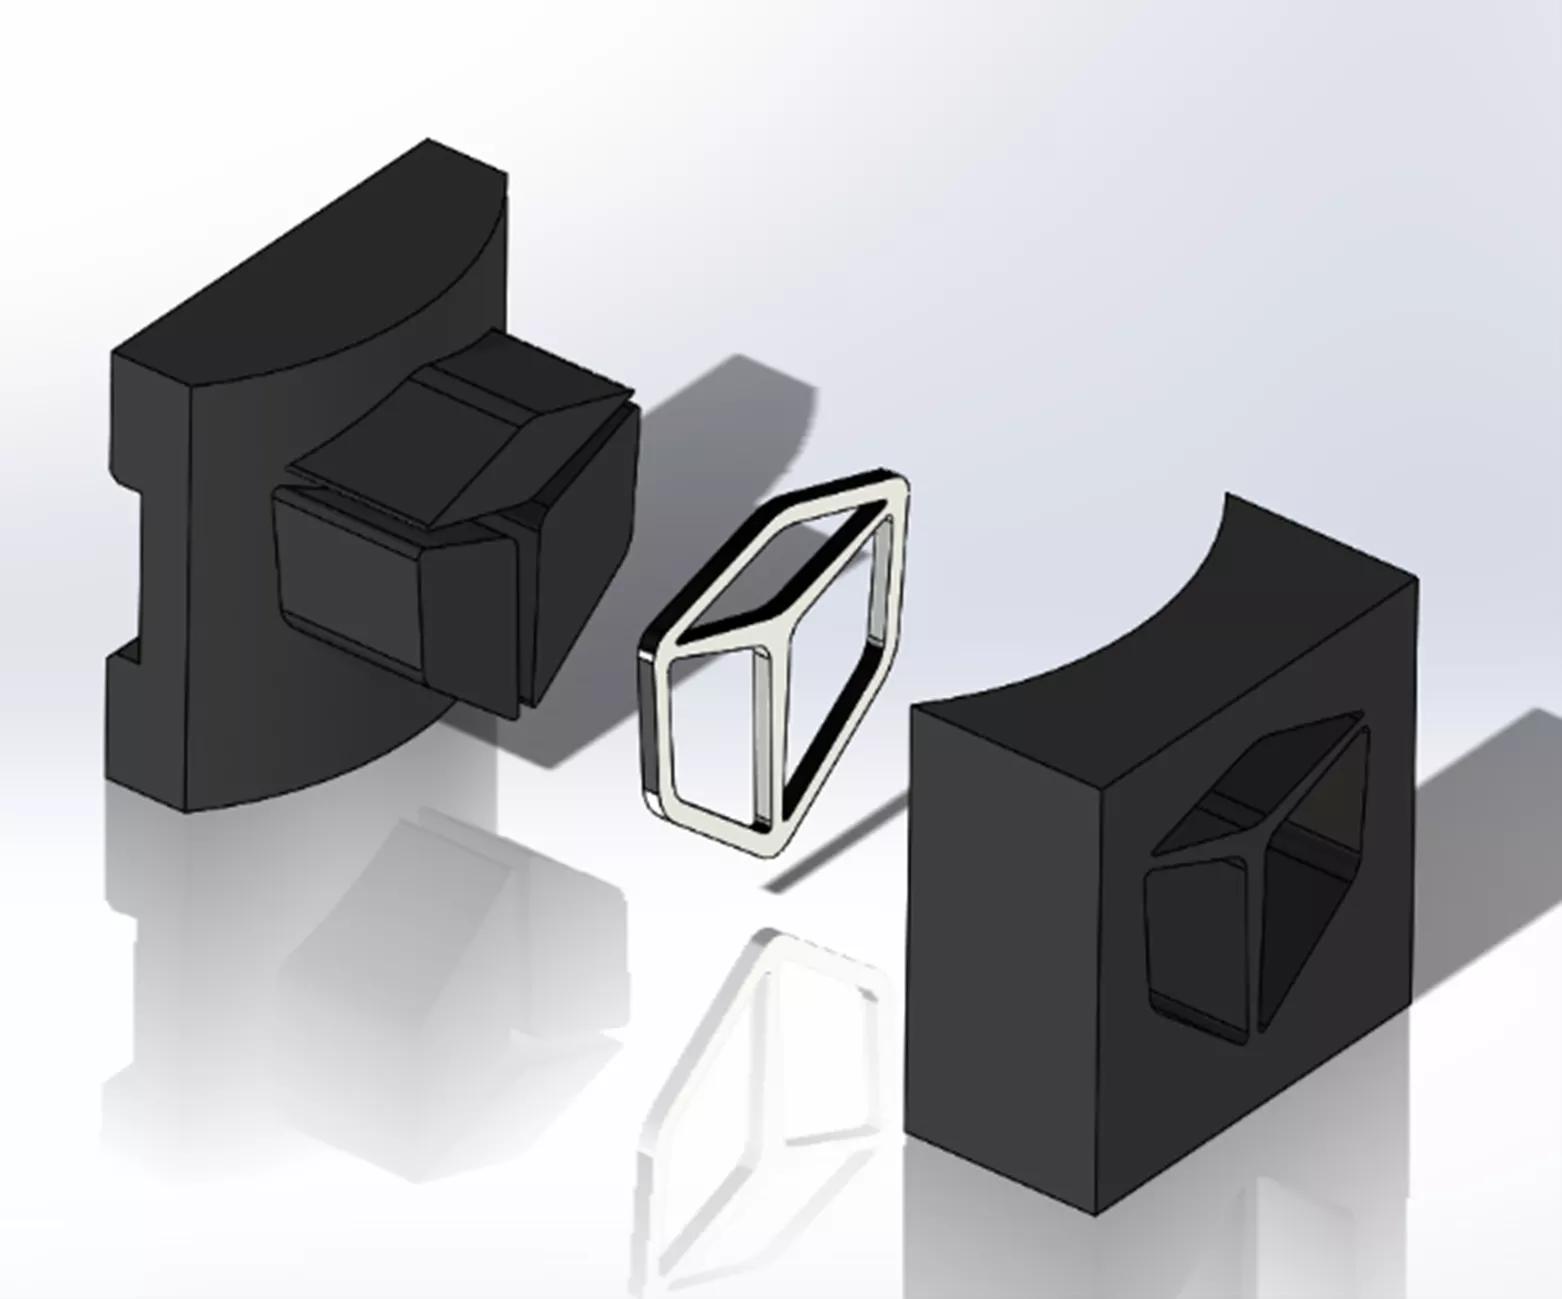
Figure 3: Press Die
The Printing Process
After designing, I exported the logo as a STEP file to Materialise Magics and supported it with a grid pattern (Figure 4), which prepares it for our LBPF 3D printer. 316 Stainless Steel material was used in this process due to its ease of printing and ductile nature.
![]()
Figure 4: 316 Stainless Steel Build
The press die was printed on a Stratasys F370 with ABS-CF10 material. ABS-CF10 is a great replacement for fixtures and jigs in the manufacturing area. For maximum strength, I used a thick wall and assigned it as a solid body. (Figure 5)
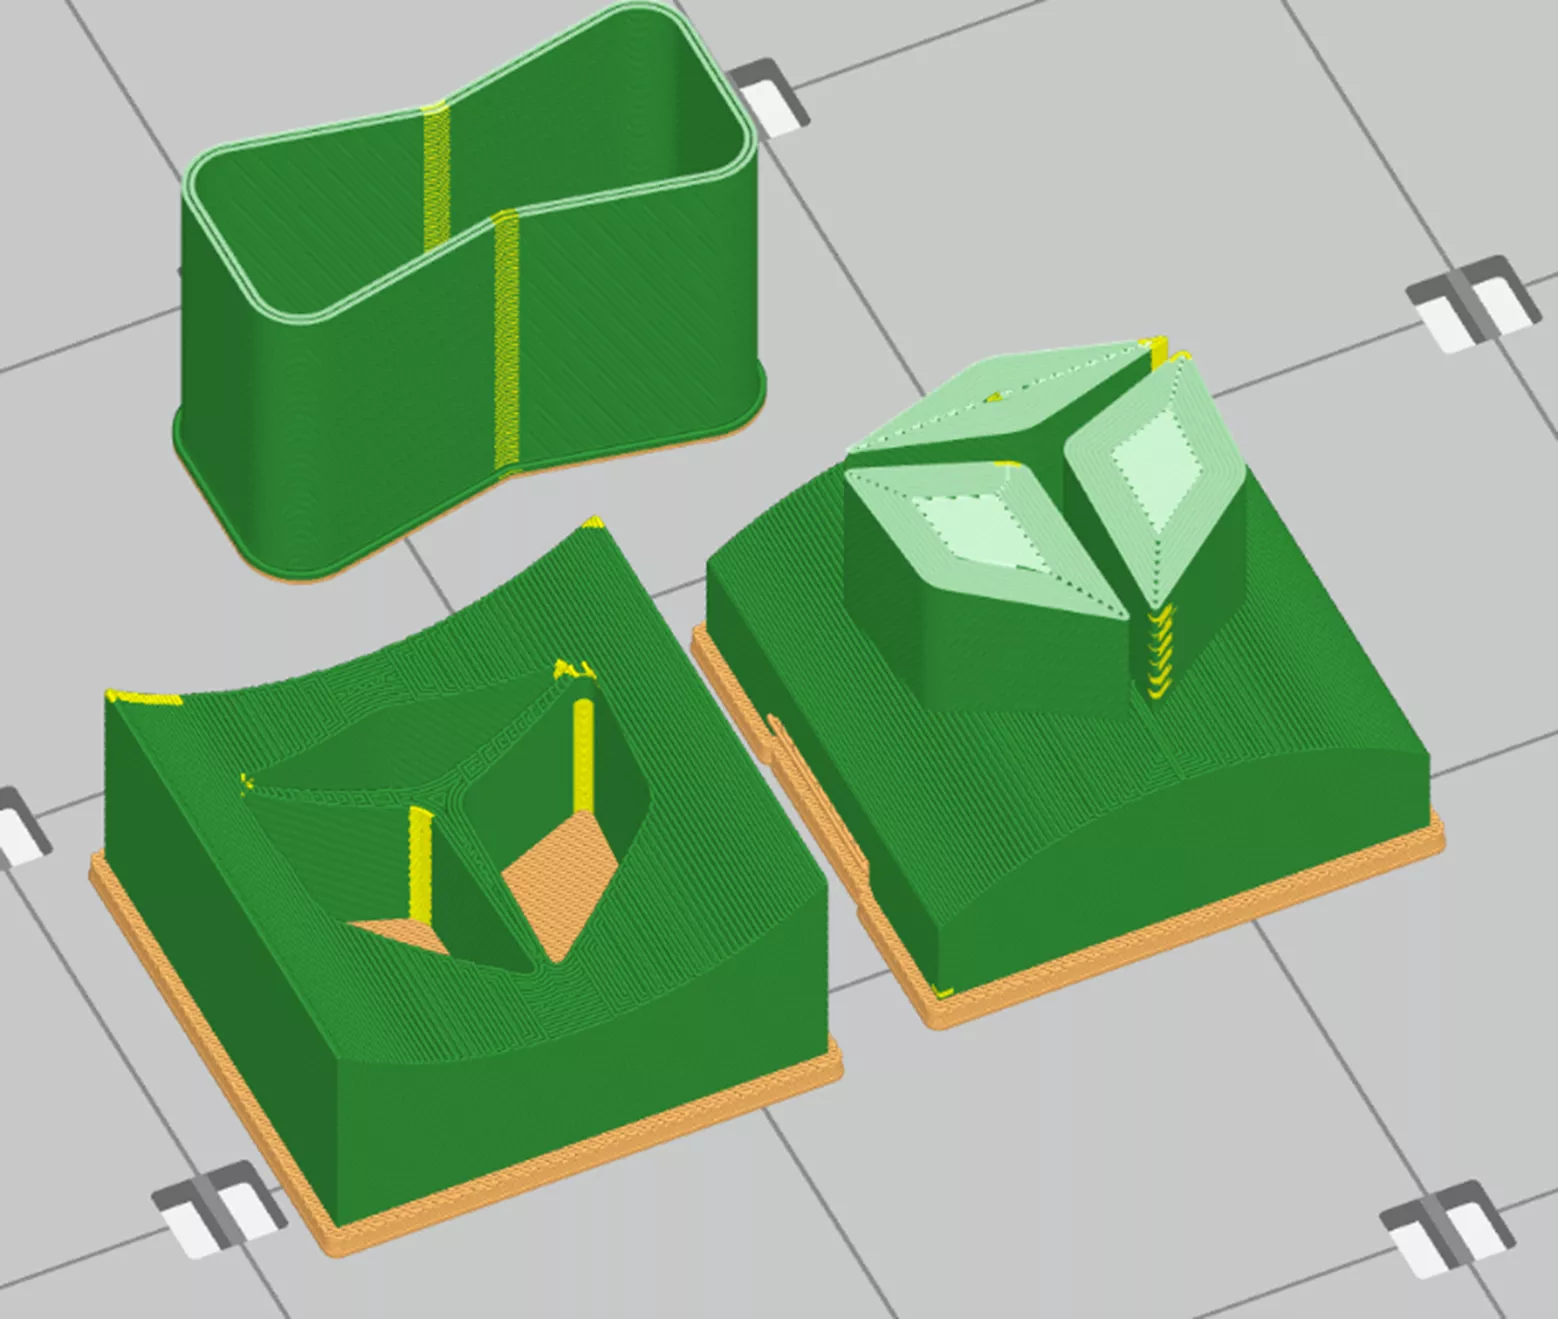
Figure 5: ABS-CF10 Parts
After the parts were printed, they were removed, cleaned, and prepared to be utilized.
![]()
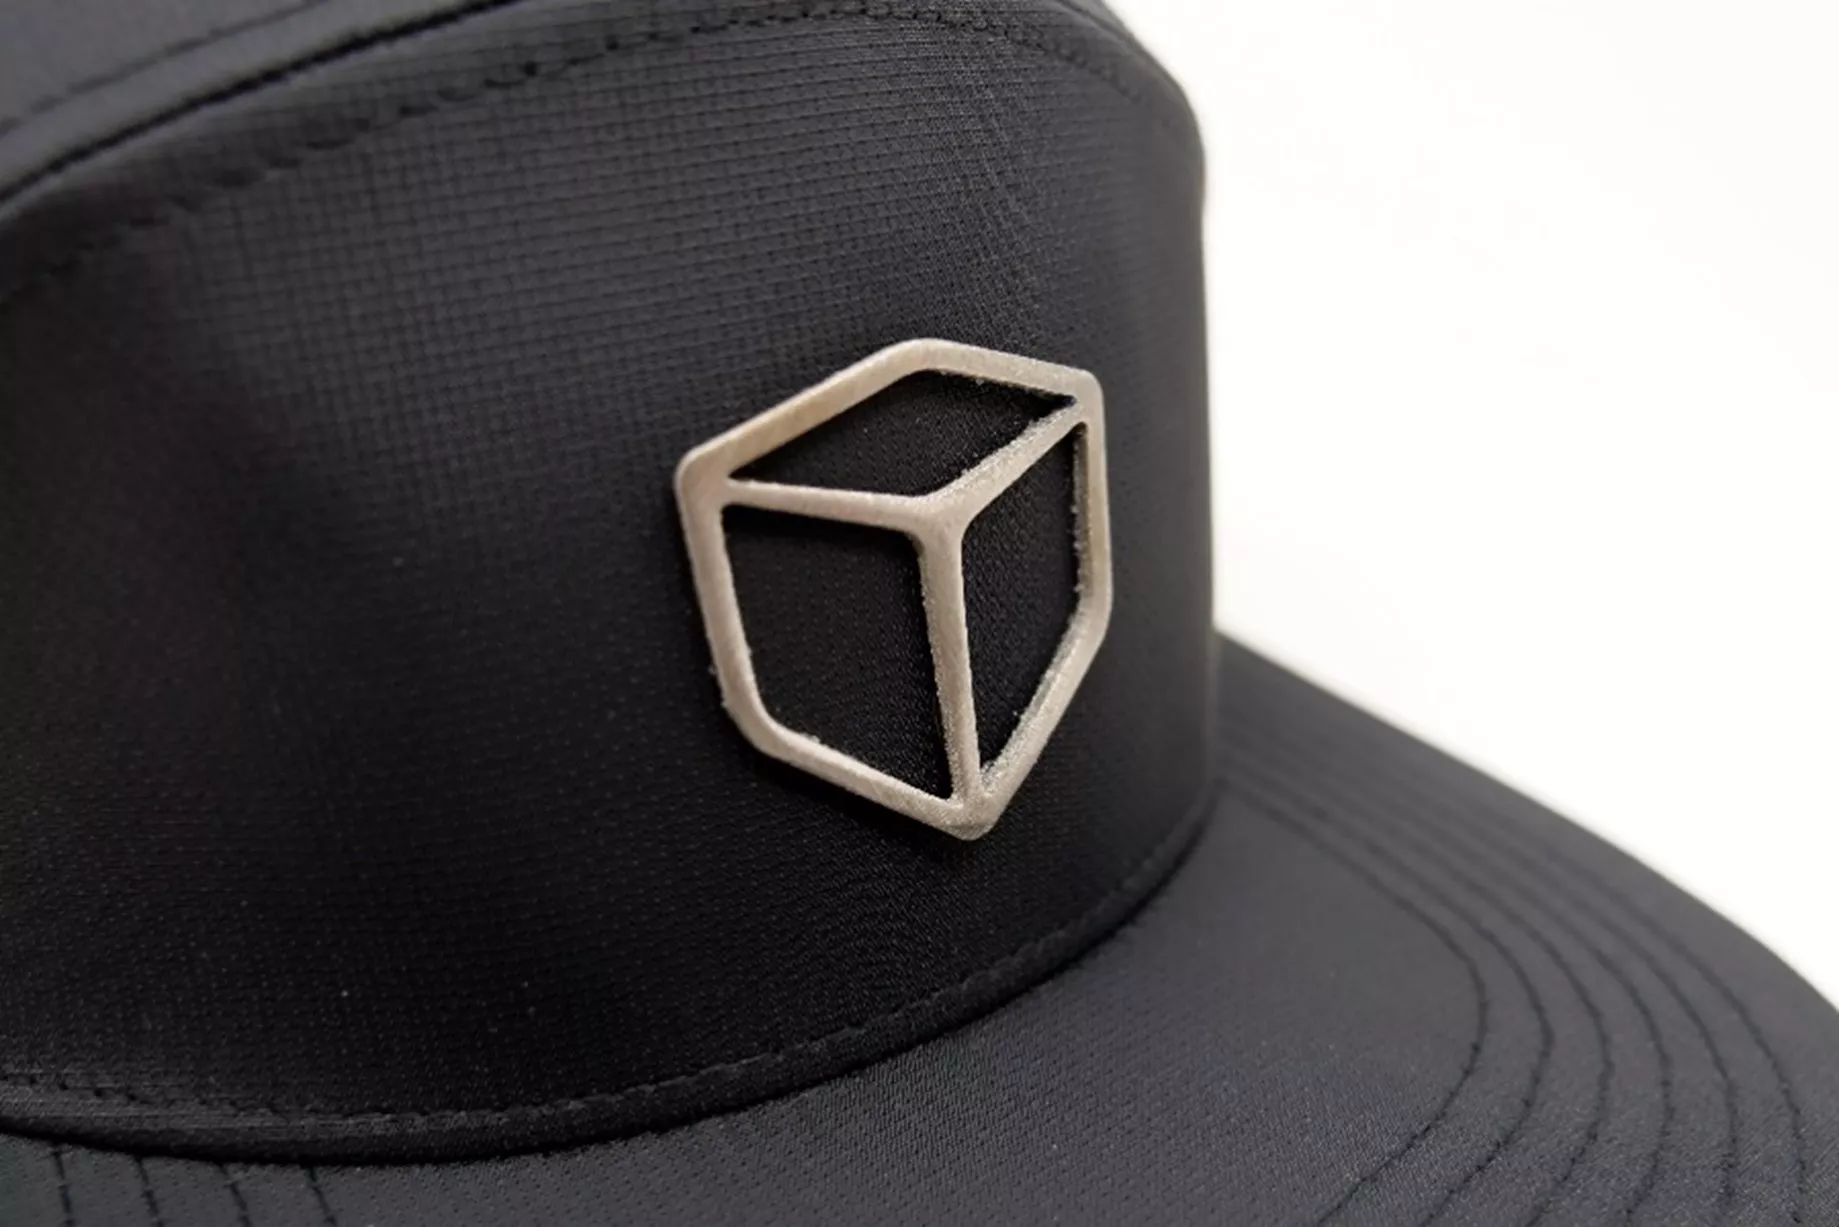
Figure 6: Hat Logo in 316 Stainless Steel
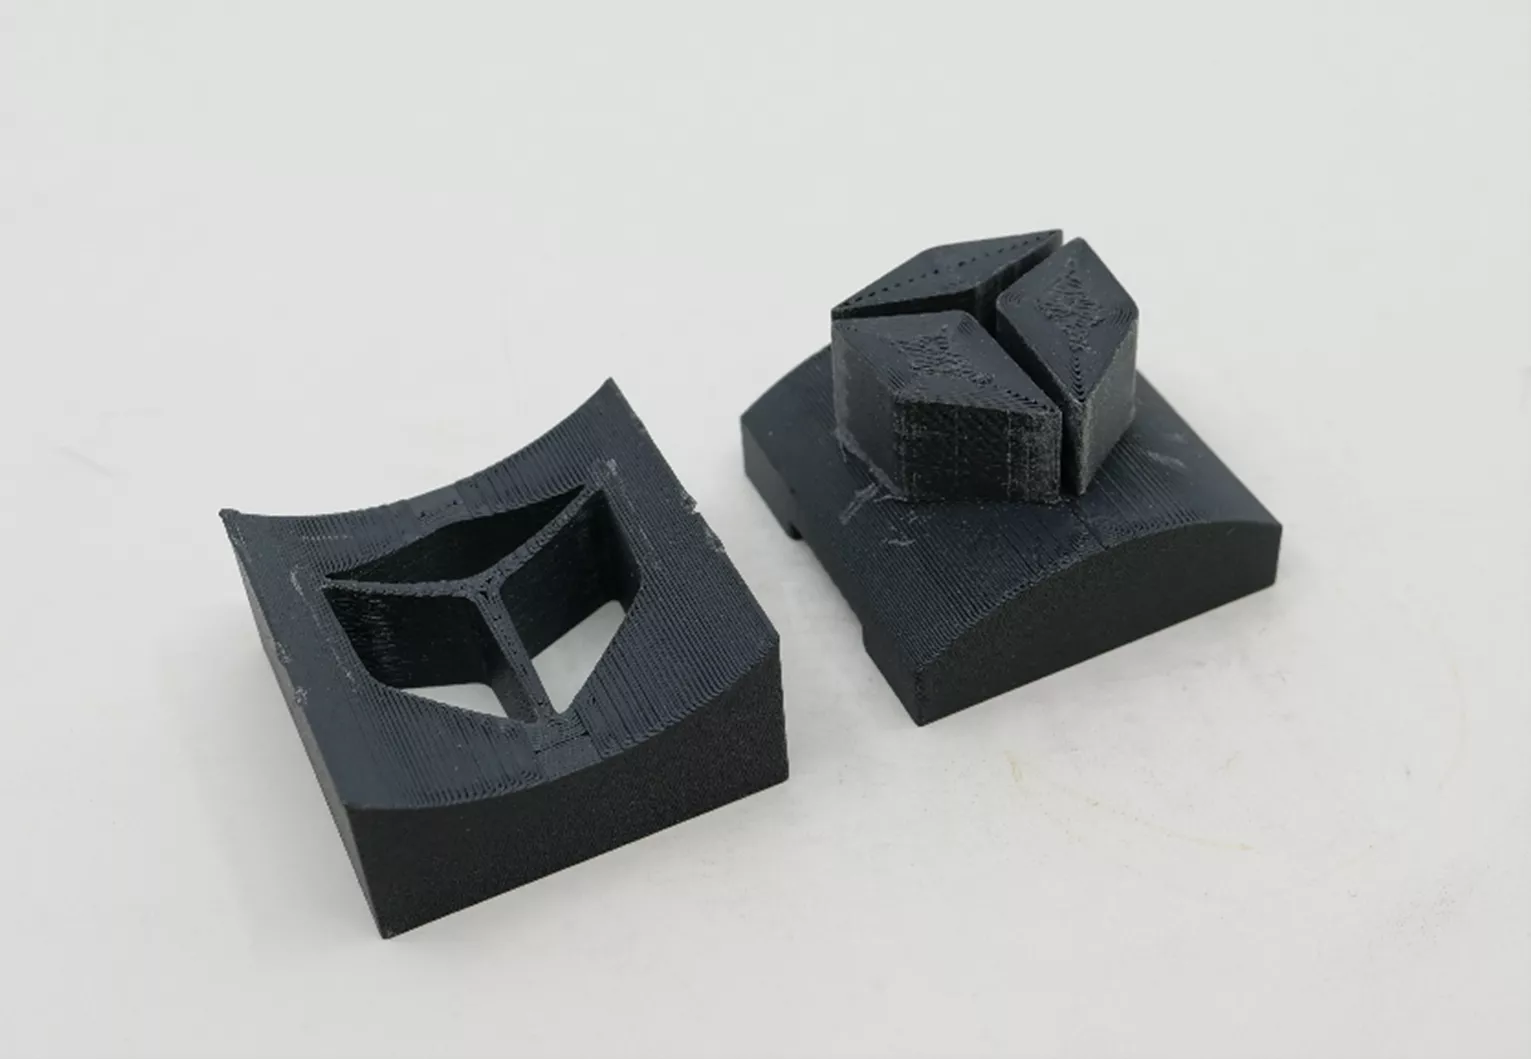
Figure 7: Press Die in ABS-CF10
The Manufacturing Process
The press die was clamped in a vise and slowly tightened, forcing the metal print to form the contour of the press die and therefore forming a curved part. This step is critical and ensures the part mates correctly with the front of the hat.
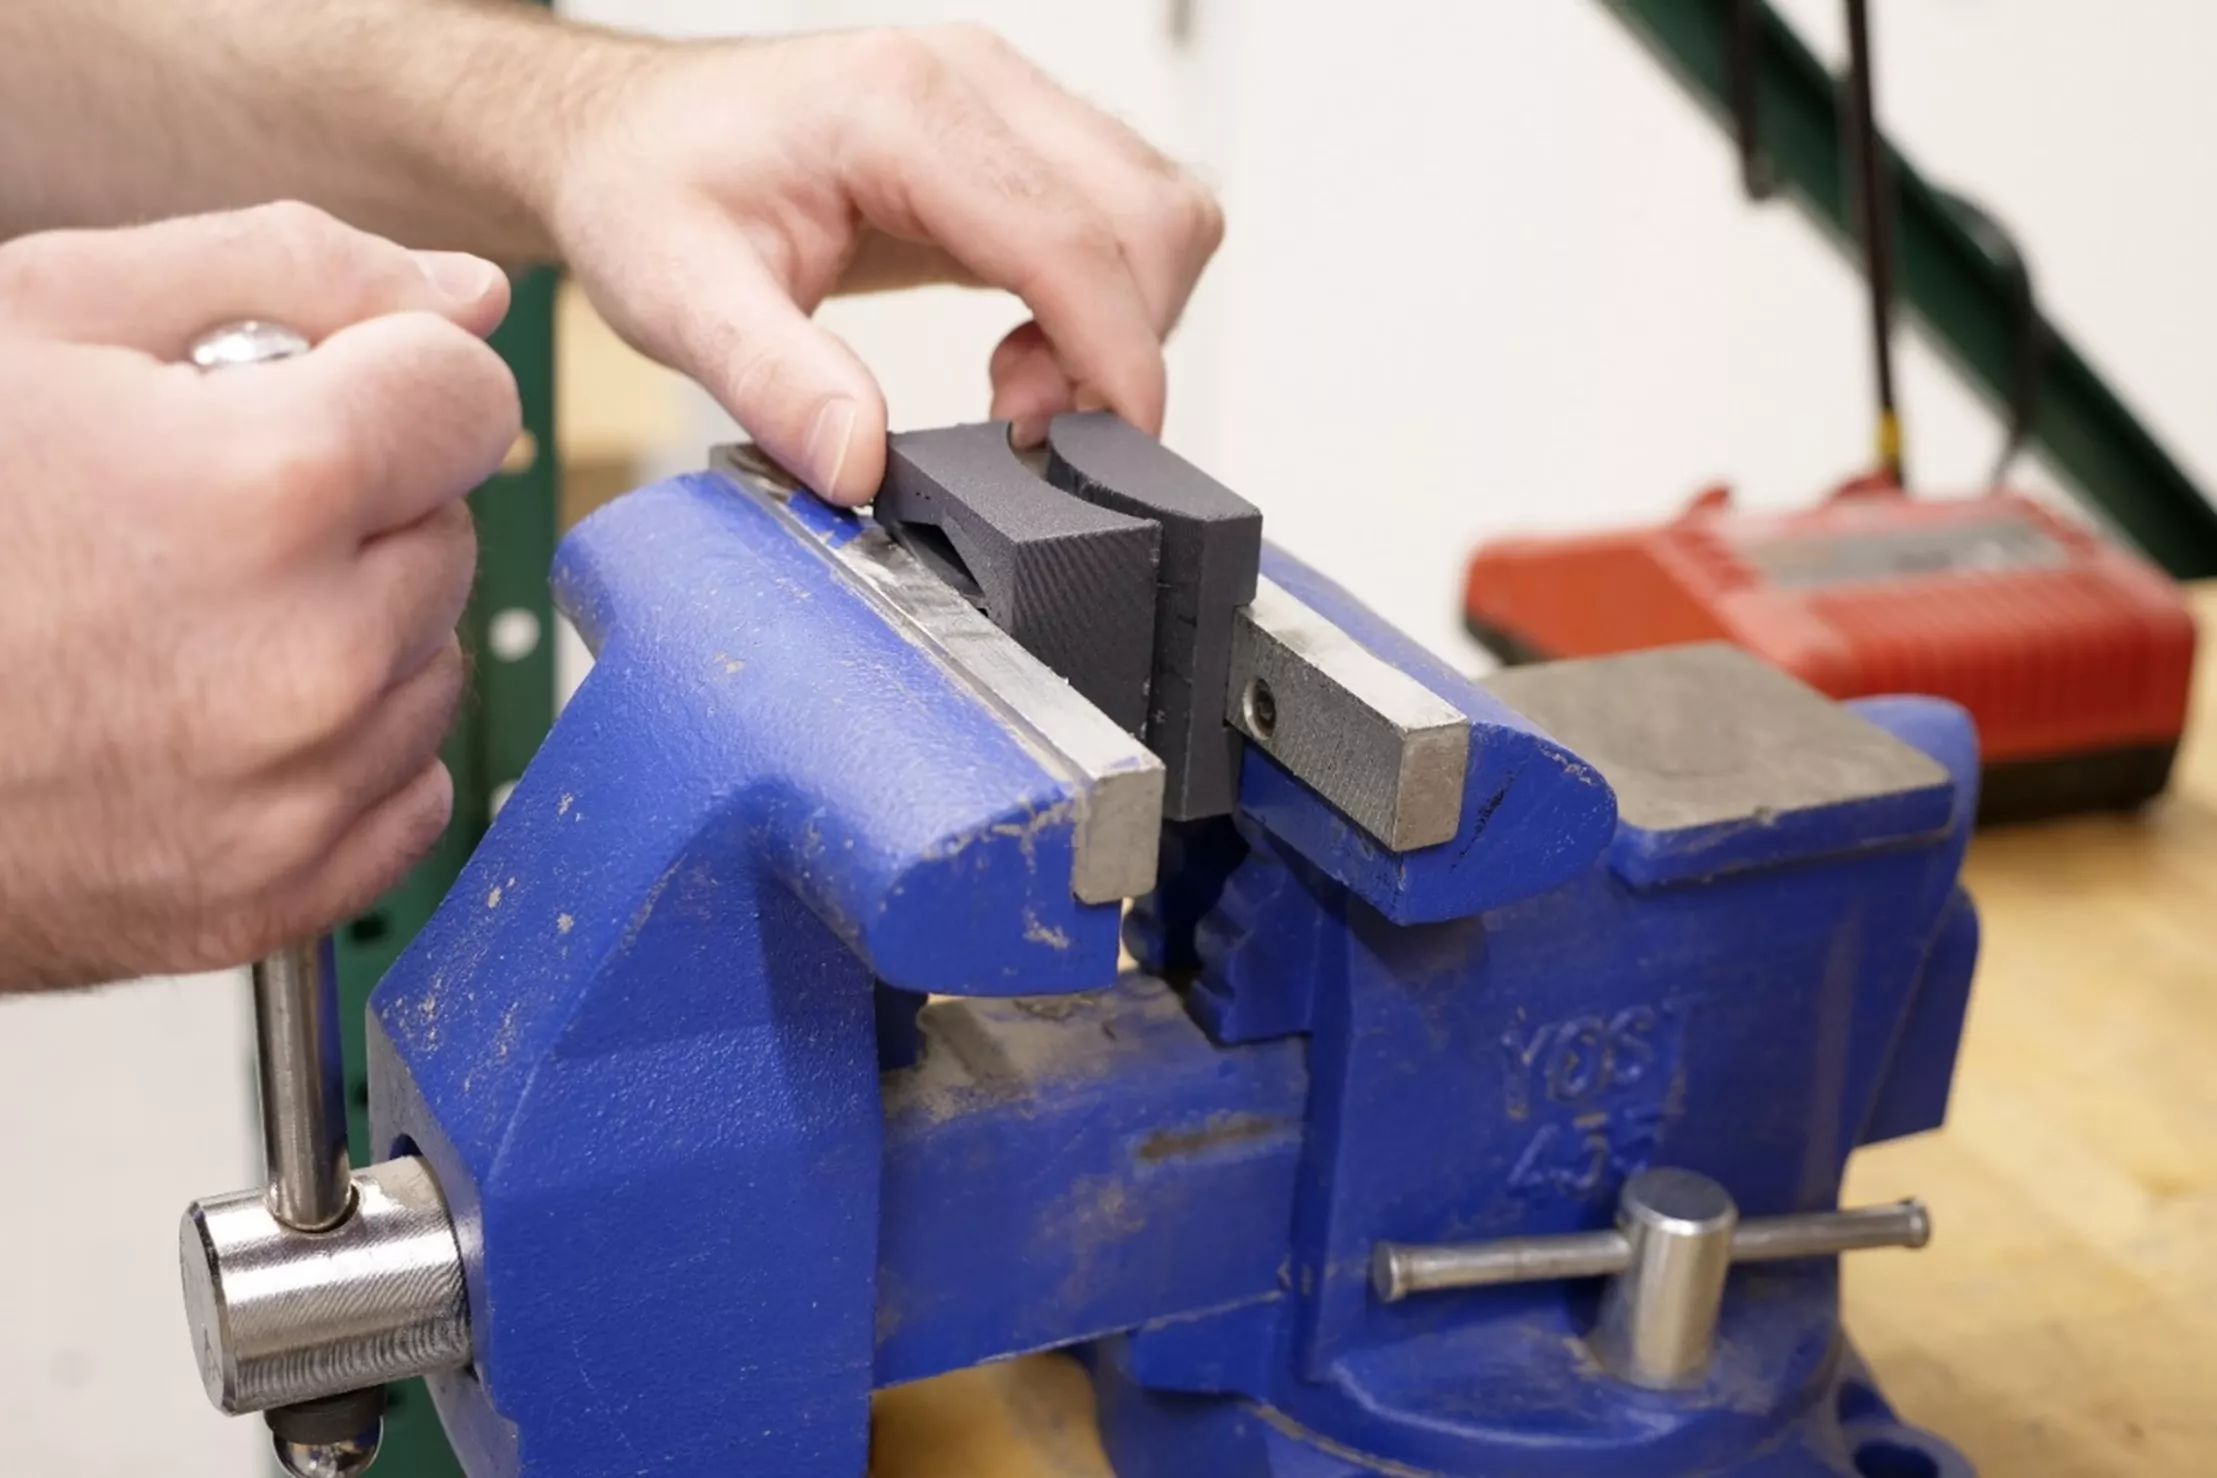
Figure 8: Assembled Part and Die
After the part was formed, the logo was fabric glued to the front - completing the project.
I hope you found this article insightful. Check out more from the 3D printing team at GoEngineer below.
3D Printing as a Service

GoEngineer offers comprehensive 3D printing services across multiple U.S. labs, equipped with cutting-edge Stratasys FDM, PolyJet, Stereolithography, and SAF technologies for 3D printed prototypes or production parts. Request your quote online today!
Related Articles
FDM 3D Printed Tool Organizers & Assembly Aids
A Modern Take on a Classic: 3D Printed Fender Telecaster
3D Printed Redesign of Corvette C4 Gas Pedal Mount
Tips for Adding Fasteners to 3D Printed Parts
![]()
About Benjamin Davenport
Benjamin Davenport is an Additive Manufacturing Application Engineer at GoEngineer.
Get our wide array of technical resources delivered right to your inbox.
Unsubscribe at any time.