Tips for Adding Fasteners to 3D Printed Parts
3D printed parts are strong, but how strong are they? Sure, you can thread parts with a tap and die set, but the overall strength of the part will typically far exceed the strength of the threads (this is plastic, after all). For hard use and frequent stress cycling, fatigue failure is not far away. This is where traditional fasteners come into play: it’s easy to add a metal insert to a printed part, and by doing so, we can attain a level of strength that will extend the life of our 3D printed parts.
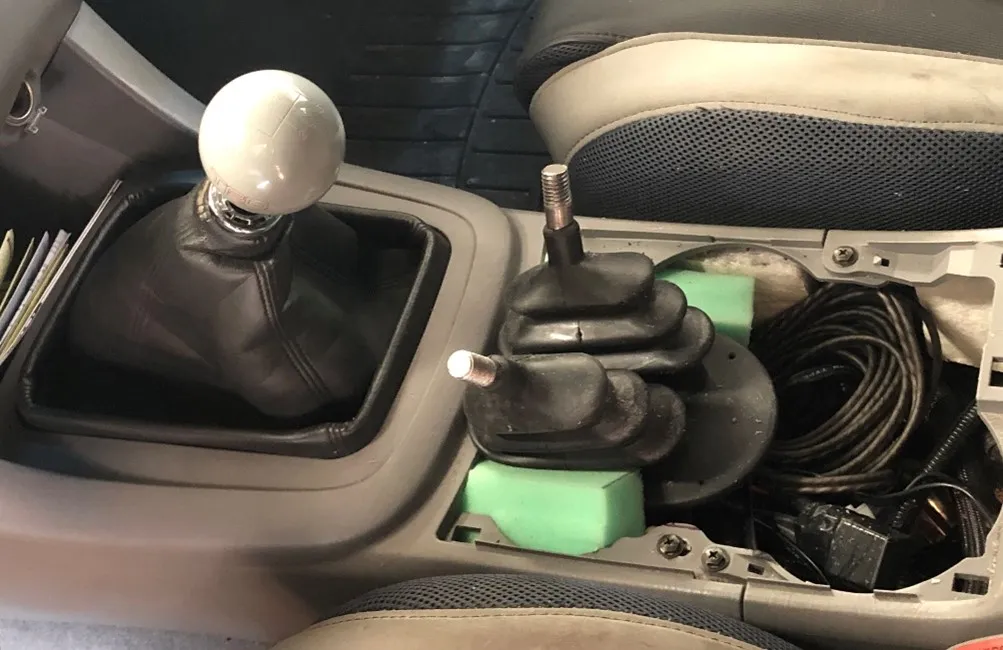
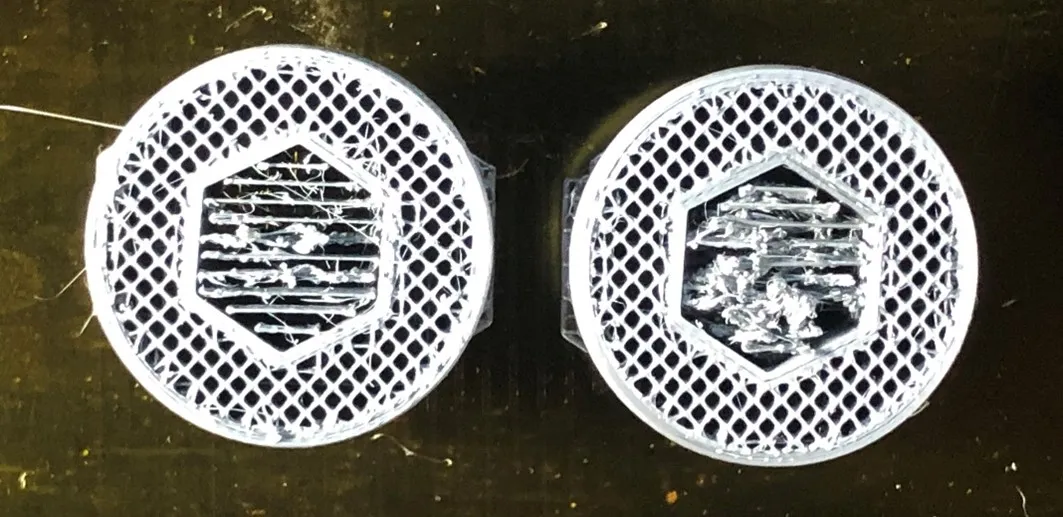
3D Printed shift knobs displaying modified shift patterns, both held in place with large heat set fasteners
Using Heat
Heat is plastic’s worst enemy, but it’s also what gives it such great utility. Heat is also what lets us 3D print parts in the first place, so why not use it to set fasteners? By extruding a hole just slightly smaller than the threaded insert, we can bond the fastener to the part. The trick is to heat the fastener to a high enough temperature to melt (but not burn!) the part. If the fastener needs to travel a long way through the plastic, it will help to heat the printed part to a lower temperature to slow the cooling of the metal insert as you press it in.
Small Fasteners
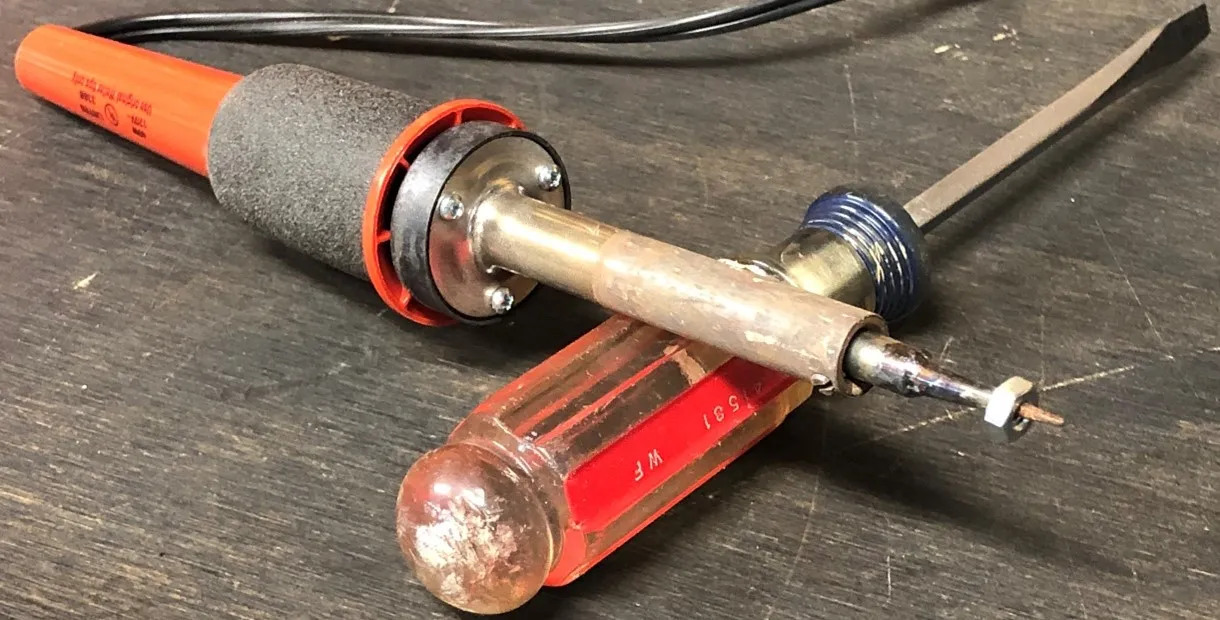
For small fasteners such as screw sizes 0-10, a convenient method is to simply put the metal insert on a soldering iron, heat it, and push it into the printed part until it reaches the desired depth. This doesn’t work too well with fasteners that have a larger inside diameter than your soldering iron though.
Large Inserts
When dealing with large fasteners and irregular steel inserts, I typically heat them to the same temperature I print at and if the part needs heating, I will heat it to just below the material’s glass transition temperature. For PETG, this means setting the toaster oven to 500°F and baking the fastener for about 10 minutes. This is high enough to melt PETG but low enough to not affect the heat treatment of most fasteners.
If the part needs heating as well, I heat it at the same time in a different oven. I have only found this to be necessary with very large parts or very small, irregular metal inserts (such as long, splined steel sleeves and rods).
Inserting the Fastener
Once my parts are heated, I put on my welding gloves and grab some pliers. Then I insert the fastener into the printed part either by hand, with a bench vise, or with an arbor press. My preferred method is to use a vise, but an arbor press gives me more accuracy when a precise depth is needed.
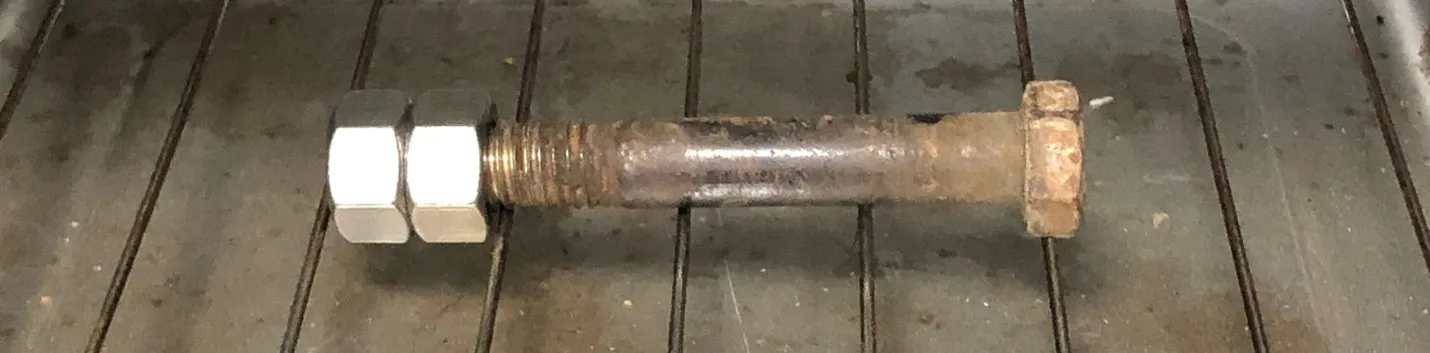
For the shift knobs on my twin-sticked transfer case, (a project I introduced in my previous blog), I screwed the large steel nuts onto a bolt and baked them like this in the oven for about 10 minutes. I left the printed part at room temperature.
Before taking the nuts out of the oven, I placed the shift knob in my bench vise then promptly pushed the bolts into their cutouts on the printed part until they were properly seated. Voila!
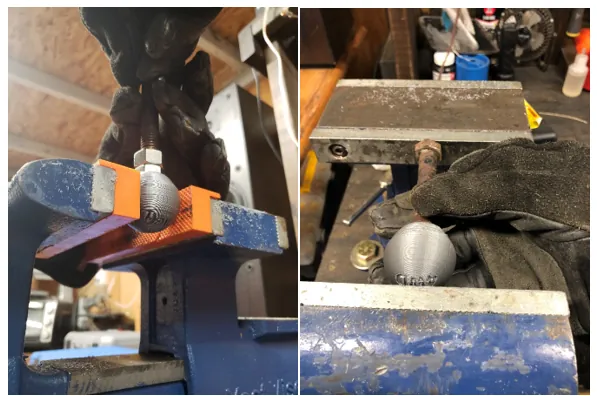
Inserting heated fasteners into a printed PETG shift knob using a bench vise
I used standard hex nuts for this, as maximum strength was not needed, but specialized heat-set inserts do exist and are optimal for applications requiring even greater strength.
Optimizing a Printed Part for Inserting Fasteners
3D printed parts are often hollow, which should be taken into consideration when you plan to insert metal components. To optimize them for strength, you can increase wall thickness, add ribbing, increase infill, or even print them as completely solid. For my shift knobs, I thickened the walls and increased infill to 30%. As you can see, the infill has a honeycomb structure that adds a tremendous amount of strength to the insert location.
More 3D Printing Hacks
3D Printed Trim Panel for Custom Shifters
A Modern Take on a Classic: 3D Printed Fender Telecaster
3D Printing & Controlling a 6-Axis Robotic Arm
Prop Guards for Drone Propellers
Creating a 3D Printed Race Medallion Hanger Using SOLIDWORKS
Designing a 3D Printed Storage Box Using Multi-Body Part Modeling in SOLIDWORKS

About Gary Ballentine
Gary Ballentine is a Mechanical Engineer based out of our Headquarters in Salt Lake City, Utah. He earned a Bachelor’s degree from the University of California, Davis, a certification in Technical Writing from San Francisco State University, and a Bachelor’s degree in Mechanical Engineering from the University of Utah. Gary has been part of the GoEngineer family since April 2019 as a Support Engineer and Certified SOLIDWORKS Instructor.
Get our wide array of technical resources delivered right to your inbox.
Unsubscribe at any time.