DriveWorks Pro Administrator - Getting Started
In this DriveWorks Pro Administrator getting started guide, we'll cover the following topics:
- How to create a new individual group
- How to create a new project
- How to prepare SOLIDWORKS to capture model
Prerequisites
- DriveWorks Pro Administrator is installed and activated
- DriveWorks Pro Add-In is active in SOLIDWORKS
Note: If DriveWorks Pro Administrator is not installed and/or activated, please refer to the DriveWorks Pro Administrator Installation-Upgrade.
Create New Individual Group
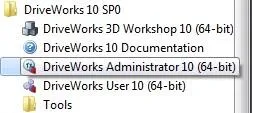
Run the DriveWorks Pro Administrator module. Navigate through Start > All Programs > DriveWorks __ SP__> Click on DriveWorks Administrator.
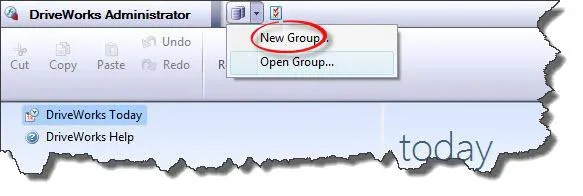
Once DriveWorks Administrator opens, click the group button drop-down > select New Group...
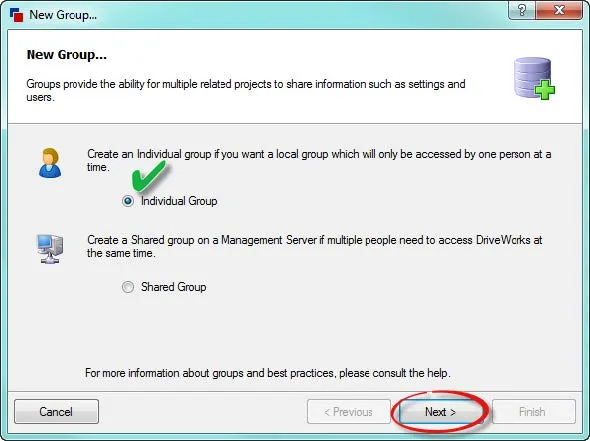
In the New Group wizard, select individual group. Click Next.
Note: For more information about individual groups and Shared groups, visit the DriveWorks Help web page using the link below.
| Topic | Link |
| Individual and Shared Group | http://docs.driveworkspro.com/Topic/InfoIndividualAndSharedGroups |
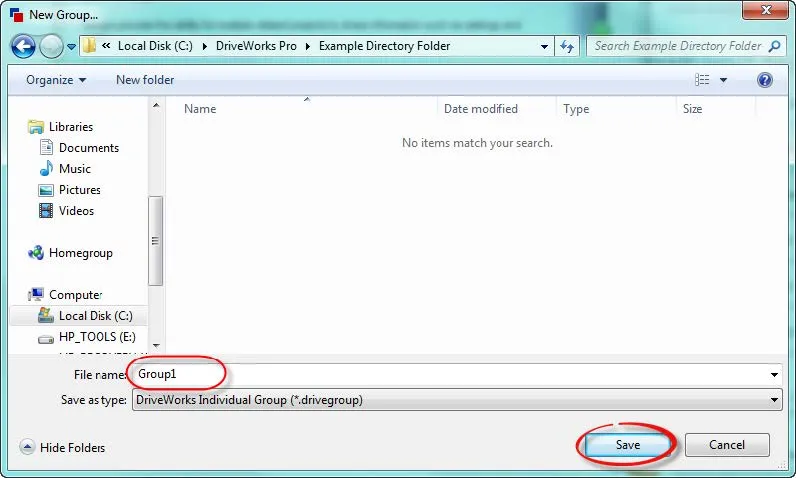
To select where the individual group will be saved, click Browse.
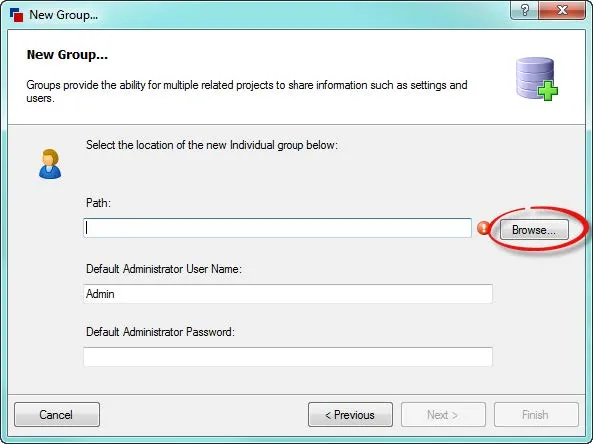
Navigate to the desired save location. Give the group a meaningful name. "Group1" will be used in this guide. Click Save.
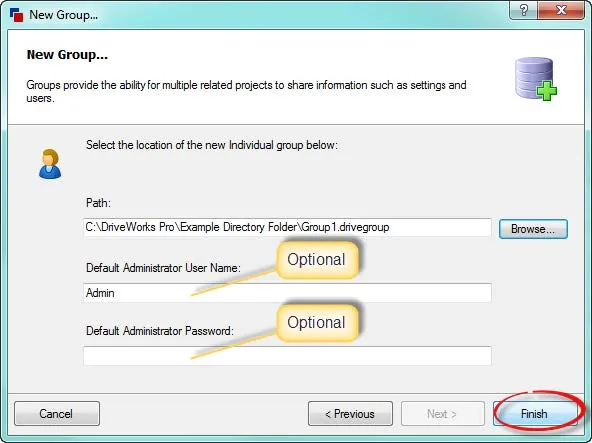
Enter a default Administrator user name and password. The standard "Admin" user name with no password will be used in this guide. Click Finish.
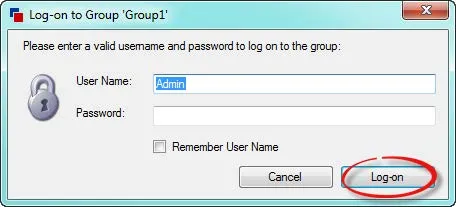
After the New Group wizard closes, the "Log-on to Group" dialog box opens. Enter-user name and password created in the previous step and click Log-on.
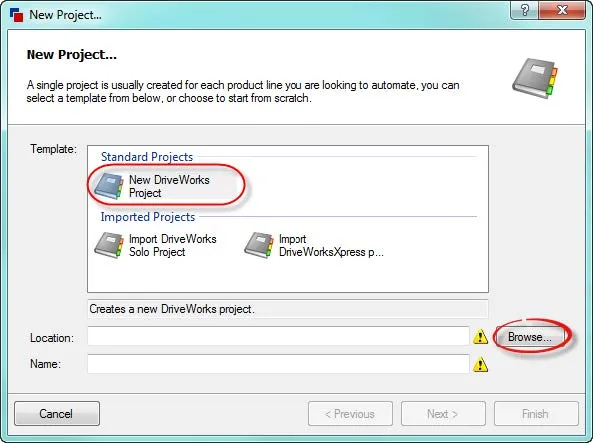
Create New Project
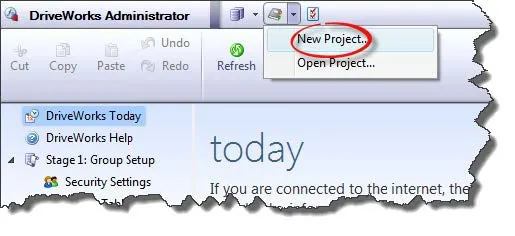
Once logged into the group, click the project button drop-down > select New Project...
With "New DriveWorks Project" selected, click Browse to browse where to save the project.
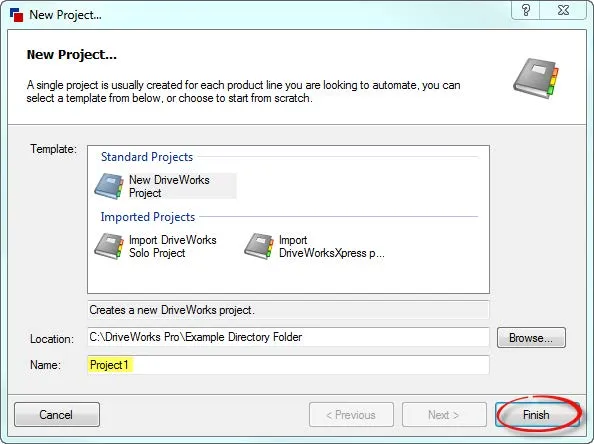
Note: Projects can be saved anywhere. In this guide, the project will be saved in the same directory as the group.
By default, DriveWorks will use the folder name as the new name for the project. Give the project a meaningful name. "Project1" will be used in this guide. Click Finish.
A group and a project are now created. The next step is to prepare SOLIDWORKS to capture a model.
Prepare SOLIDWORKS to Capture Model
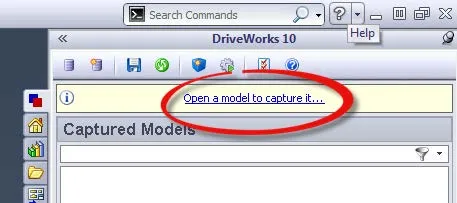
With SOLIDWORKS open, click the DriveWorks tab in the SOLIDWORKS Task Pane.
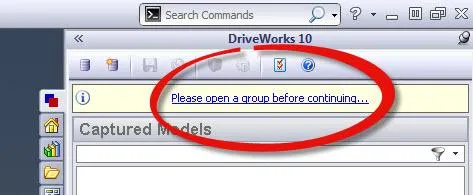
Click the helper link to open the group.
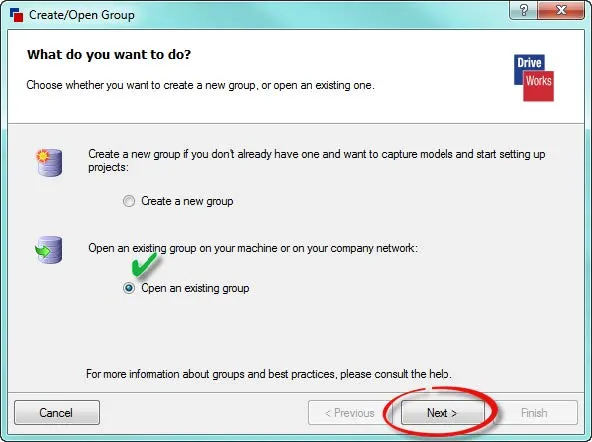
Select "Open an existing group". Click Next.
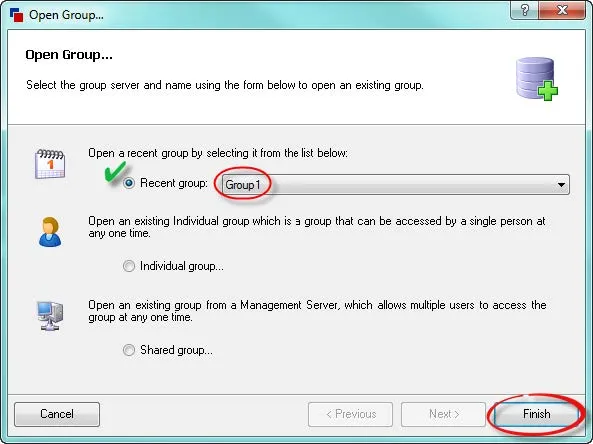
Select "Recent Group" and select the name of the group from the drop-down list. Click Finish.
Log in to the group when the dialog appears. DriveWorks is now ready to capture a model.
Expand Your DriveWorks Skillset
MyDriveWorks: A New DriveWorks Community Platform
DriveWorks Pro Admin Stages Explained - Group Setup
DriveWorks Pro Admin Stages Explained - User Interface

About Francisco Guzman
Francisco Guzman is the PDM Technical Support Lead at GoEngineer, and is pursuing his degree in mechanical engineering at the University of Utah. In addition to providing guidance and support to SOLIDWORKS and SOLIDWORKS PDM customers, Francisco also provides support for DriveWorks design automation. He won the world-wide DriveWorks reseller CPD contest as the best DriveWorks AE for 2015. For fun, he designs, 3D-Prints, builds and races custom first-person-view (FPV) racing drone frames.
Get our wide array of technical resources delivered right to your inbox.
Unsubscribe at any time.