GrabCAD Print for SOLIDWORKS Add-In
In addition to the new Stratasys launch of its new F123 series 3D printers, Stratasys has also launched another product; GrabCAD Print and GrabCAD Print SOLIDWORKS Add-in. GrabCAD for SOLIDWORKS allows users to skip the extra step of saving to an STL, and is the perfect add-in for designers and engineers to rapidly develop prototypes.
Related Article >> Stratasys Slicer Updates for FDM: GrabCAD Print & Insight
How to install GrabCAD Print SOLIDWORKS Add-in
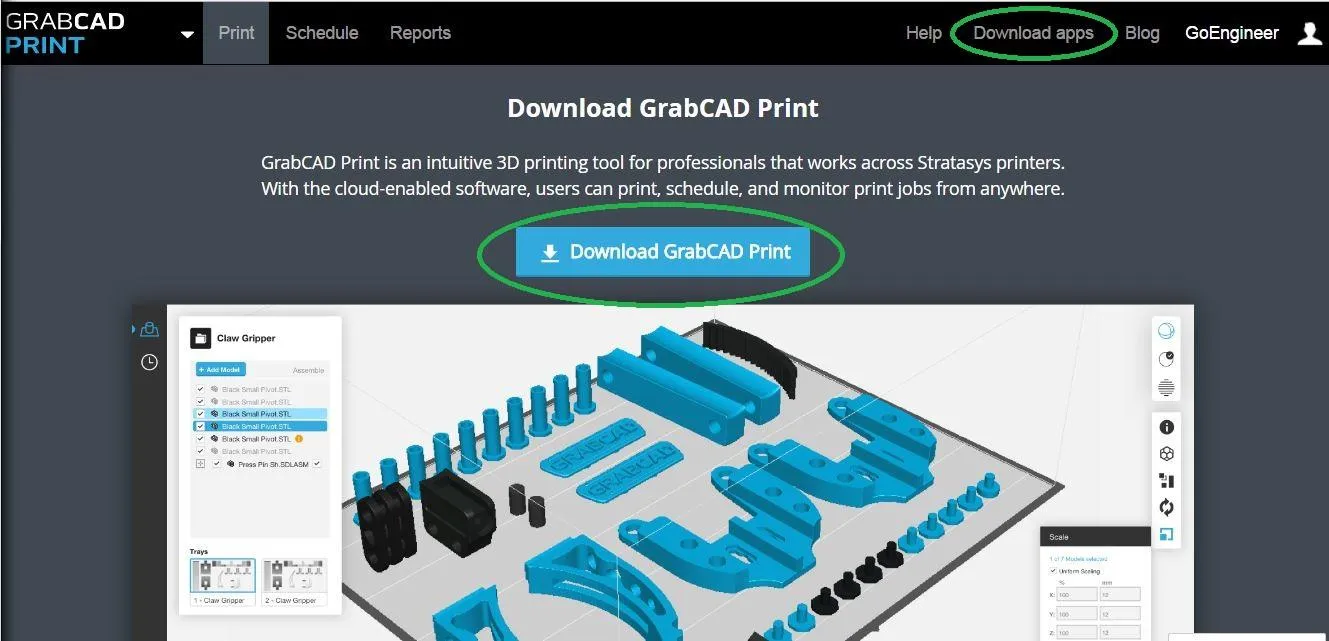
First, download the GrabCAD Print desktop app from the GrabCAD website and create a free account if you don’t already have one. Once the desktop app is downloaded and installed, select the download apps and download GrabCAD Print for SOLIDWORKS.
How to use the GrabCAD Print for SOLIDWORKS Add-in
Once the app is installed go to Tools > Add-ins and check GrabCAD Print for SOLIDWORKS just as you would for simulation or toolbox. A tab will appear on the task pane and the command manager.
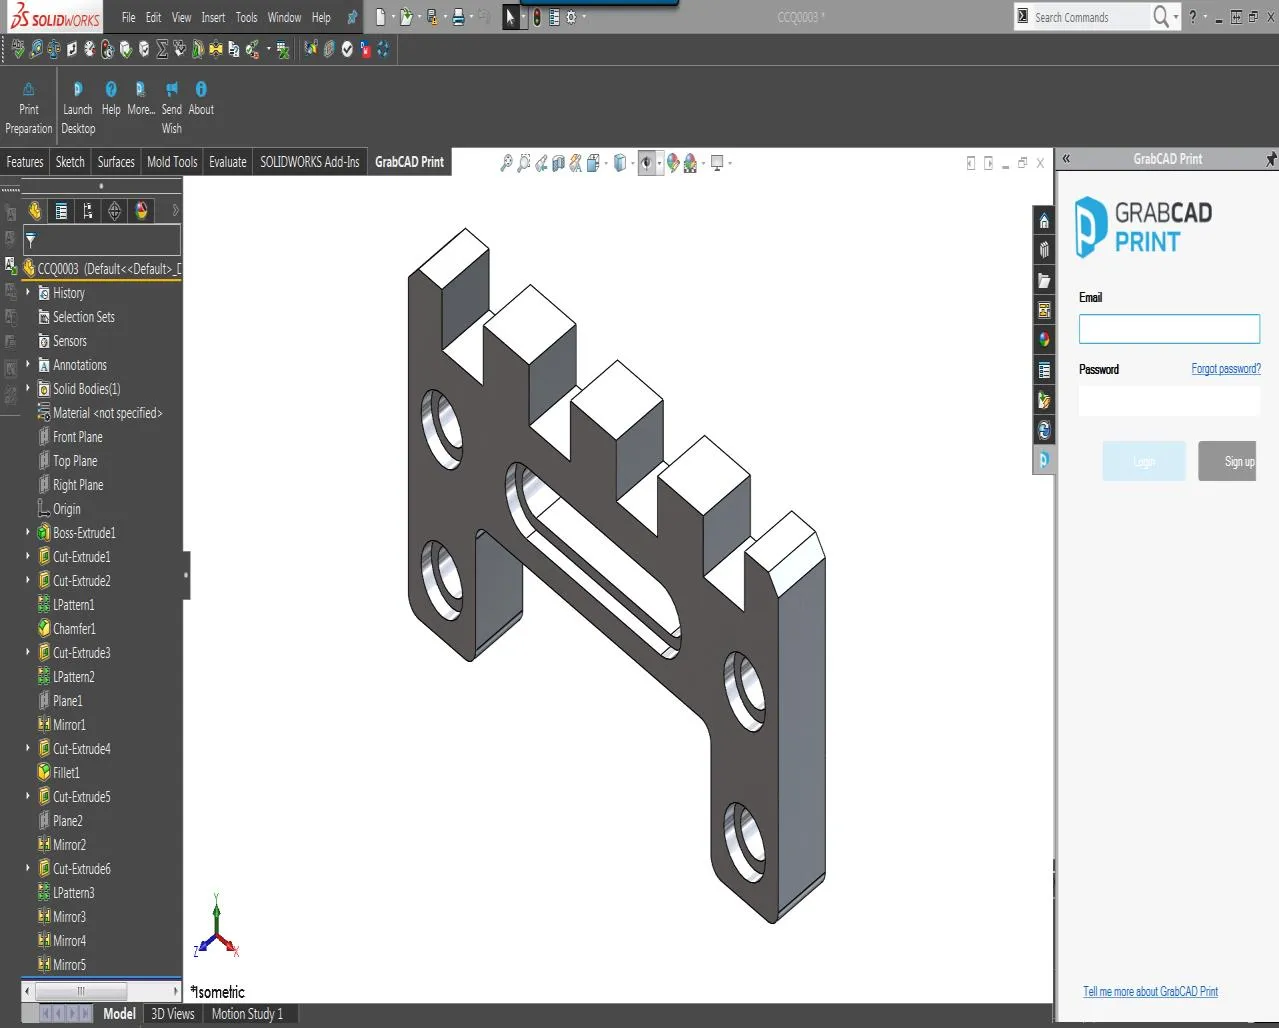
Input your login credentials in the tab located in the task pane and select your company's account.
Print Preparation
Open a Part* and select the Print Preparation tool in the command manager.

Related Article >> 5 F123 Series Maintenance Tips for New Users
Printer Selection
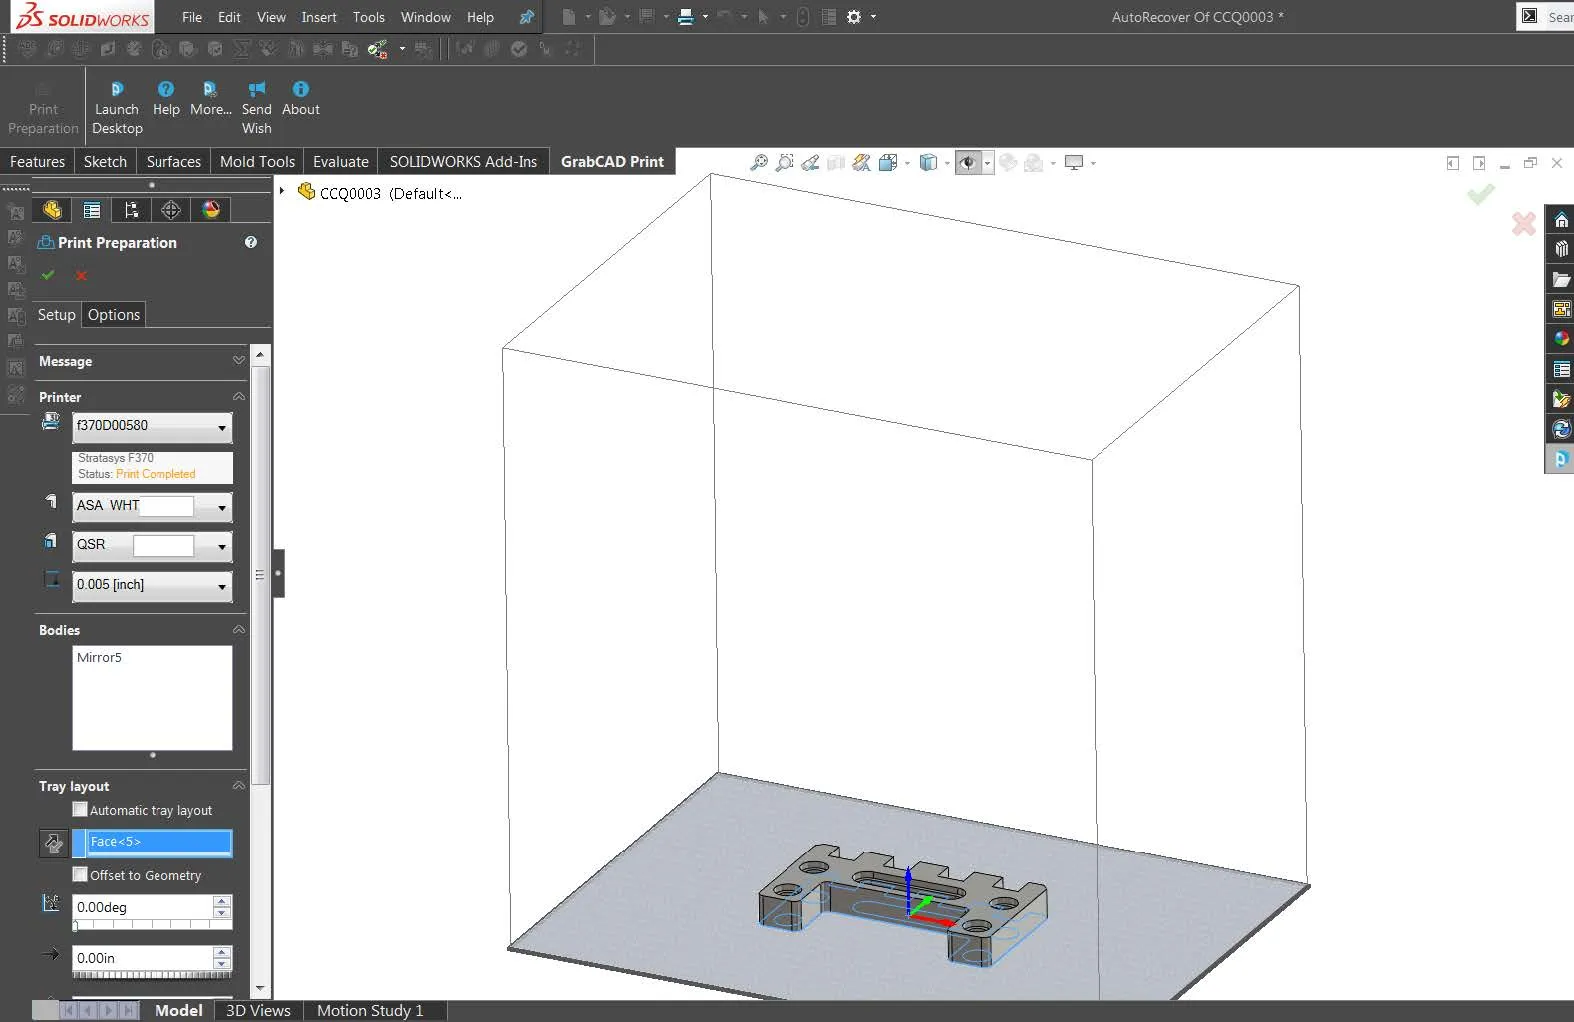
The list of supported printer and printer templates will be available as well as the 3D printers that are available on your local network. The status of the printer will be available on the left-hand pane as well as model material, support material, and slice height under the printer header.
The printers on the local area network will be displayed with the current status of the printer displayed as well as the printer templates for supported printers.
It is possible to change the slice height for the F123 Series printers from this drop-down menu. The bodies of the part file that will be printed are shown under the bodies section.
Related Article >> 3D Printing with the F123 Series: Hardware, Software, & Materials
Pro tip: Use the Move/Bodies Copy command in SOLIDWORKS to created multiple bodies to add more bodies to the print tray.
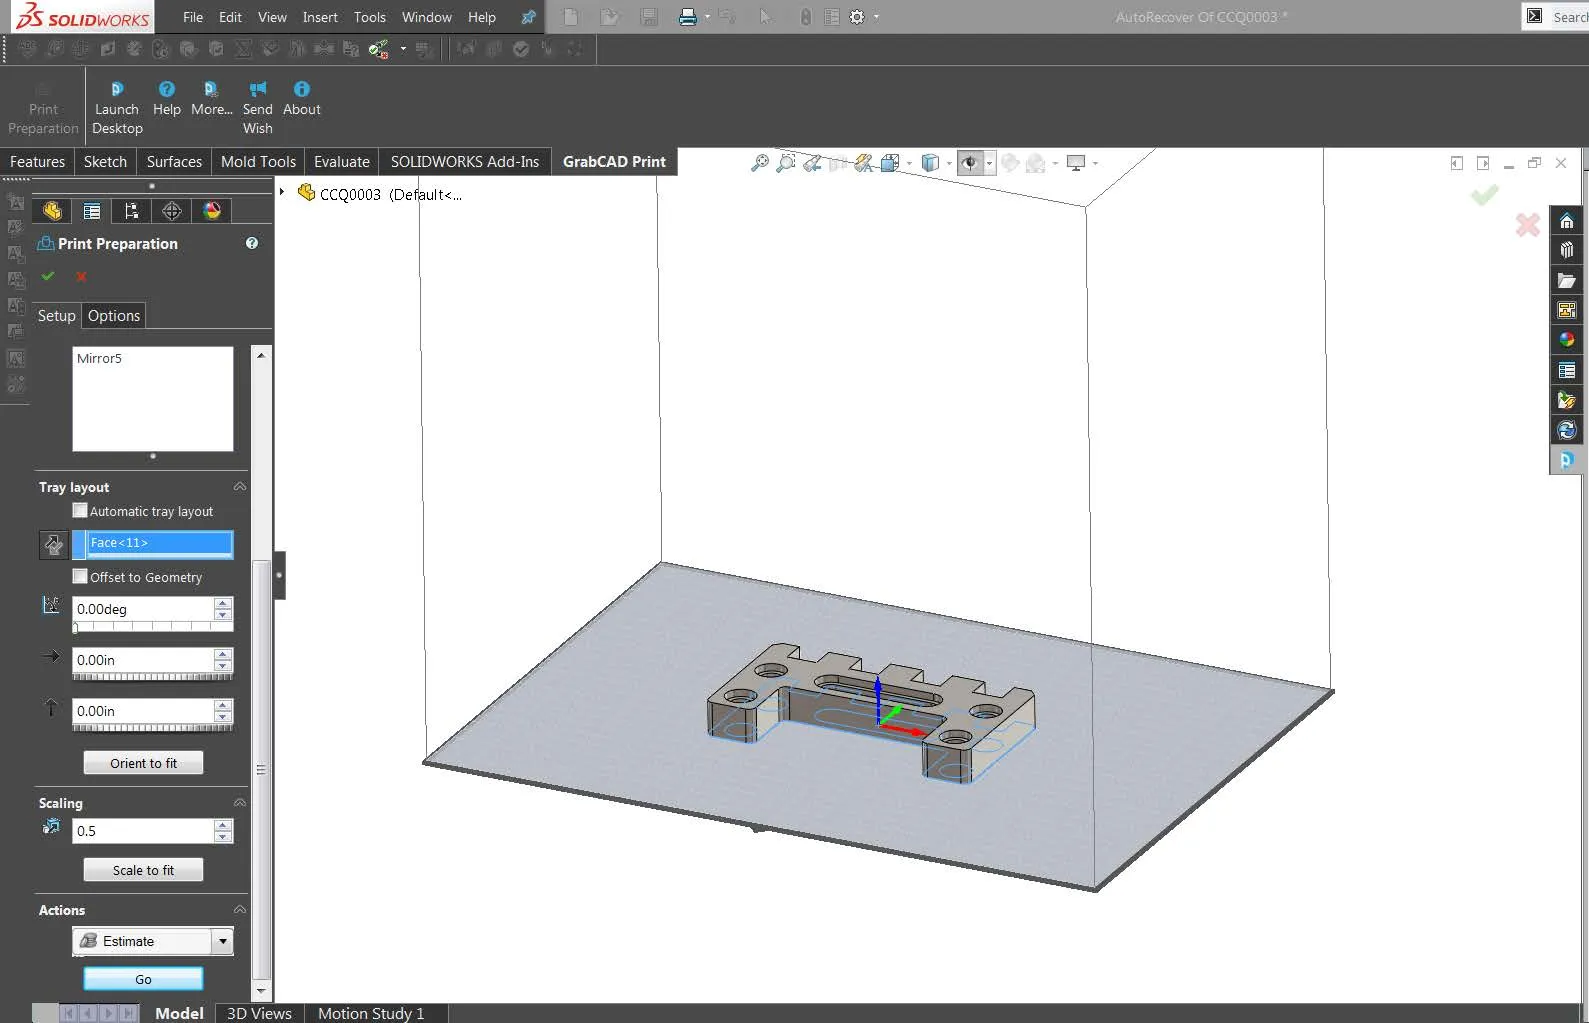
Orientation
With the automatic tray layout option selected the part will be placed at the bottom corner to optimize room for more copies in the virtual build envelope.
To place the datum of the part as you would in Insight or Catalyst, simply select the bottom face of the part in the graphics area.
This interface allows the user to change the angle and position of the part. The Orient to Fit button will automatically place the part in an optimal orientation. Underneath the tray layout there is an option to change the scaling as well, or automatically Scale to Fit.
Print Preparation Additional Options
By selecting the Options tab it is possible to manually change the part’s STL tessellation and preview the changes by selecting the Preview check box. The options to change the Chord and Surface tolerance and angle, as well as the maximum and minimum facet width, exist within this options tab.
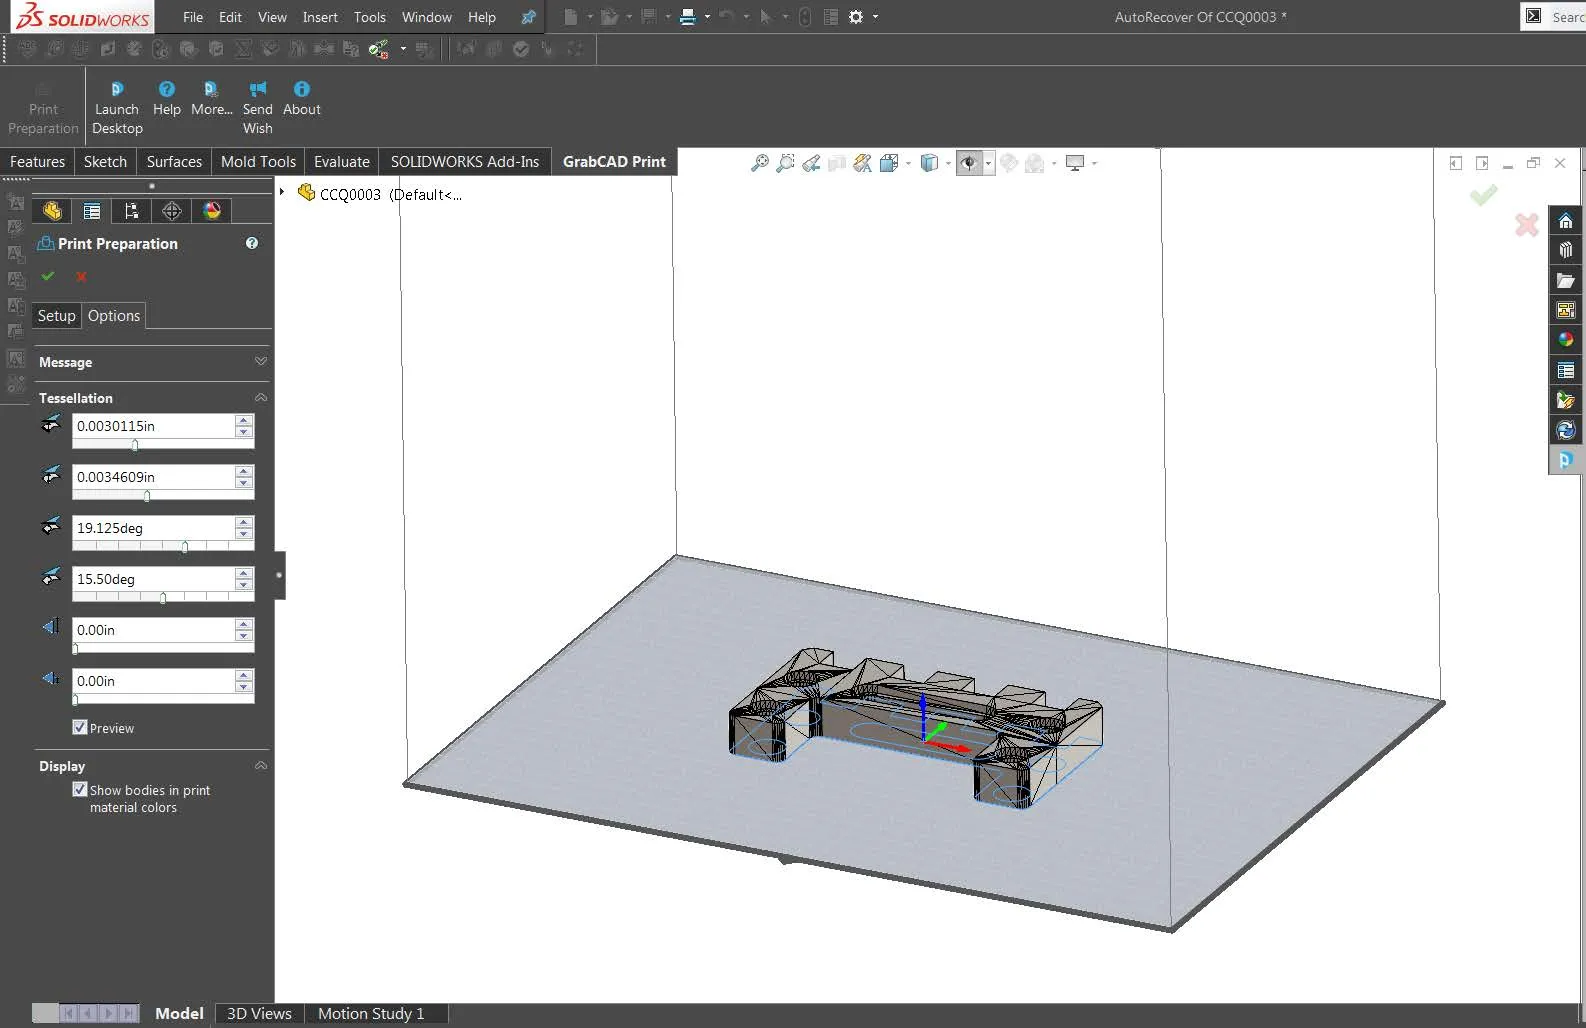
By checking the box for Show bodies in print material colors it is possible to preview the color of the part based on the material selection in the Setup tab.
Related Article >> Stratasys F123 Series Print Head Storage Solutions: 3D Printing Hacks
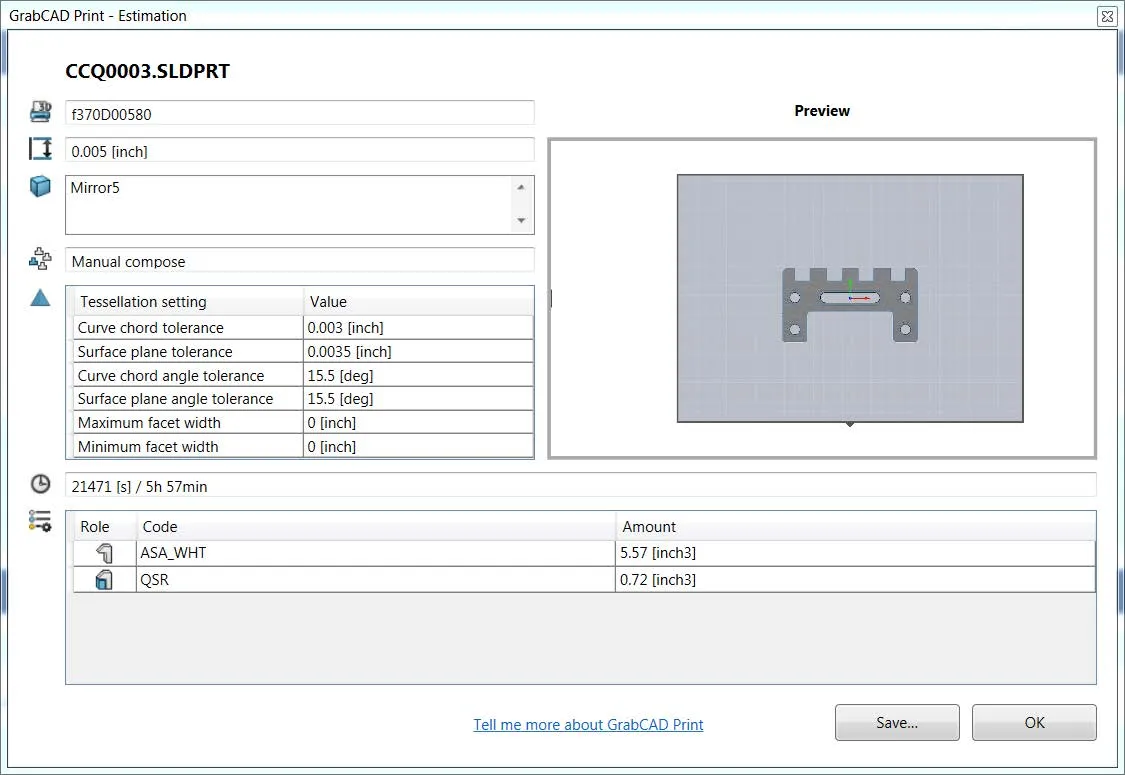
Print, Estimate, and Save
In the Actions dropdown, the user can choose to:
- Estimate – Shows time and material consumption (as shown below)
- Print – Sends the job to the printer
- Open in Desktop – Closes the add-in and opens the GrabCAD Print desktop application with the current tray. This is the only way to view the slice preview, more advanced print preparation, and print to the Stratasys J750
- Save As – Allows the user to save to an STL of the tray layout and save to a GrabCAD Print project file
Select the Go button to perform the selected action.
SOLIDWORKS Add-in Limitations
- Cannot directly print a .SLDASM file
- Cannot print multiple trays at once
- Cannot print to a J750 at this time
- Cannot show slice preview
- Cannot Drag model freely in tray space
- Cannot have Add-in in and Desktop app open at same time
Note: All SOLIDWORKS add-in limitations are available in the GrabCAD Print Desktop Application. Additionally, uncheck the add-in at startup as it may slow down the opening time for SOLIDWORKS. It may be helpful to just check the box for add-in when needed.
More 3D Printing News
3D Printed Topographical Map Project: Preventing Future Flood Damage in Mid-Michigan
Stratasys' 'BIG' Release: Meet the F770
Stratasys Unveils 3 New 3D Printers
Binder Jetting and Stratasys? Meet SAF Technology
New Stratasys ABS-CF10 Carbon Fiber Composite 3D Printing Material

About Jacob Bakovsky
Jacob is a Senior Elite Application Engineer at GoEngineer. His expertise is in SOLIDWORKS but he also has knowledge with PDM, Composer, Inspection, Visualize, Simulation, and the 3DEXPERIENCE platform. In addition, he also helps run the 3D printing service bureau at our Santa Ana, California branch.
Get our wide array of technical resources delivered right to your inbox.
Unsubscribe at any time.