Microphone Repair Using 3D Printing & SOLIDWORKS
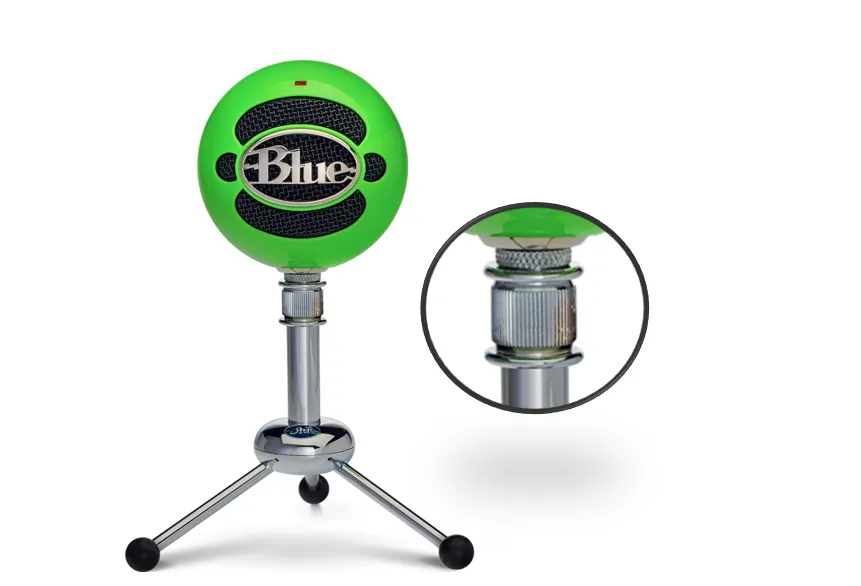
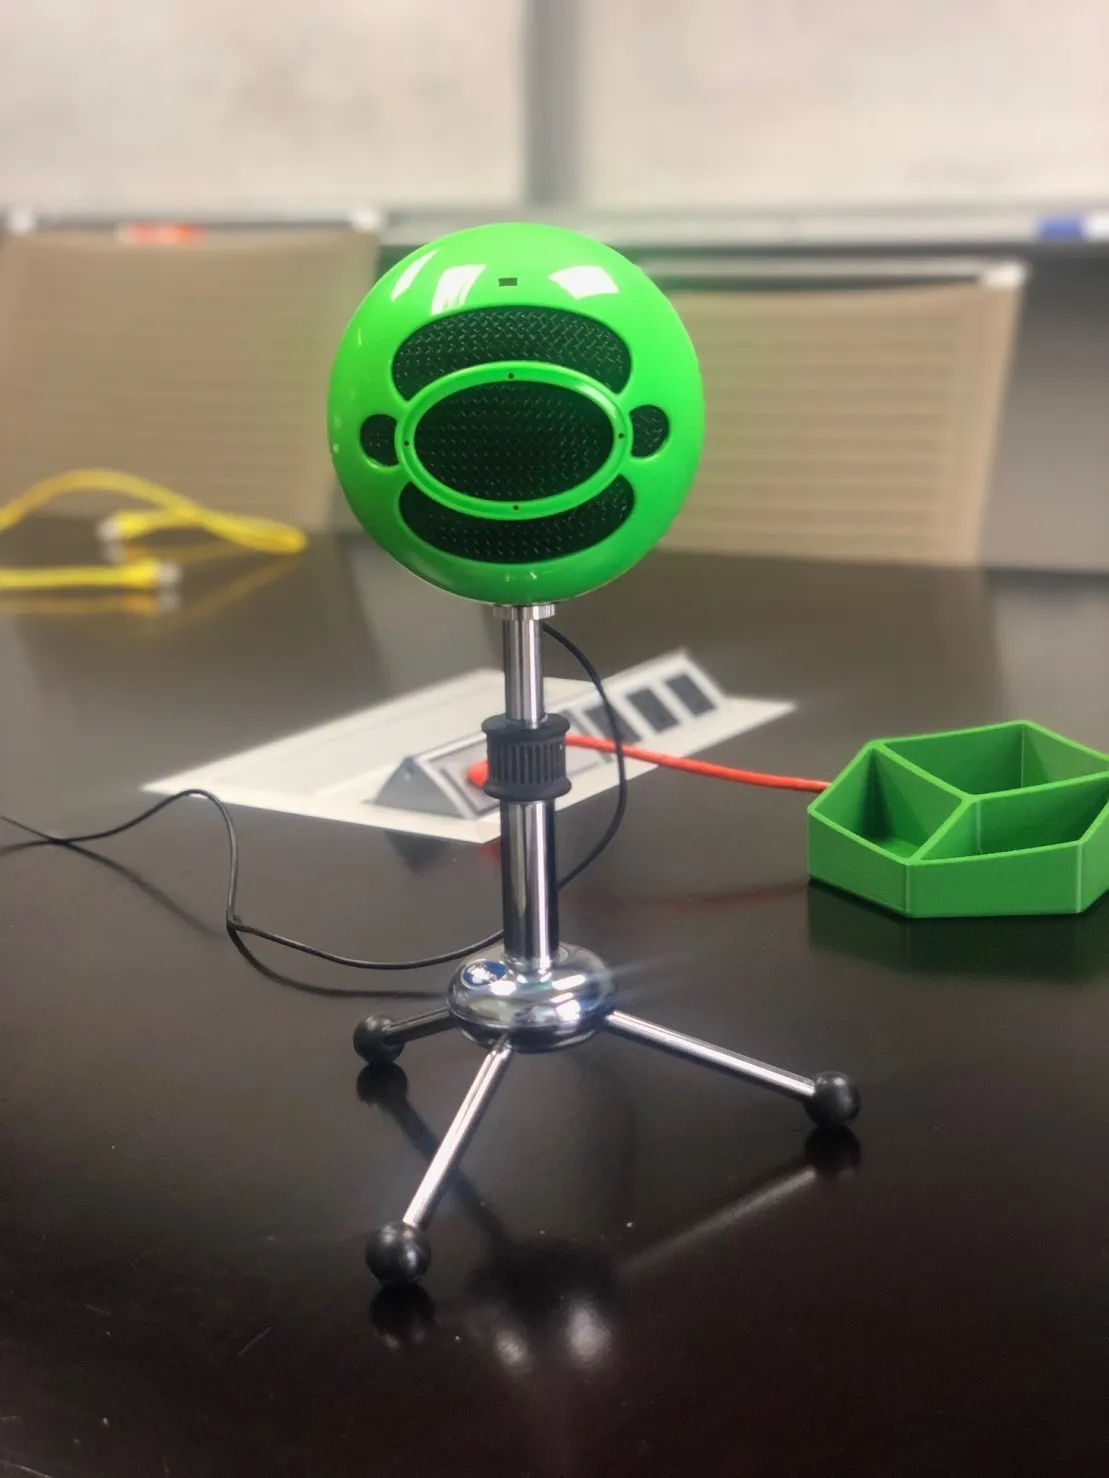
After much use, the Blue Microphone that we use to create all of our wonderful video content was in disrepair. The threaded collar used to hold the microphone at a particular height suffered a catastrophic failure. This connection works as a compression fitting with an inserted sleeve. While this type of fitting is very robust and commonly used for applications that require a solid connection, the material of the original collar failed to withstand the stresses.
Related Article: Feasibility of Threaded Holes for Rapid Prototyping
In the image below, you can see how the loads caused by clamping the sleeve caused the model to crack and fail. There were a couple of areas for improvement on this part that could have prevented this failure: Increasing the wall thickness and the use a stronger material.
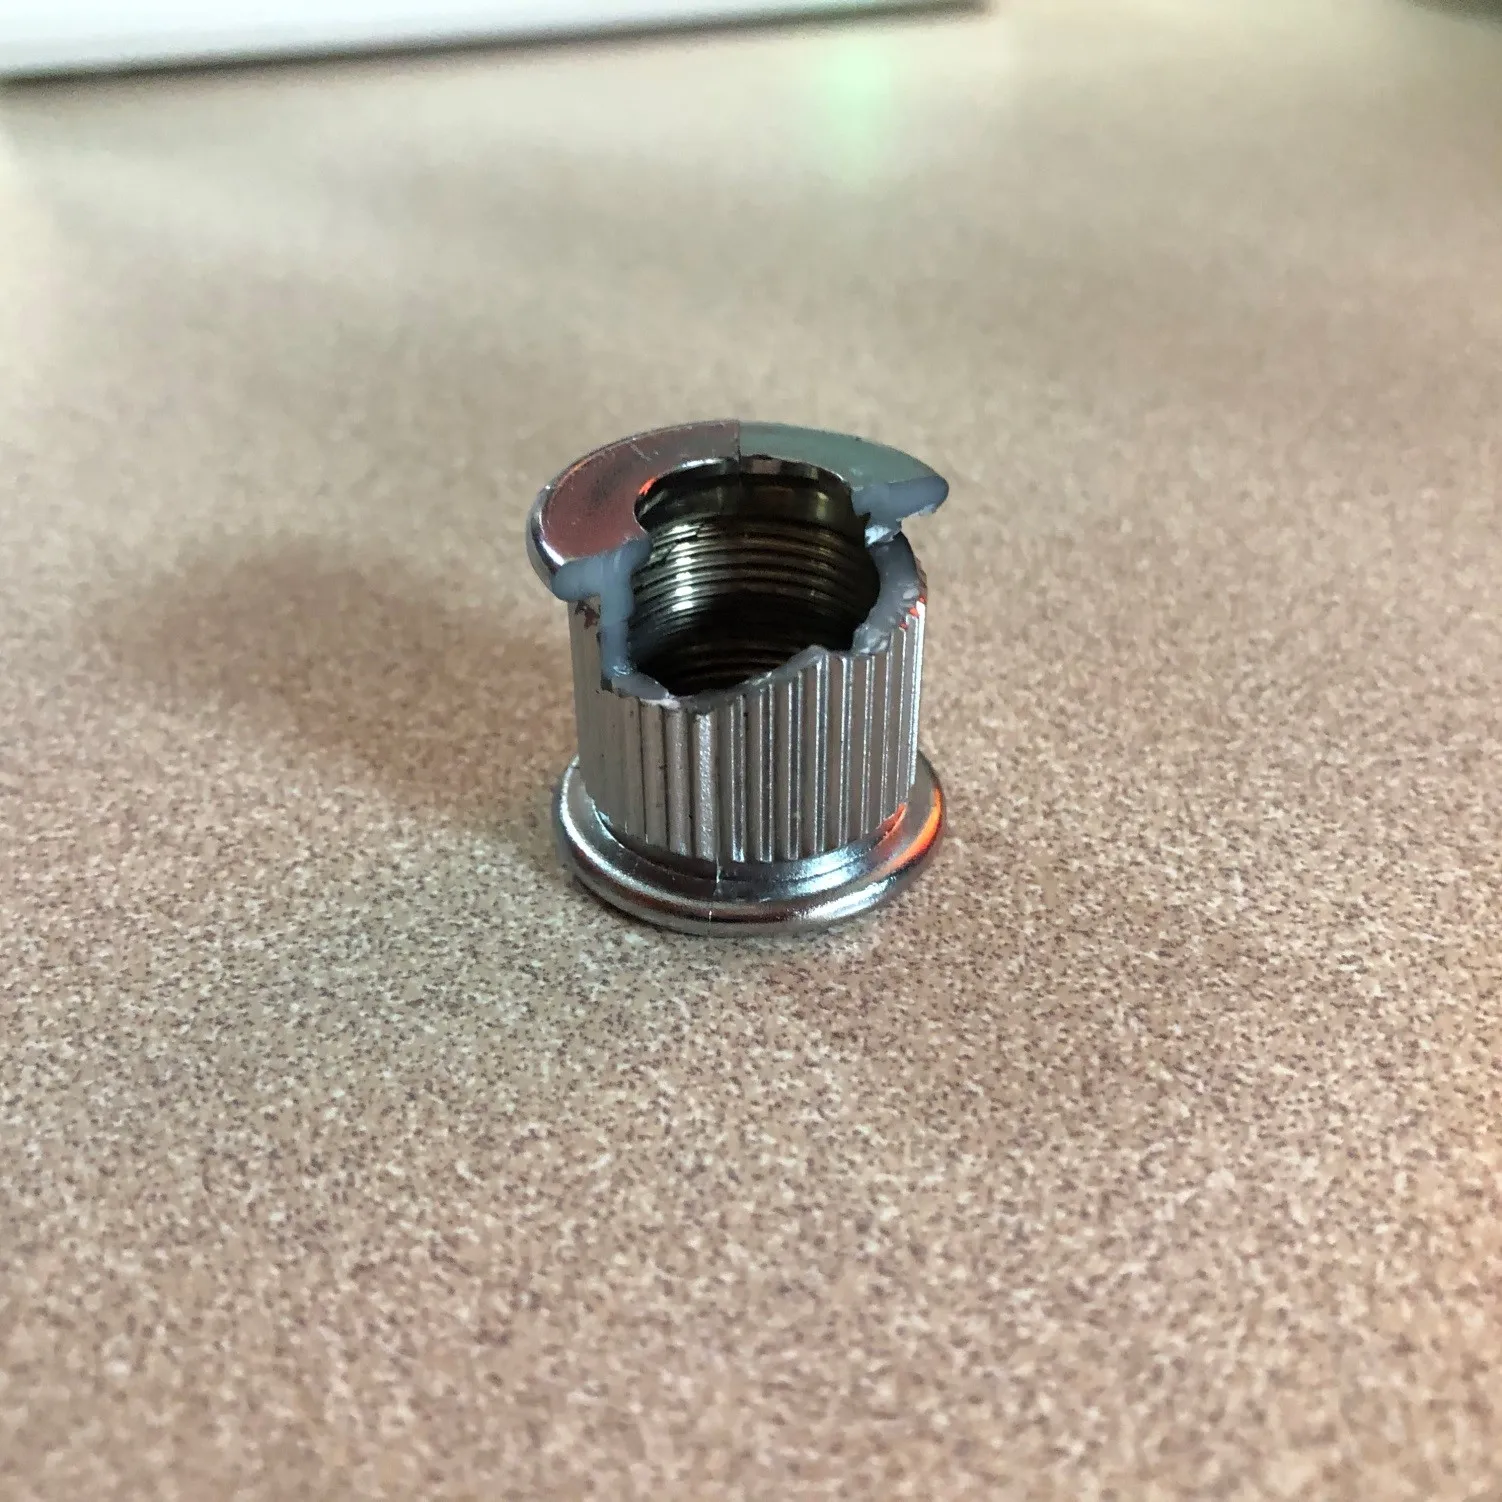
We could accomplish both of these by creating a robust model design with SOLIDWORKS, and a high-performance Stratasys 3D printer.
Visualize the Creation
Before I start modeling in SOLIDWORKS, I like to visualize how I would create the part…which features would I create first, then second, and so on. This will always save you time in the end.
Once the sizes, such as diameter and length, were determined, the main feature of this part is the very fine thread they used for this component. I figured I would use the SOLIDWORKS Thread feature, which allows designers to quickly create threads without hassle.
I called Blue Microphones to find out which thread was used for this particular model, fearing the worst. After speaking with their tech support, it turns out that this is a very common thread that is widely used in the audio/video industry… 5/8-27.
This is still a somewhat uncommon thread profile and it is not included in the default profiles provided by SOLIDWORKS. That is no challenge though, we can easily add it to the existing ‘Inch Tap’ thread library feature part which contains all of the existing thread profiles.
Related Article: To Thread or Not to Thread? Hyperthreading and SOLIDWORKS Performance
Thread Profiles
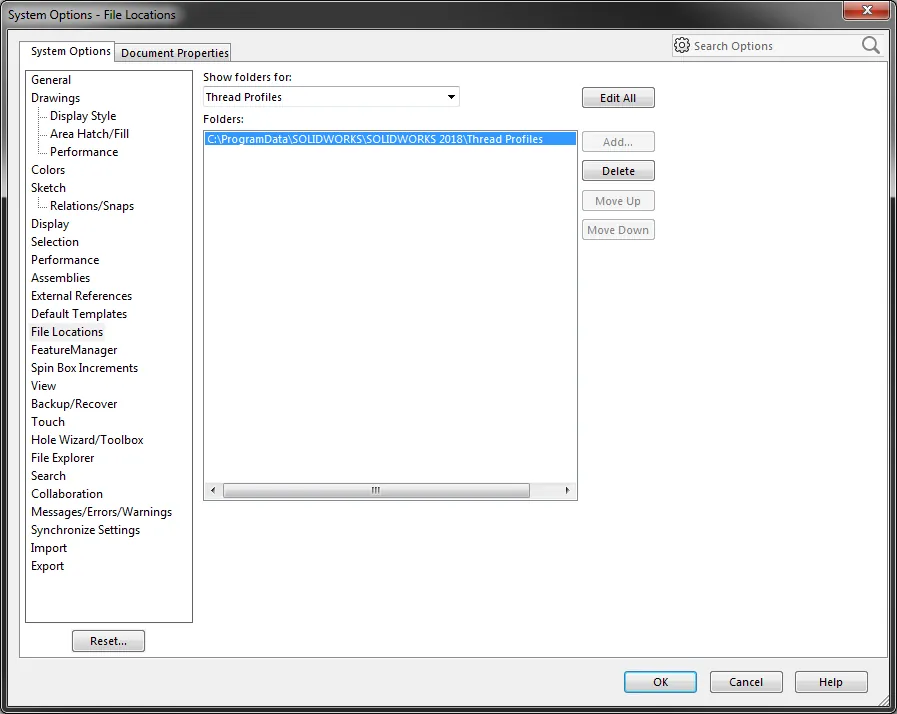
To add this profile, we need to first locate the location of the thread profiles. In System Options (Tools -> Options), click on ‘File Locations’, then use the drop-down menu to choose ‘Thread Profiles’. Next, navigate to this folder in Windows File Explorer or through the SOLIDWORKS file open dialogue box and open the correct thread type… in this case, the ‘Inch Tap.SLDLFP’ file.
Here is the information for the 5/8-27 thread needed for the thread profile in SOLIDWORKS:
Pitch: 0.0370”
Profile Angle: 60deg
Profile Height: 0.0231”
Profile Land (Root Flat): 0.0060”
After opening this ‘Inch Tap.SLDLFP’ file in SOLIDWORKS, I added a new configuration by copying the similar 0.6250-18 configuration. Next, I modified the dimensions to match the thread data above and saved the file with this new information.
Related Article: Missing Cosmetic Threads and How to Fix Them in SOLIDWORKS
Thread Feature
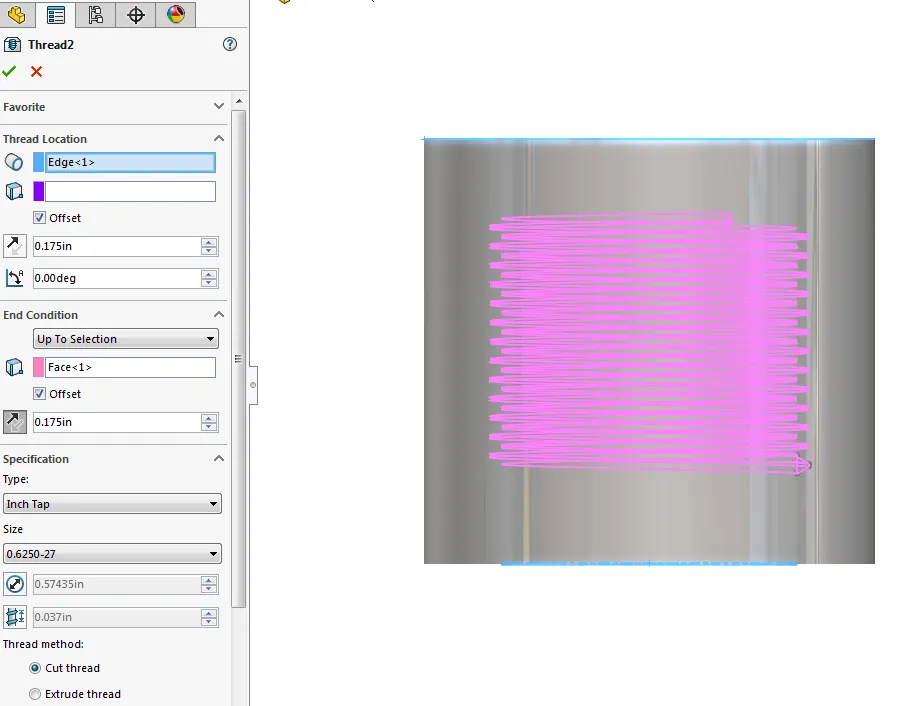
Before you create the threads in SOLIDWORKS, you need an existing hole. I created a hole with the same diameter as the tap drill size for this thread (also the minor diameter of the thread), approximately 0.574”. Using the thread feature in SOLIDWORKS (Insert -> Features -> Thread), my new configuration shows up in the size drop-down menu for the Inch Tap thread type. I specified the start edge, start offset, and end offset from the bottom face. Be sure that you are using the correct thread method, Cut or Extrude.
![]() Related Video: How to Use Thread Feature - Part 1
Related Video: How to Use Thread Feature - Part 1
Thread Design & 3D Printing
Here is the cross-section of the completed model showing the details of the thread and geometry and the increased wall thicknesses to prevent the same failure from occurring again. Similar knurling was also added to the outside to aid threading and unthreading.
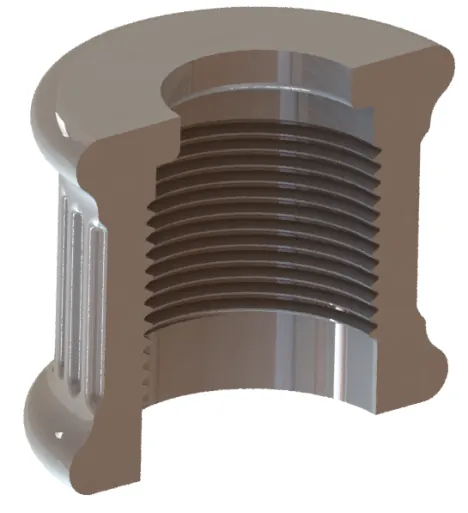
The last step was to print the model and test it out! We chose one of our Stratasys PolyJet 3D printers to produce the best threads. The print only took about 45 minutes, about the same time needed to accurately recreate the part geometry in SOLIDWORKS. We did not doubt that by using the thread feature the part would work just as intended… now we can get back to making more awesome video content using this great microphone!
More Design & 3D Printing Hacks
3D Printed Redesign of Corvette C4 Gas Pedal Mount
3D Printed Trim Panel for Custom Shifters

About Benjamin Modic
Ben was raised in Metro Detroit and went to school for Mechanical Engineering Technology at Ferris State University. He started using SOLIDWORKS in 2010 while in school after joining the Formula SAE program. After graduation, he spent time working as an engineer in the automotive, sporting goods, and furniture industries in Michigan. Ben moved to Utah to join the GoEngineer team in 2015 and has since focused on leading simulation support for our customers.
Get our wide array of technical resources delivered right to your inbox.
Unsubscribe at any time.