Re-Aligning Textures in SOLIDWORKS Composer
Here’s the dilemma: you are ready to apply a texture to your SOLIDWORKS Composer actor, so you click the activate checkbox. However, the alignment of the texture is not what you desired, so you unclick it, re-align, then try to re-add, but to no avail.
Not to worry, there is a simple solution!
If you are already in this situation and just want to know the solution, skip to ‘The Workshop’ section.
To learn what a texture in SOLIDWORKS Composer is and how to apply it, continue reading.
How Textures Work In SOLIDWORKS Composer
A texture in SOLIDWORKS Composer is a 2D graphic file ( Bitmap, Jpeg, Targa, and Rgb) that can be applied to an actor. The texture will wrap around the whole actor.

However, in some cases, you may want to apply the texture to a specific region on the actor, like a logo, as we will do in this example. To do this, I first created a primitive and apply the texture to that new primitive actor.
To enable the texture for an actor, select the actor and check the option to Show the Texture.
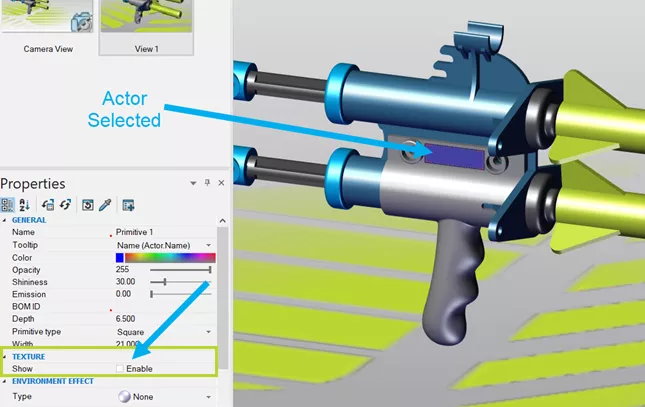
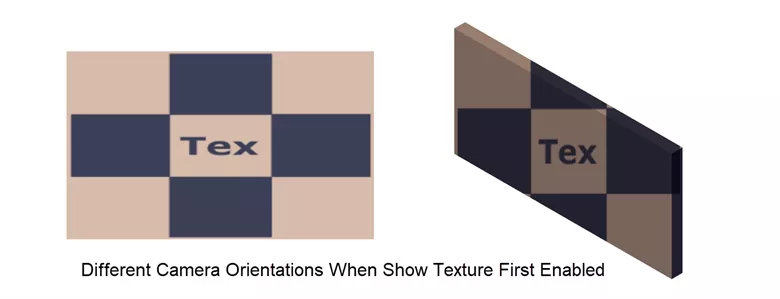
However, before you do this, you should align the camera in the orientation you want the texture to come in. This camera orientation will determine the initial orientation of the texture when it is enabled. (if you don’t, more on that later, which was the reason for this tutorial).
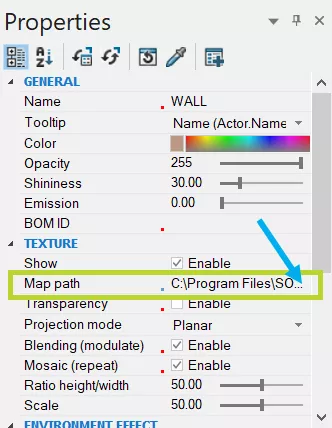
Once texture is enabled a default texture is applied. To change the default texture, simply click on the three little dots on the Map path property and choose the desired texture.
The Options
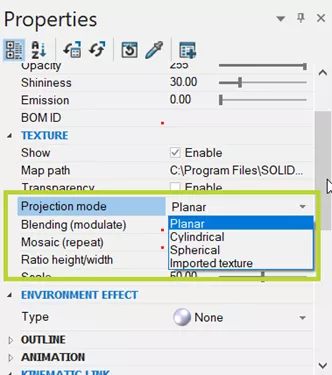
Once the texture is enabled and a specific texture is chosen, there are several options you can change to affect the texture (these can be changed with the default texture still applied as well). Projection Mode affects how the texture image is projected onto the actor. The default Projection mode can be changed if needed.
The Blending option allows the texture color and transparency to mix with the actor the texture is applied to. When turning this option off, the actor (and scene lighting), will not affect the texture.
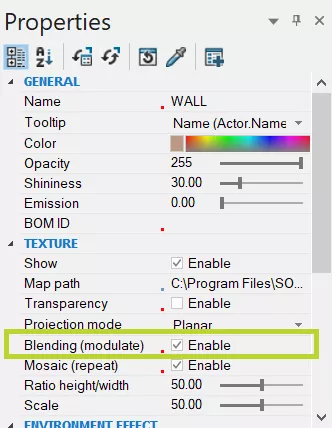


The last three options allow you to repeat (Mosaic(repeat)), stretch (Ratio height/width), and scale (Scale) the texture image.
Finally, you can apply transparency to the texture to make the actor behind it visible. This works best with Blending Off. With Blending On, the actor is blended with the texture, so it will also become transparent.
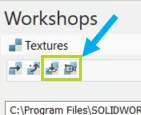
The Workshop
As mentioned above, the orientation of the texture when it is initially applied depends on the camera orientation at that time. It can be easily changed, however, through the Textures Workshop.
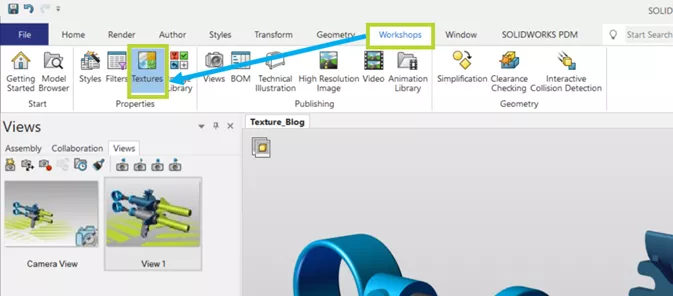
Two options in the Textures Workshop can help us achieve re-orienting a texture: Set Texture Projection Axis and Set Texture Project Camera.
Set Texture Projection Axis
Set Texture Projection Axis lets you align textures normal to a face. If you are aligning just one texture, and it is to a face on that actor, select the Set Texture Projection command, then click on that textured actor where you want to align.
If there are multiple actors you want to change at once, or to choose a face from another actor, select the actor(s) first (using CTRL, if multiple), before selecting the Set Texture Projection Axis command.
Set Texture Projection Camera
Set Texture Projection Camera lets you align textures normal to the current camera orientation. For this option, if aligning just one textured actor at a time, first align the camera as desired. Next, select Set Texture Projection Camera then choose the textured actor. Be sure to deactivate the command when done ( either deselect the command or press ESC).
To align multiple actors at once, select the textured actors, activate the command, then click anywhere on the model. Again, be sure to deactivate the command when done.
Conclusion
Re-aligning textures in SOLIDWORKS Composer is as easy as that. You just have to know where the commands are! If you have any other questions about SOLIDWORKS Composer, please check out our technical blog and YouTube channel or contact us directly.
Related Articles
Create Custom Views in SOLIDWORKS Composer
How to Link Navigation Views in SOLIDWORKS Composer
Mirror Parts with Symmetrize in SOLIDWORKS Composer
SOLIDWORKS Composer Remove Watermark Tutorial
![]()
About Ryan Field
Ryan Field is a Sr. Application Engineer at GoEngineer.
Get our wide array of technical resources delivered right to your inbox.
Unsubscribe at any time.