SOLIDWORKS Routing Electrical Route Through Clips
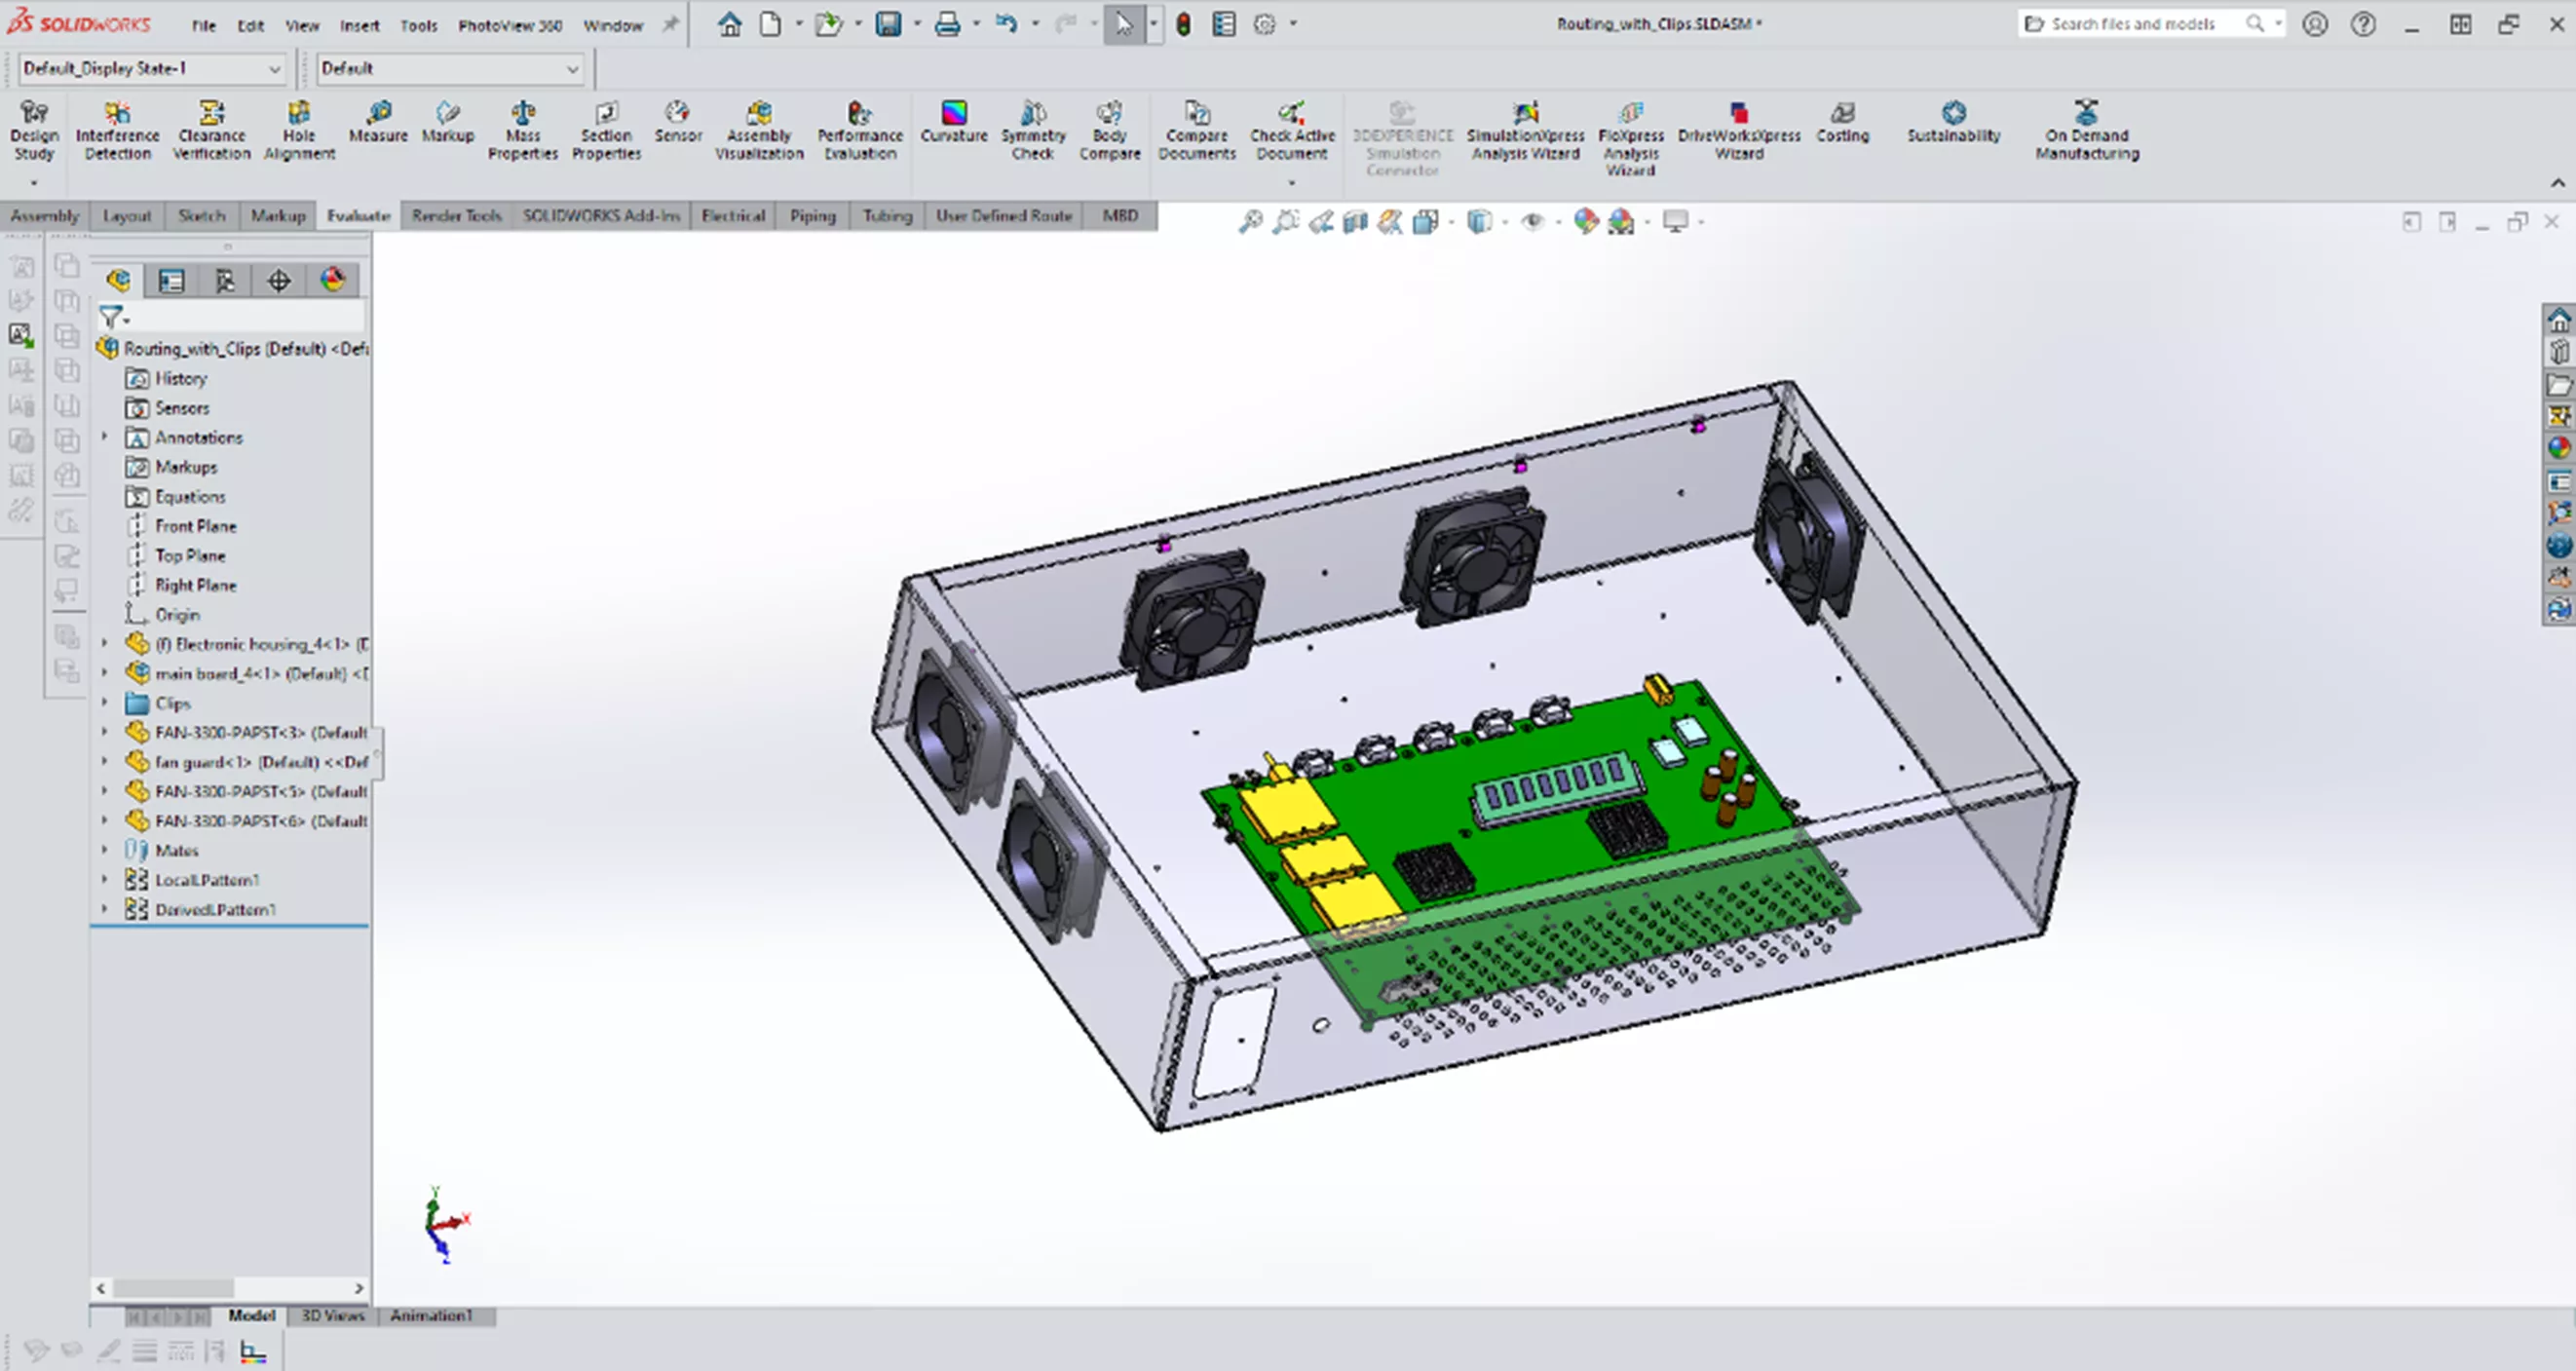
In this quick tip, we will explore a couple of approaches for creating a route through clips in SOLIDWORKS. Both methods discussed here accomplish the routing task but have differences worthy of discussion. We will briefly examine both methods, beginning with an assembly for an electronic enclosure.
(Note: Routing is a feature available in SOLIDWORKS Premium)
Routing Through Existing Clips
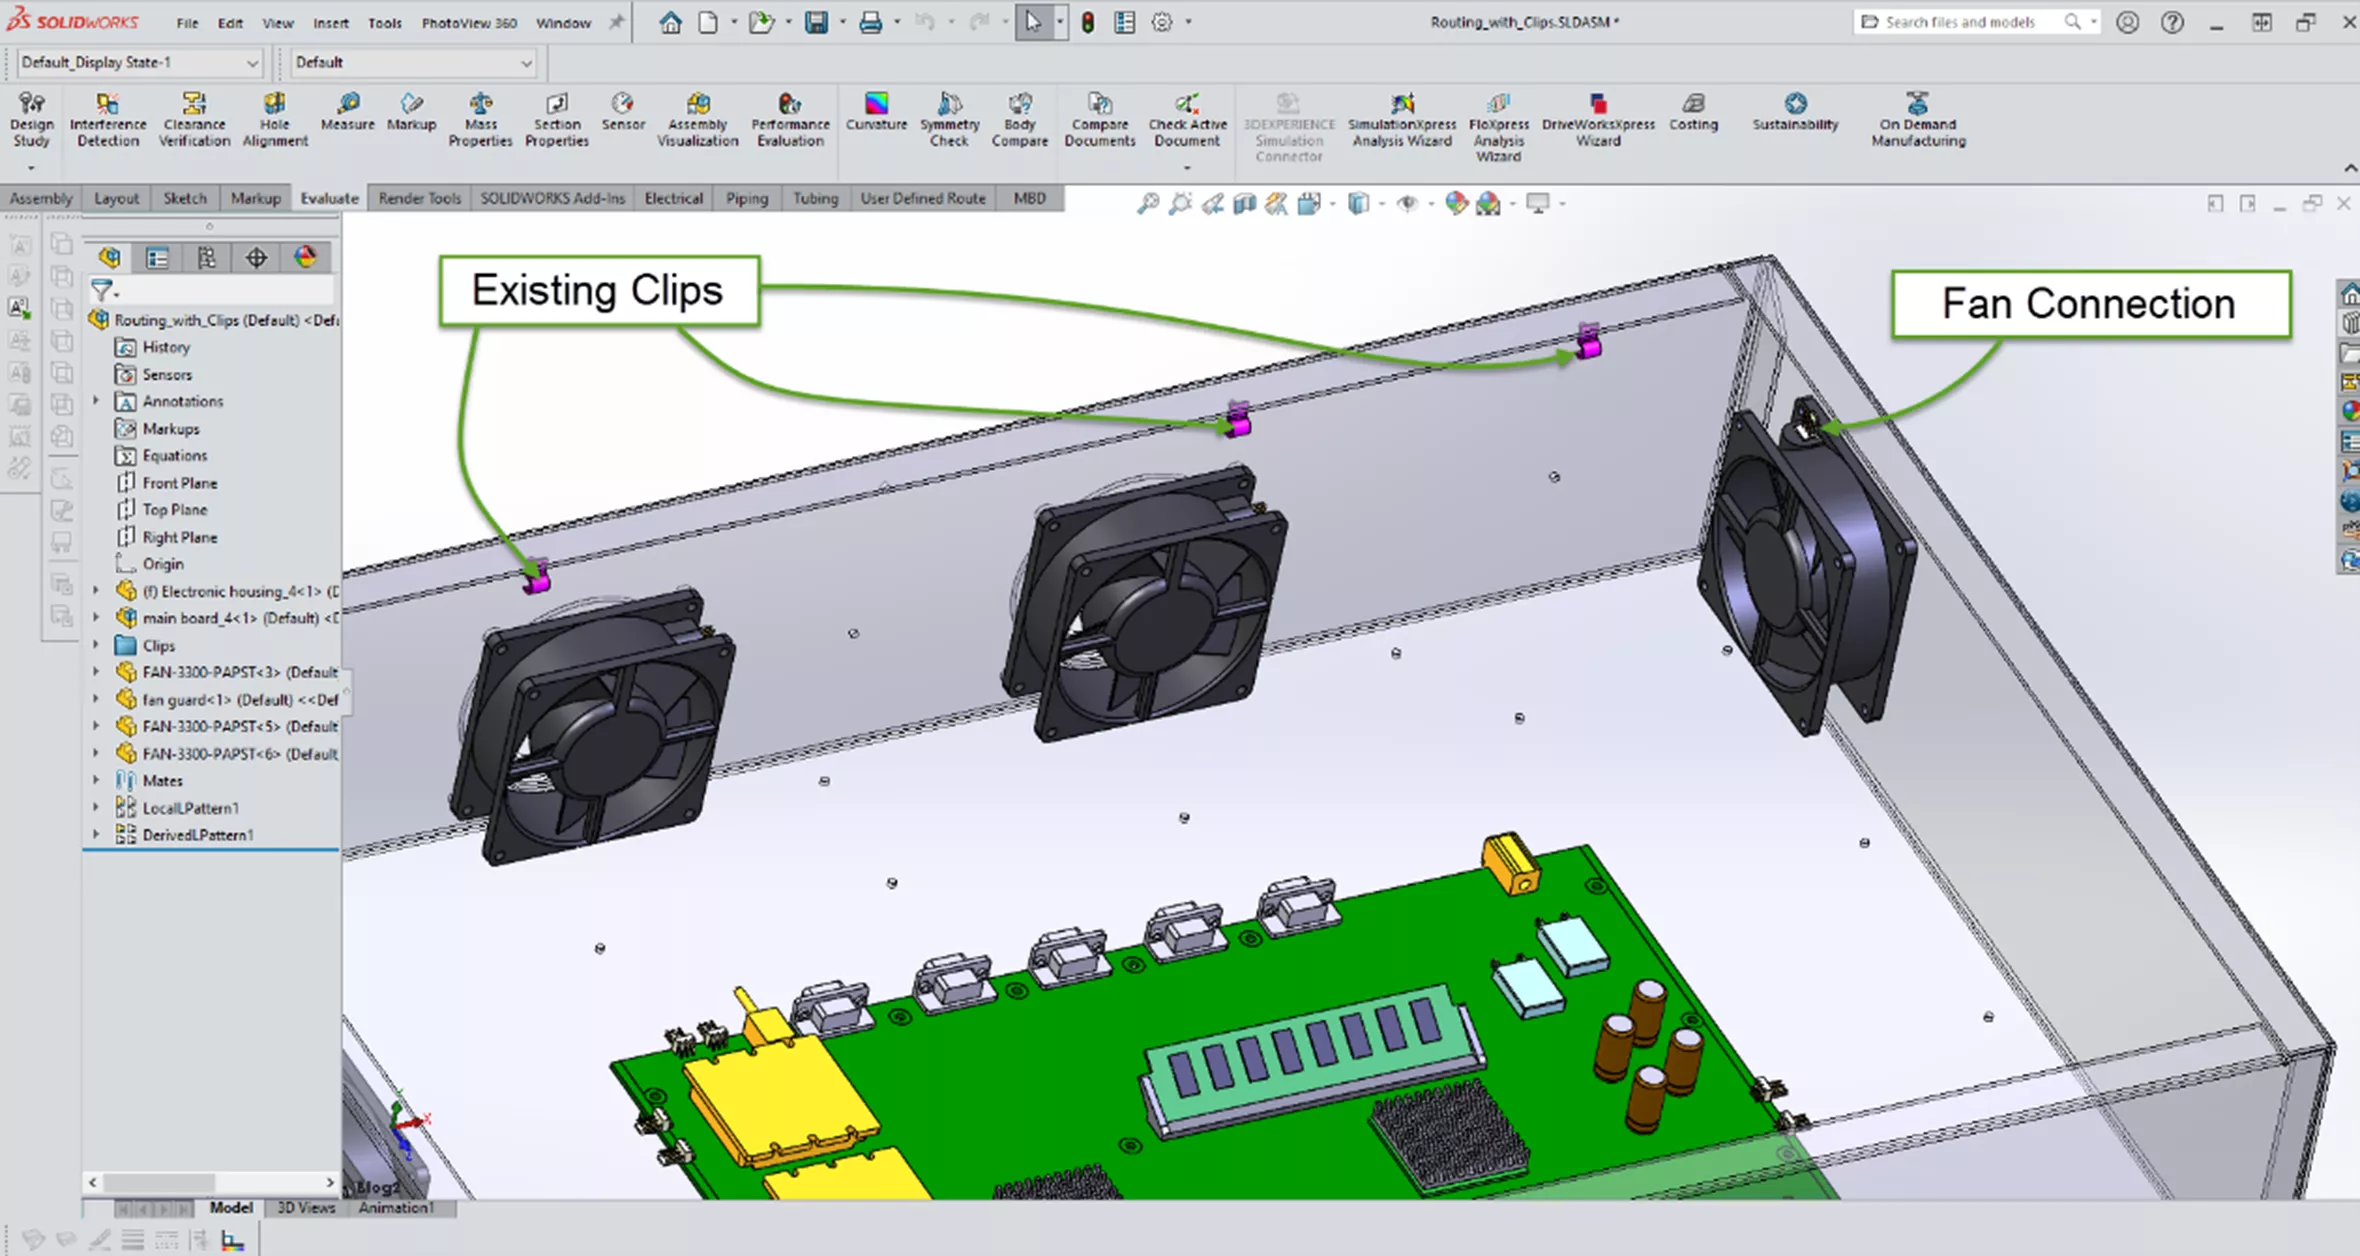
Where clips are already in the assembly, you can route through them during the route creation process. Here the existing clips are in magenta for better visibility.
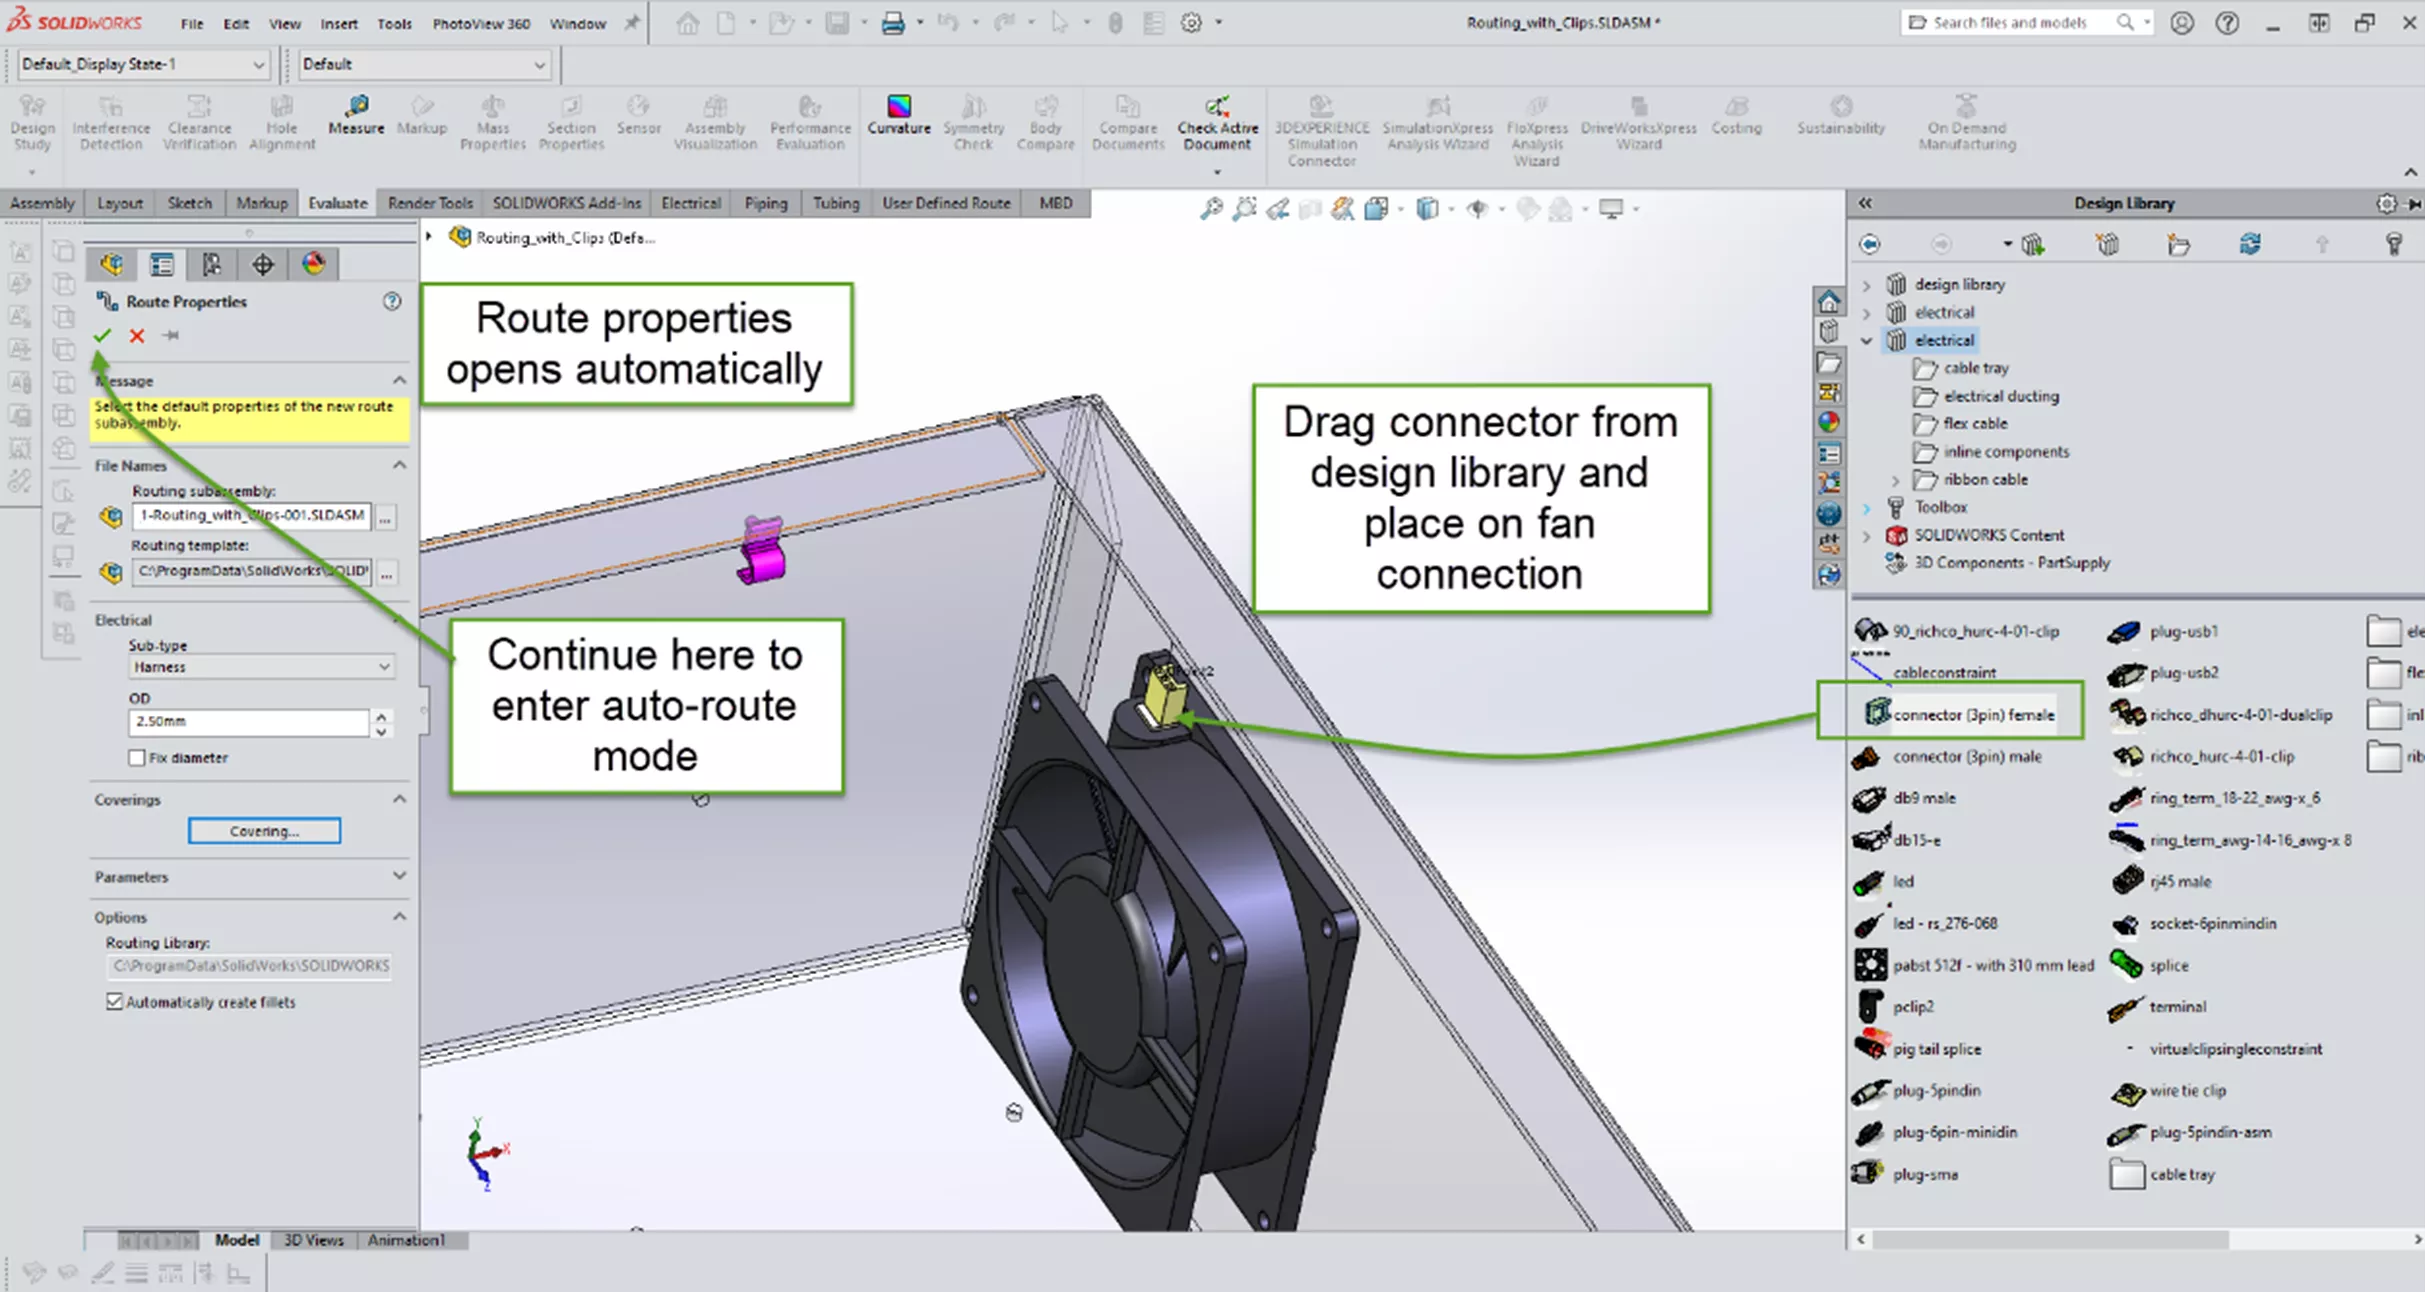
We will go from the fan connection through the existing clips and place another connector on the board to finish the route. From our initial assembly, we can start a route by performing a drag and drop from the Design Library. In this example, I will start with a 3-pin connector and add it to the fan on the right.
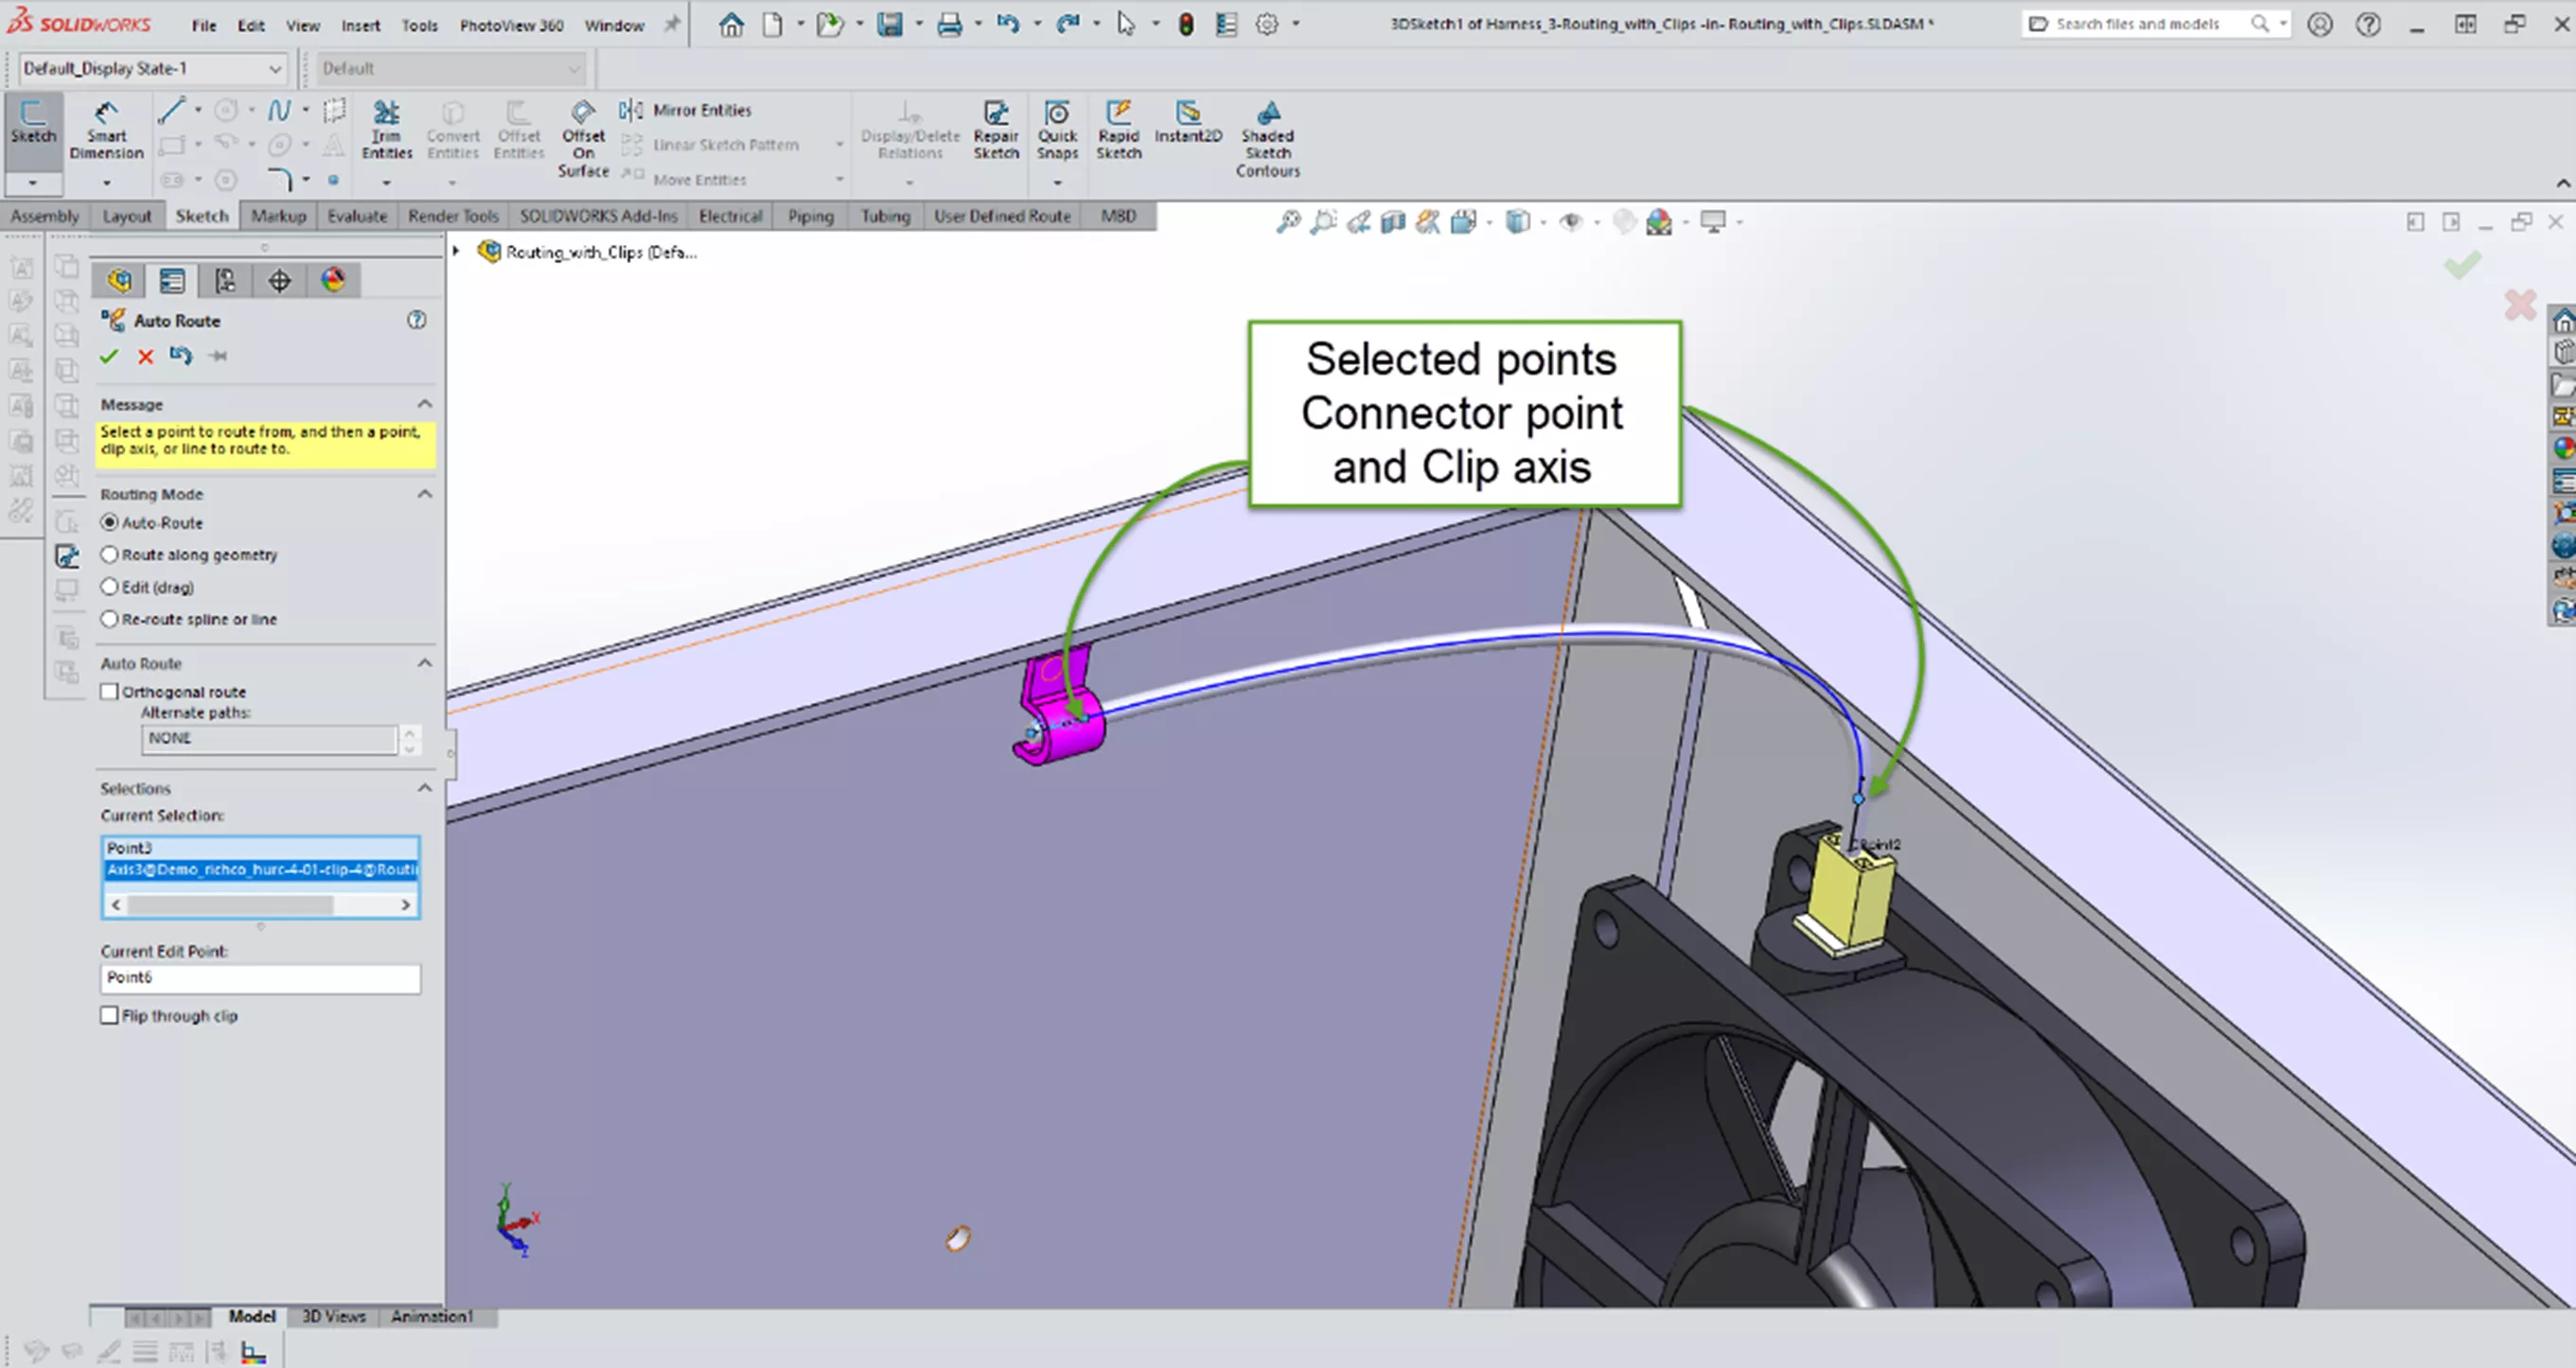
Using Auto Route, we can select the connector then the clip axis to begin the wire route.
Continuing to select the axes of the other clips the route continues.
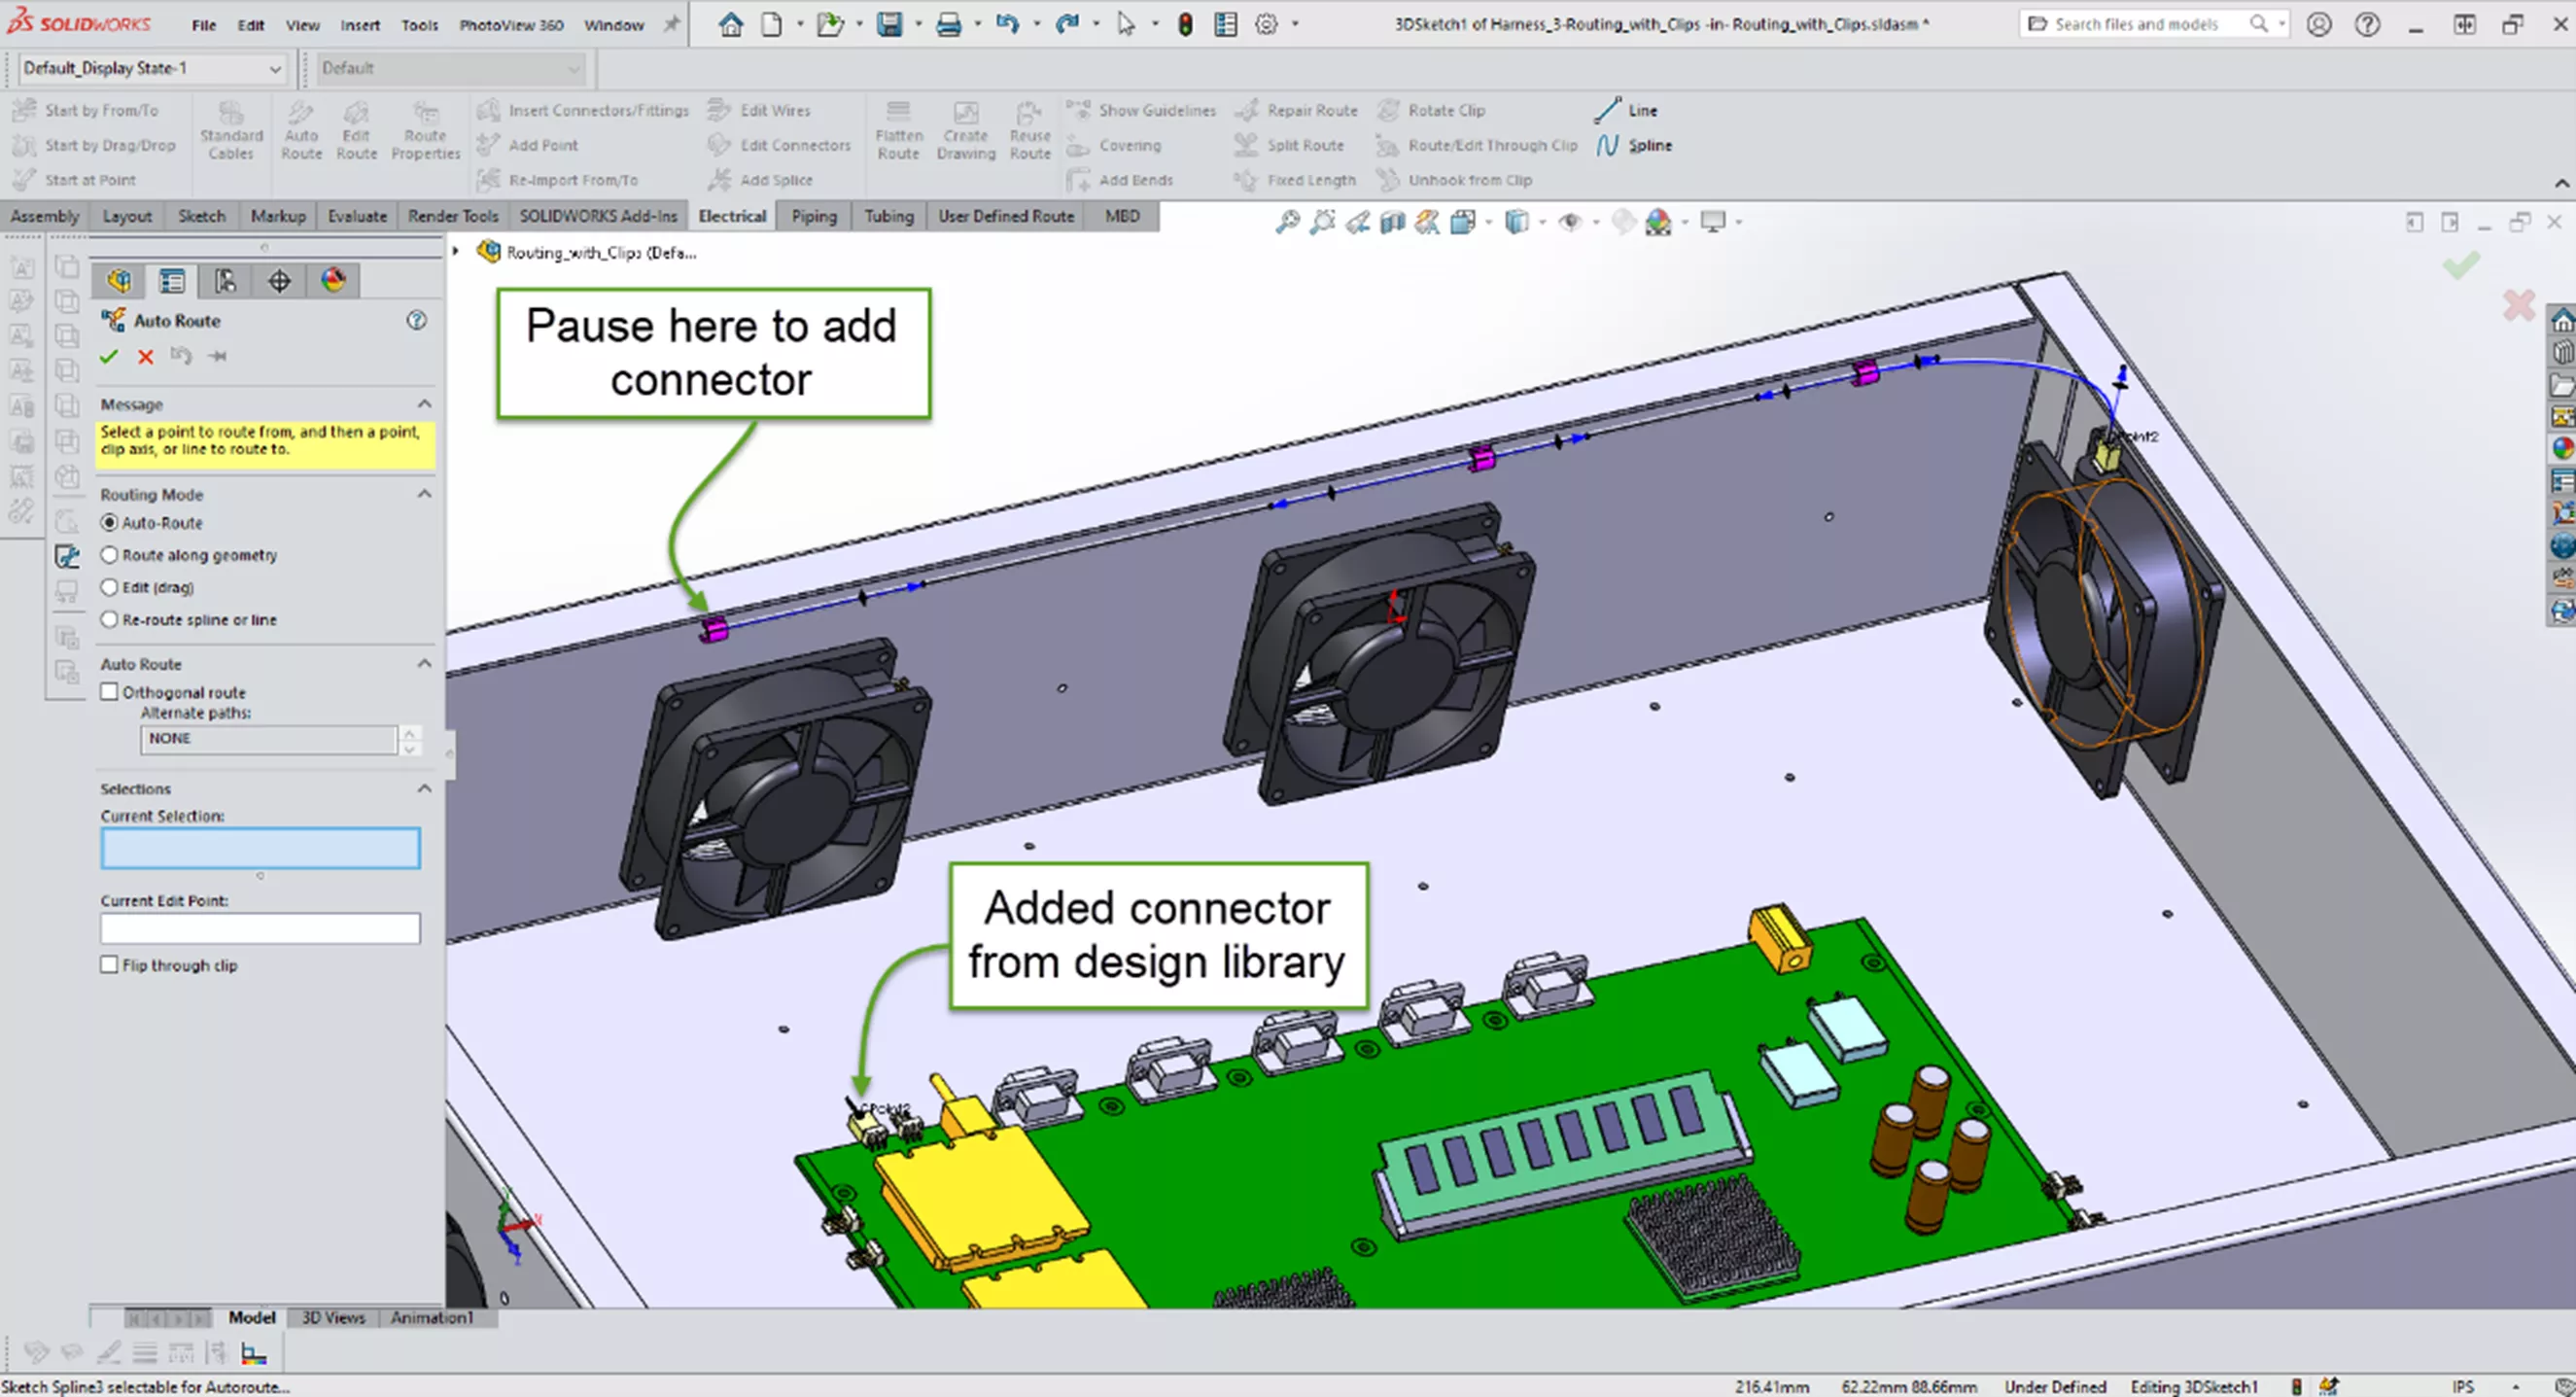
At this point I paused to add another 3-pin connector to the route.
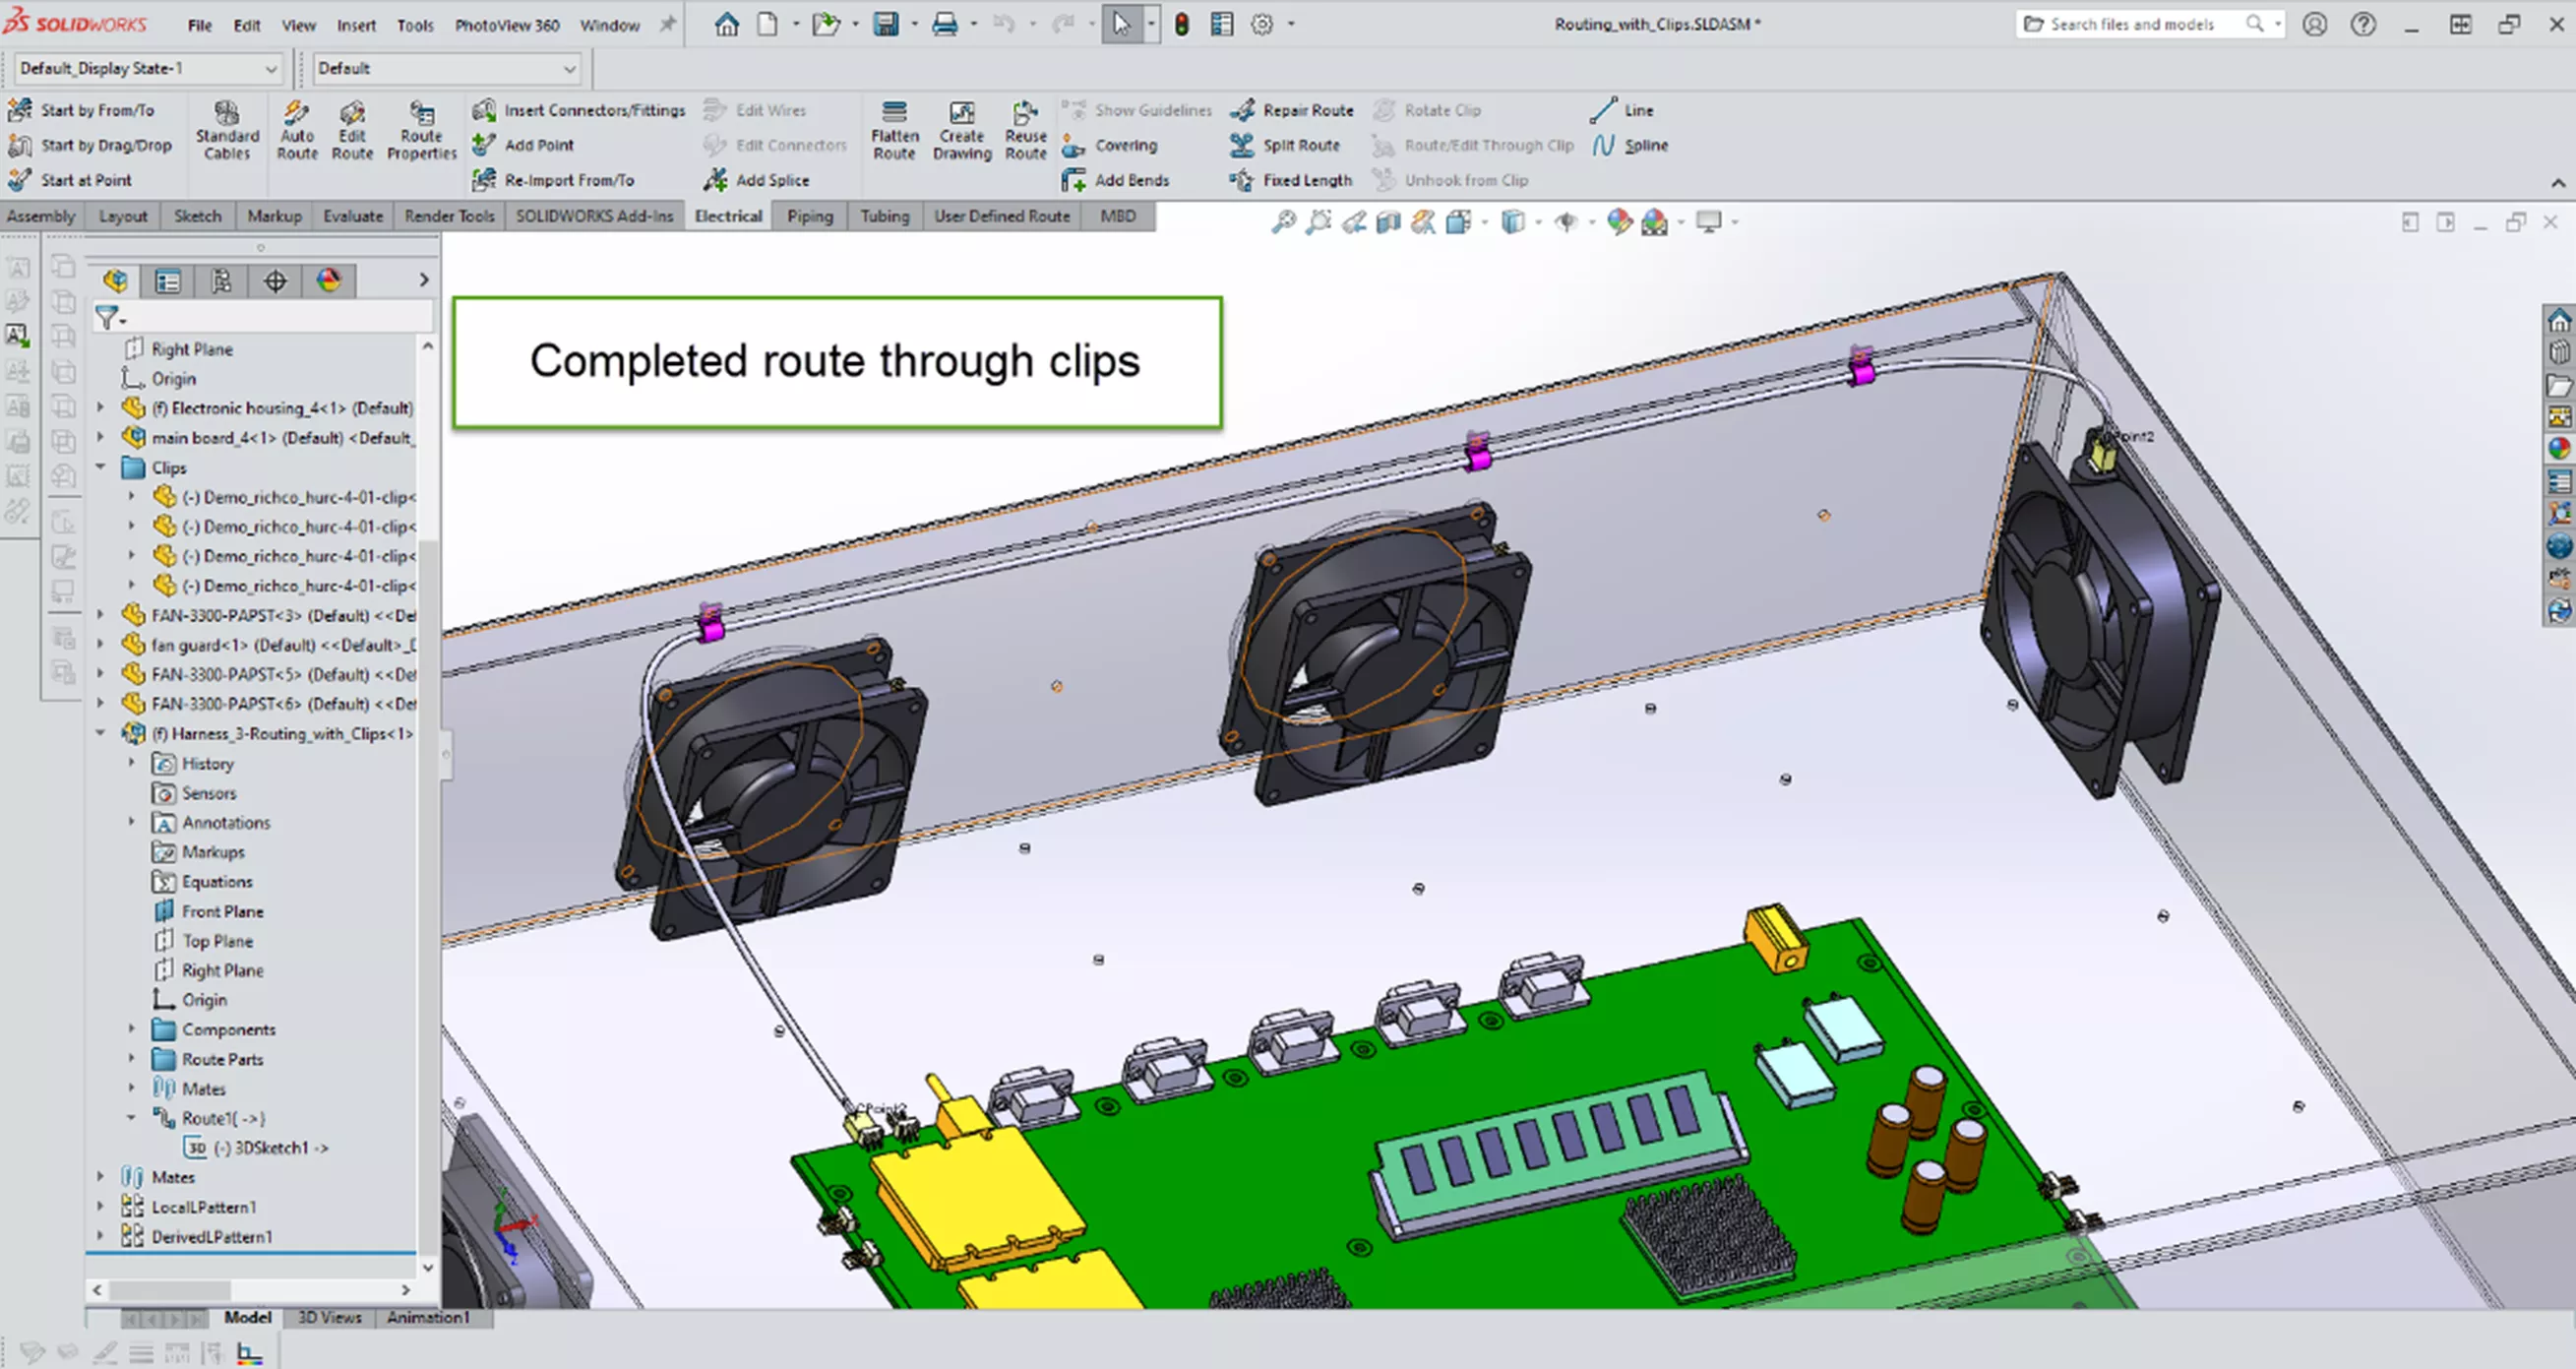
Selecting the endpoint of the existing route and the connection point of the 3-pin connector completes the route.
Routing Through Clips Added During the Route
Where route clips are not yet present, they can be inserted during route creation.
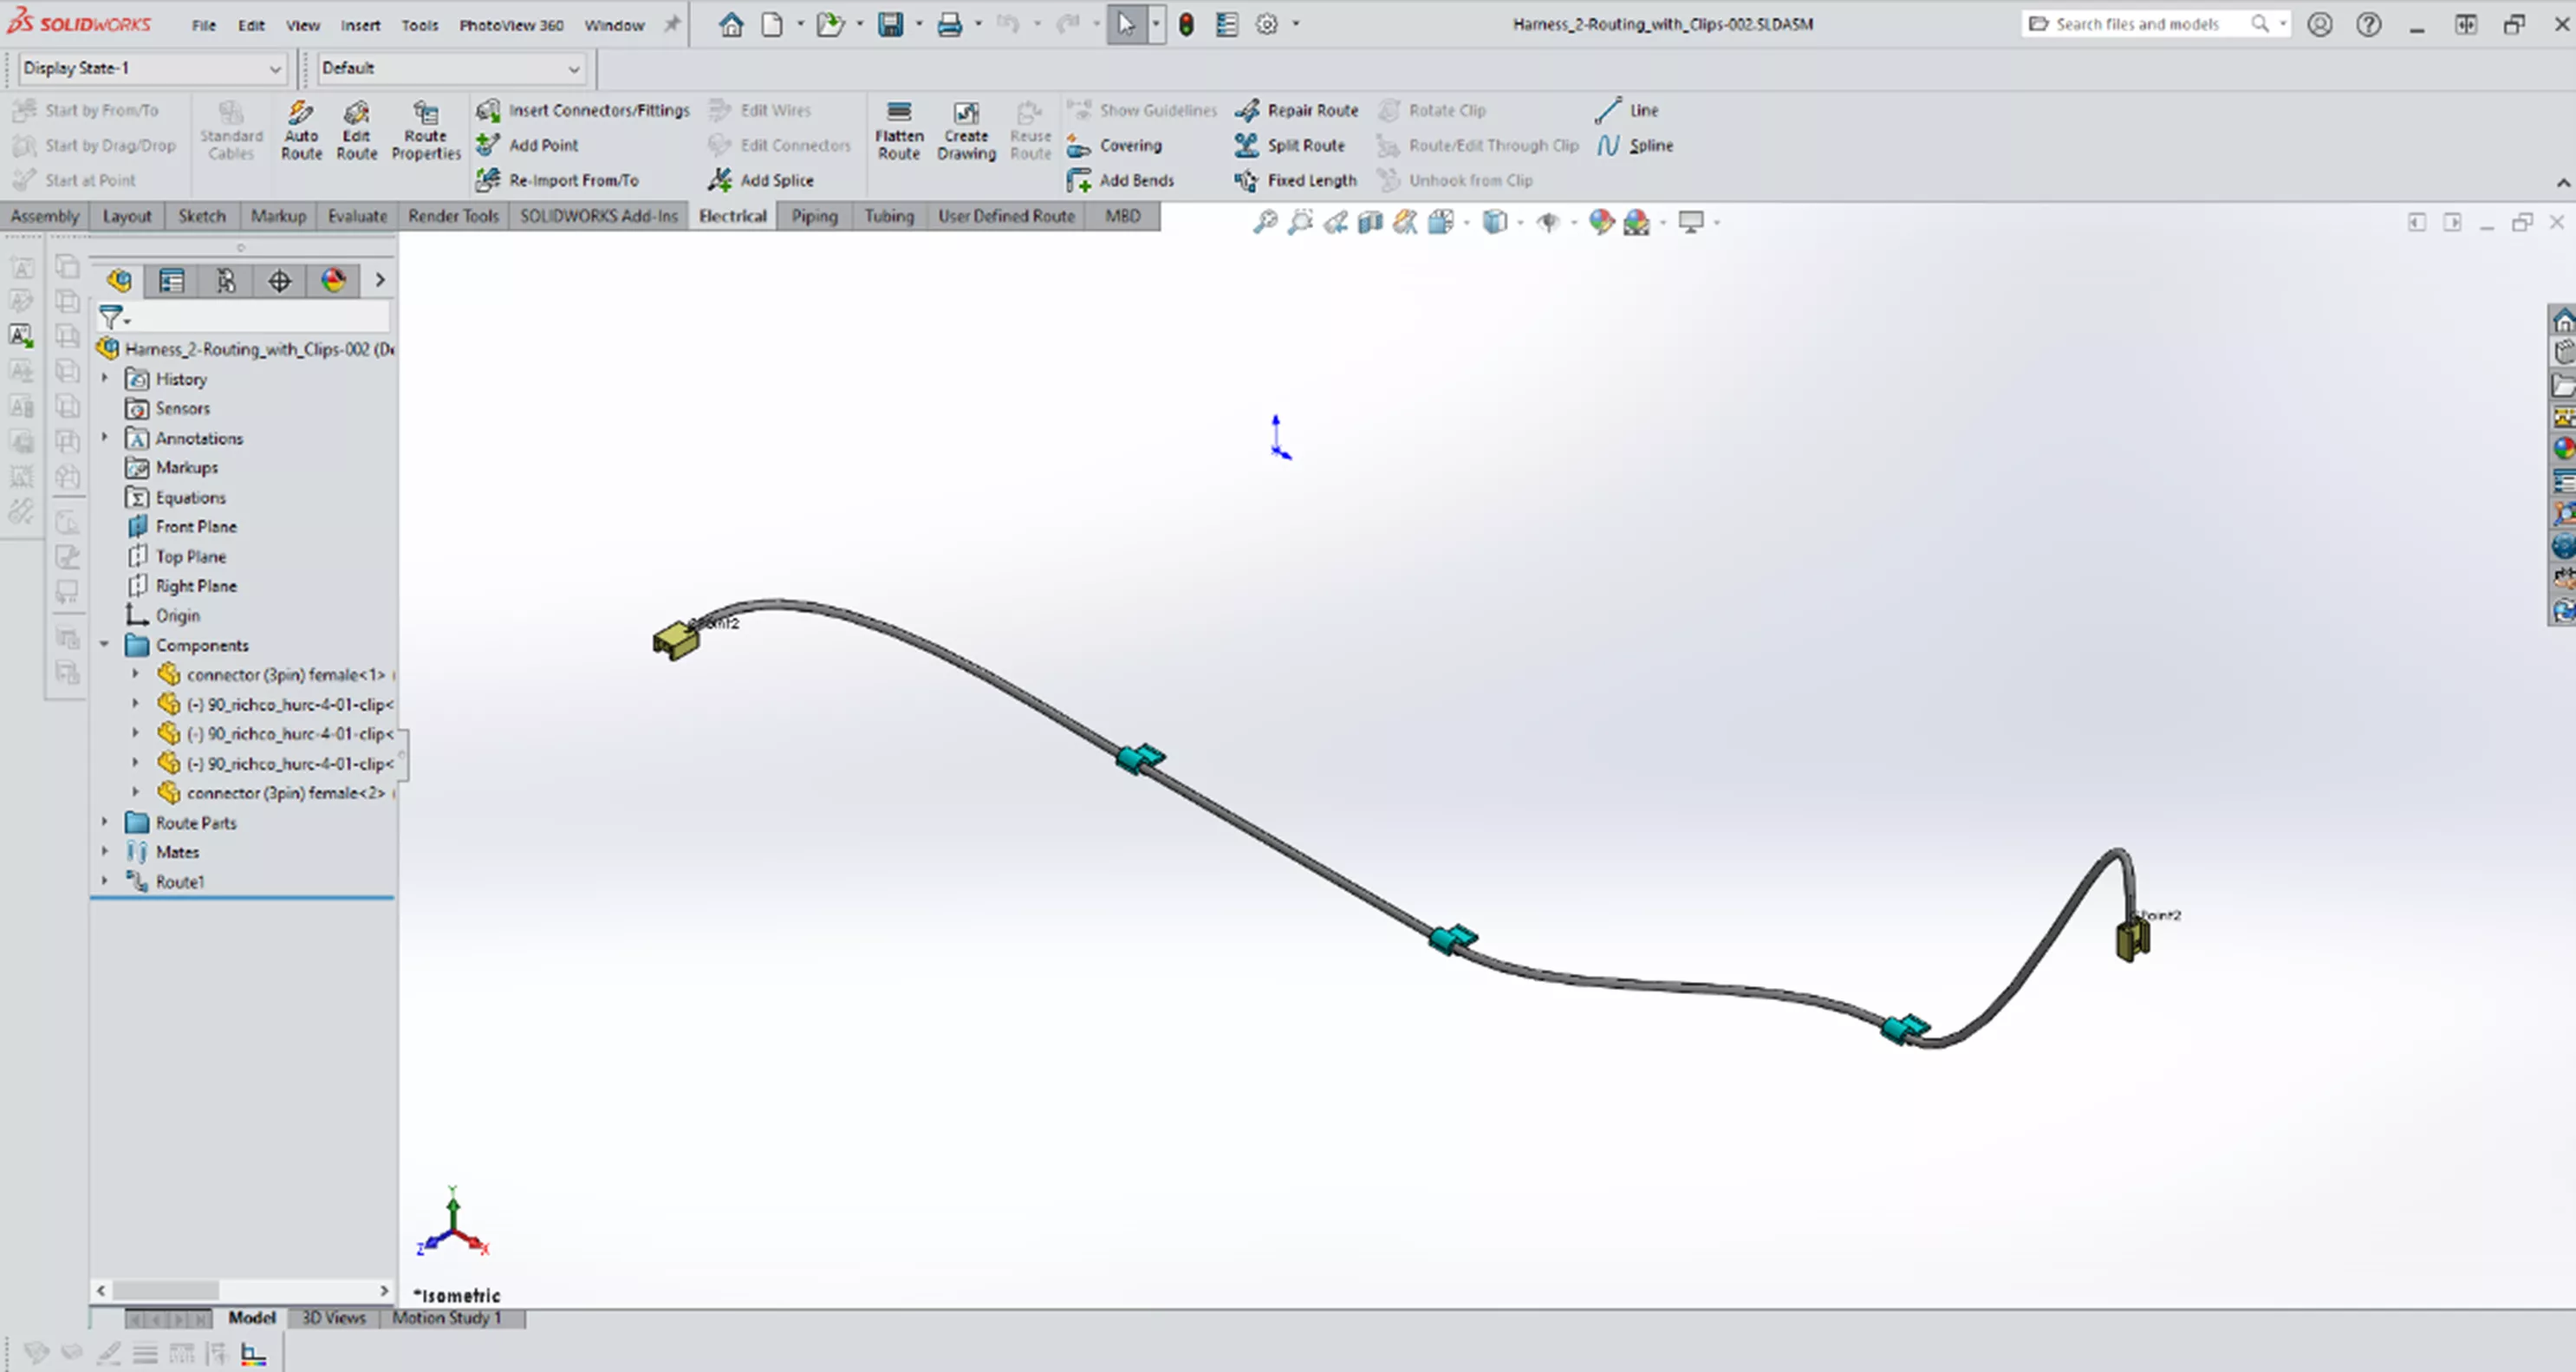
Here, I have added a 3-pin connector to start the route, then added clips on the floor of the case and another 3-pin connector on the board.

Completing the route sequence, we have our desired route.

What is the Difference?
When routing through existing clips, the clips are retained as a part of the top assembly.
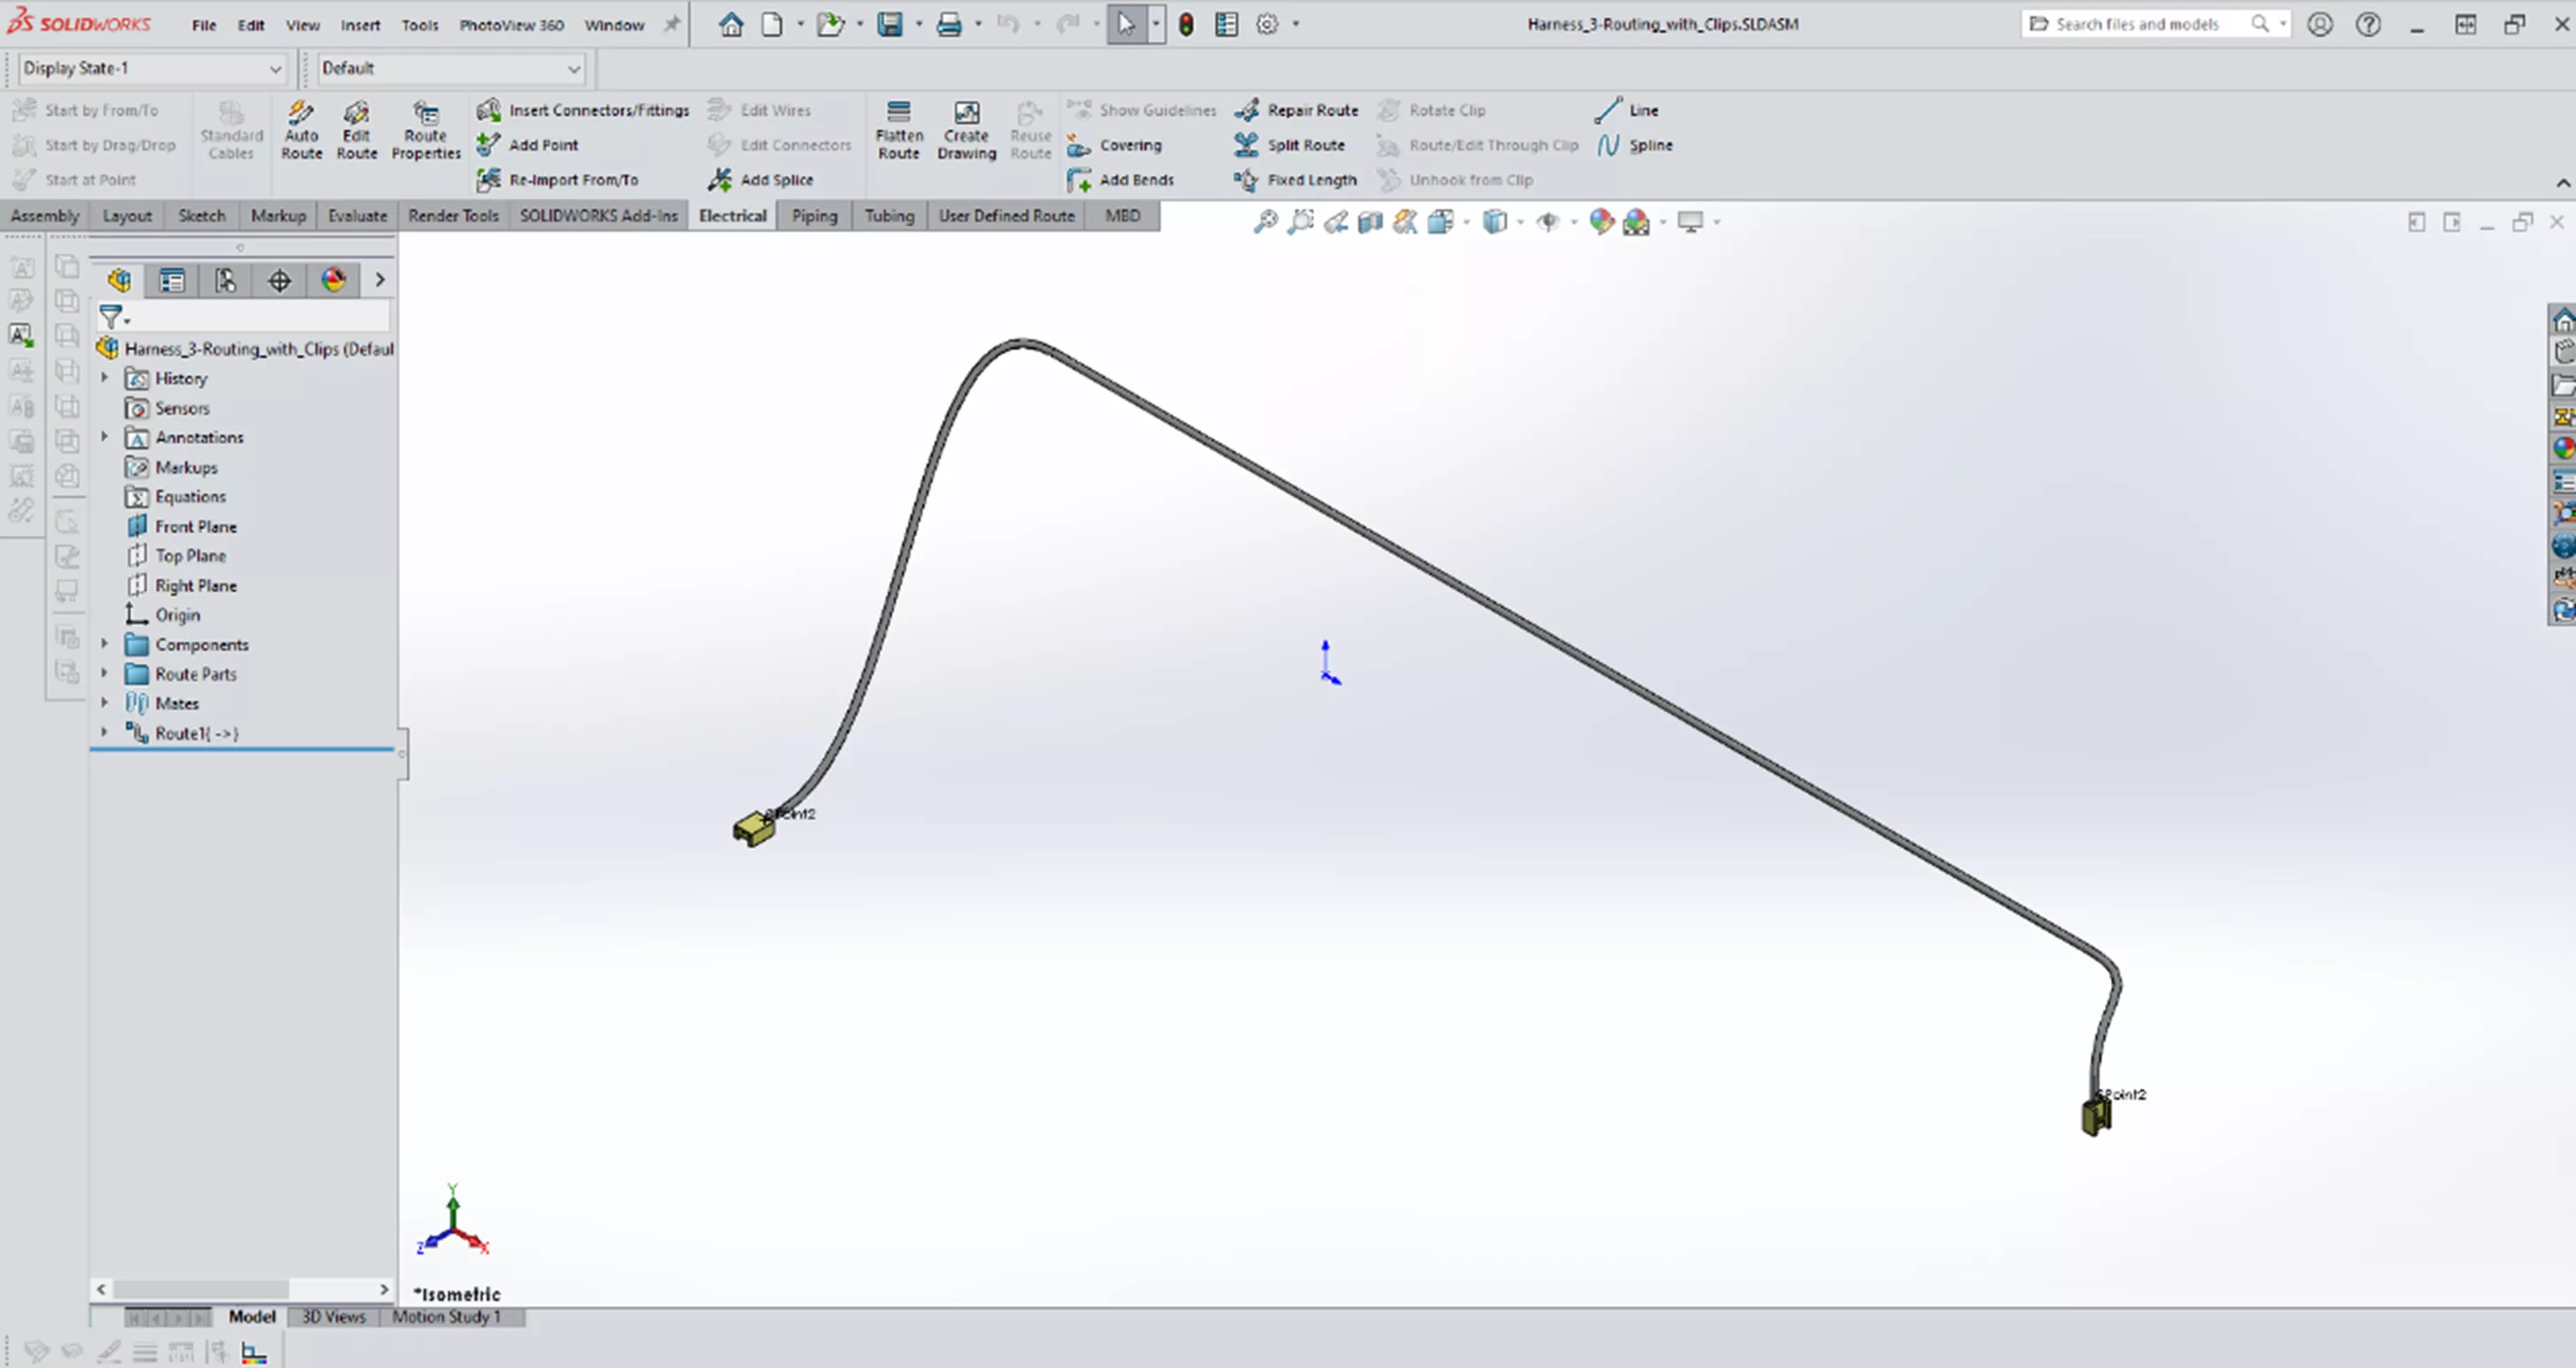
When adding clips during creation of the route, the clips are absorbed into the route subassembly.
While this may seem to be a subtle difference, the positioning of the components in the master assembly can be important to your SOLIDWORKS Routing-Electrical design.
Related Articles
SOLIDWORKS Routing 101: Pipe Design
Create Custom SOLIDWORKS Electrical Routing Component
Updating the SOLIDWORKS Routing Database
![]()
About Martin Adams
Martin Adams is a Senior Technical Support Engineer at GoEngineer supporting SOLIDWORKS CAD and SOLIDWORKS Electrical products. In addition to a CSWE certification, he has a Bachelor's degree in Industrial Engineering and an Electrical Associate's degree. Prior to joining GoEngineer in 2019, he worked for almost twenty years on prototype automotive instrumentation. He also served as an Electrician's Mate in the US Navy. His favorite activities are fishing and spending time around a campfire with friends.
Get our wide array of technical resources delivered right to your inbox.
Unsubscribe at any time.