SOLIDWORKS Sheet Metal Tab and Slot Tutorial
The release of SOLIDWORKS 2018 added a great sheet metal feature called Tab and Slot. Tabs and slots can be added to adjoining components to create an interlock between them. The feature can be added to a multibody part or an assembly. Using SOLIDWORKS Tab and Slot for sheet metal assemblies is a great way to avoid making fixtures that hold the parts together during fabrication.
- Suggested Article >> The History of SOLIDWORKS
Where is the Tab and Slot Feature Located?
Insert > Sheet Metal > Tab and Slot
Or
Sheet Metal Toolbar > Tab and Slot Icon ![]()
How To Use SOLIDWORKS Tab and Slot
In this example, we will use a multibody sheet metal part however, Tab and Slot can be added to any part, not just sheet metal.
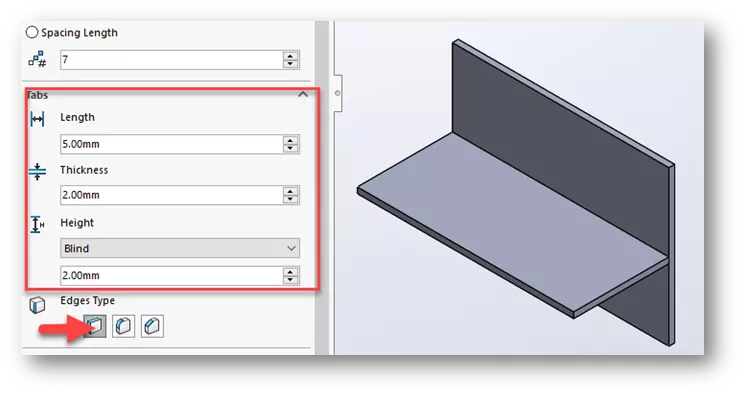
Click Tab and Slot on Sheet Metal Toolbar. We will first fill in the parameters for the size of the tabs.
Tab and Slot PropertyManager
Listed under the Tabs section are Length, Thickness, and Height which are set to 10mm, 5mm, and Blind Height to 5mm respectively.
For Edge Type, we will keep this at Sharp Corner, although there are also selections for Fillet and Chamfer edges.
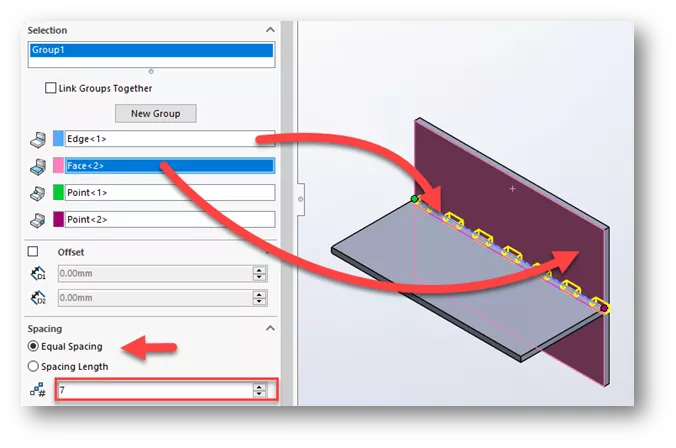
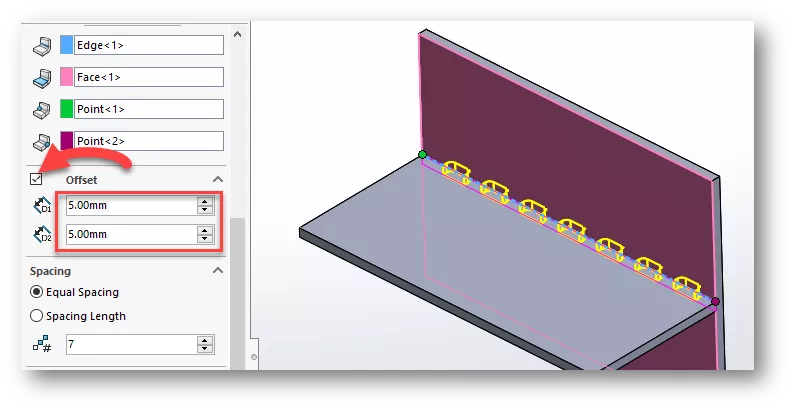
For Edge<1> selection, we will choose the edge where the two parts meet.
For Face<2> selection, we will choose the face for the component that will have the slots.
Preview shows automated Tab and Slot geometry.
For Spacing, we will choose Equal Spacing and set the number of instances to 7. Click OK.
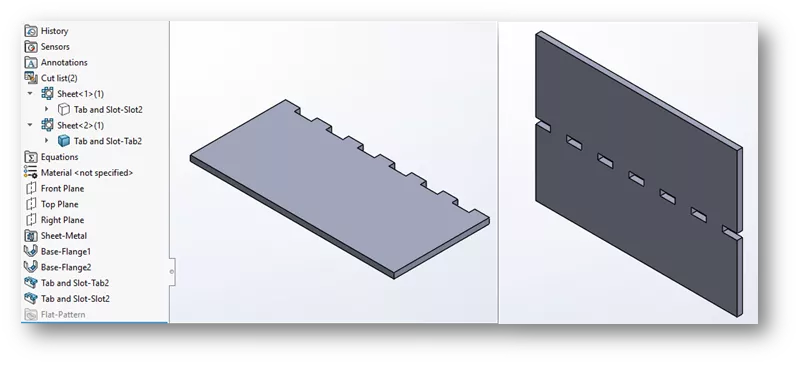
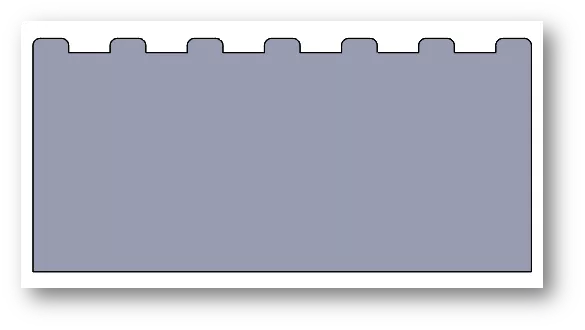
Two Tab and Slot features are created. Hiding each body individually reveals the tabs and slots.
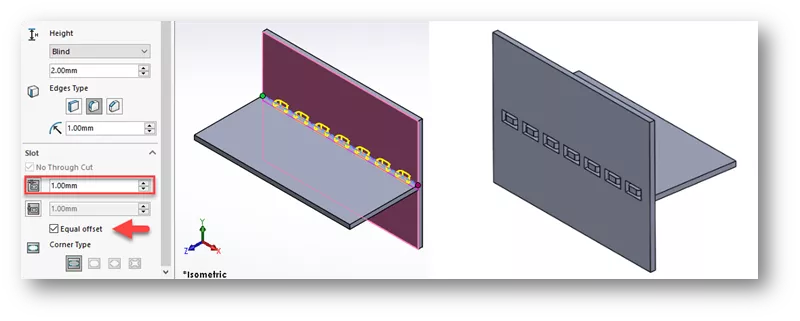
Edit one of the Tab and Slot features (right-click > Edit feature).
Change the Edge Type to Fillet Edge and click OK.
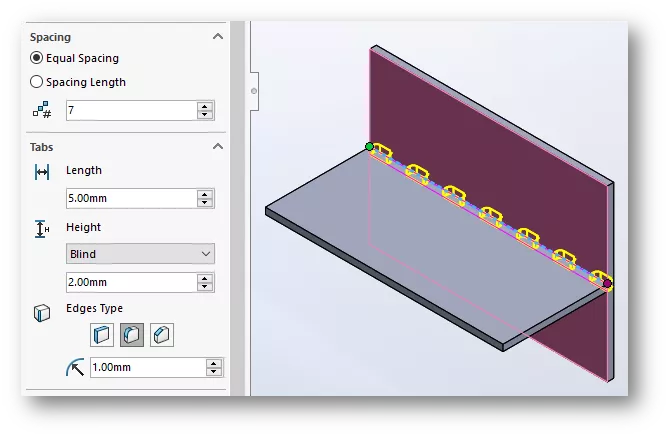
Notice fillets are added to the edges of the tabs.
Edit one of the Tab and Slot features again. Enable Offset and add on offset value to each side. Notice how the tabs and slots move inward.
Under Slot, select Equal offset and key in a value. Click OK. An equal gap around the tab is created in the slot.
Tab and Slot features can also be added at the assembly level between two components. To do this, the assembly must be in Edit Part Mode on either the tabbed or slotted component then follow the above guide.
To see a live tutorial of the SOLIDWORKS sheet metal Tab and Slot feature, check out the video below.
SOLIDWORKS - Sheet Metal Tab and Slot Video Tutorial
Learn More About SOLIDWORKS Sheet Metal
Using Sheet Metal Bodies in SOLIDWORKS Simulation
SOLIDWORKS Convert to Sheet Metal Command Explained
Creating Normal Cuts in SOLIDWORKS Sheet Metal
SOLIDWORKS Multibody Sheet Metal Flat Pattern Drawing

About Zach Brown
Zach Brown is a certified SOLIDWORKS Expert and a Technical Support Engineer. Prior to working at GoEngineer, he spent 15 years as a mechanical designer, CAD support tech, and instructor using SOLIDWORKS. His hobbies include playing guitar, riding motorcycles, and skiing.
Get our wide array of technical resources delivered right to your inbox.
Unsubscribe at any time.