Intro to Vapor Smoothing: FDM 3D Printed Parts
3D printed parts from FDM (Fused Deposition Modeling) machines, like the Stratasys F123 Series and Fortus printers, fulfill a variety of applications. Whether a user is trying to test form, fit and function, produce manufacturing aids, or create end-use parts, FDM can be quite versatile.
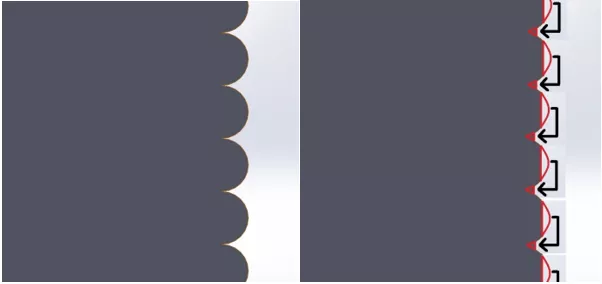
An area where FDM might not match up to other 3D printing technologies, like PolyJet, is surface finish. FDM printers use much larger layer heights, which often result in visible “steps” on the part, especially when the part has curved or angled surfaces.
Though not often required, the visual properties of an FDM part can be improved using chemical vapor smoothing. This process can be simple, using just a brush and acetone (or other solvent) to paint the part, or more complex, using an enclosed volume with circulating air and acetone vapor passing over the part. Both methods attempt to smooth the layer lines from an FDM print by melting the print material with a chemical solvent. Melting the external layer smooths the “peaks” and “valleys” in a printed part, shown in the simplified images below.
Smoothing parts with a solvent can potentially, but not in all cases, provide one other benefit to FDM parts: making them stronger.
FDM parts are not isotropic with regard to strength. The greatest strength is found through individual layers because they are printed continuously, but less strength is found between layers, which don’t have much bonding power between them. Solvent smoothing can sometimes increase the strength between layers by melting material and bonding those layers more than a part fresh off the printer.
Commercial vapor smoothing units exist, but is it possible to achieve similar results with a homemade system? Many 3D printing hobbyists create their own vapor chambers to great effect (and at a more appealing price point). We have had several Stratasys 3D printing customers express an interest in this process, but commonly outsource the work and, though happy with the results, aren't aware of the full scope of the process.
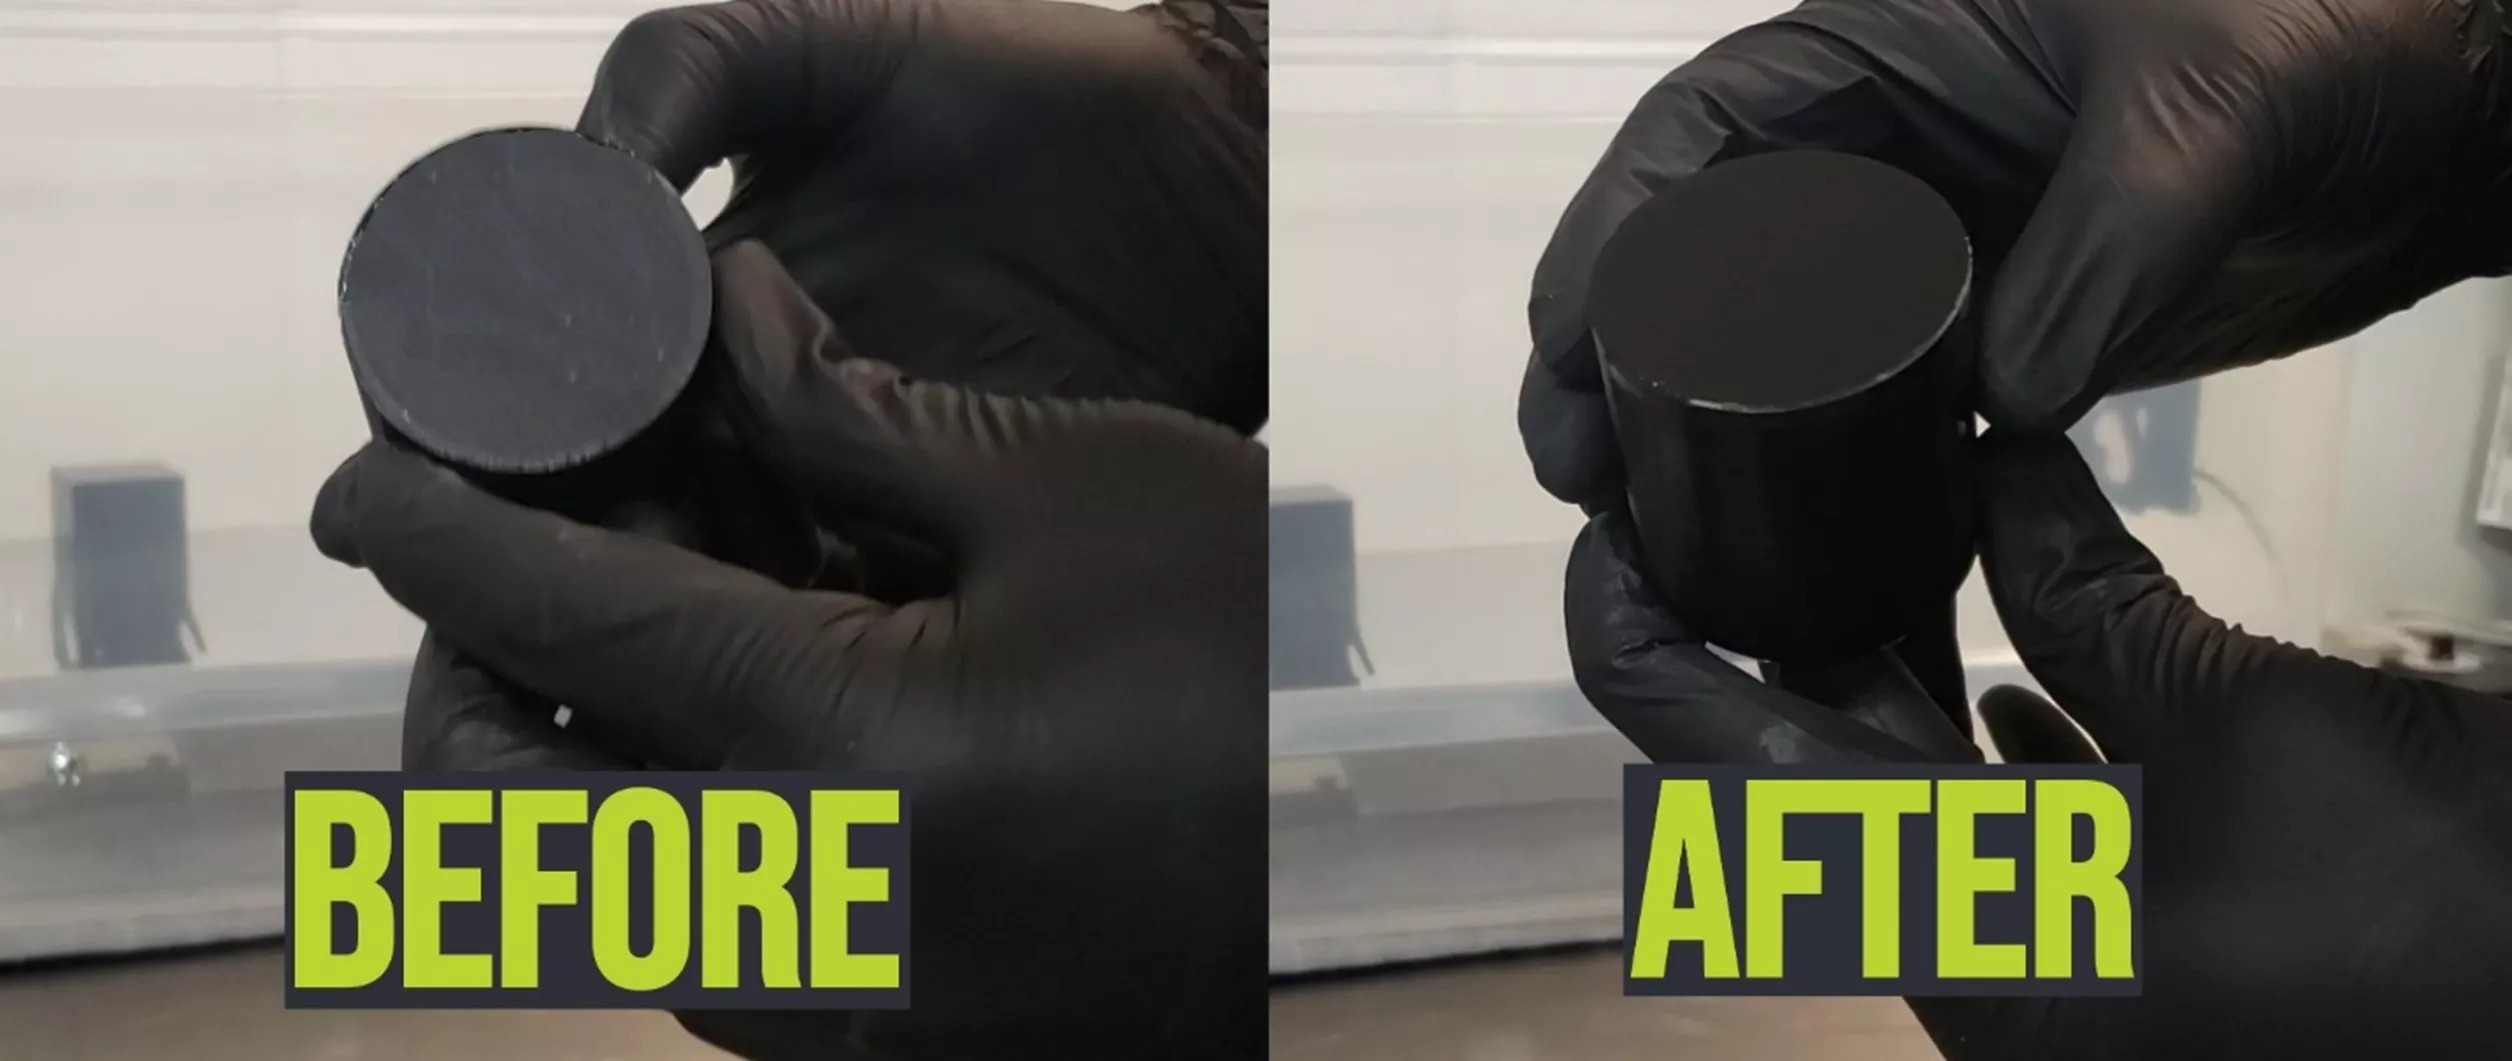
With access to a Stratasys F370 and Fortus 450mc, I documented my first attempts at vapor smoothing in the videos below. For my setup, I used an acetone-resistant container, a fan to circulate, a metal tray to suspend my parts, a heating pad to accelerate vaporization, and of course, acetone.
Let's start by building the vapor smoothing station.
So, now that we've constructed our vapor smoothing station, we're ready to throw some parts in. However, there are a few different variables we'll need to test in order to achieve a baseline to determine how well the system is working. These variables include the amount of acetone being poured in, exposure time, additional heating from the heat pad, and how effective the venting holes are.
As you can see, there were some mixed results with our first test. When it came to vapor smoothing, there was too much air and not enough vapor - so, we'll need to plug most of the holes that were drilled into the side of the container. More acetone may be needed, and we'll need to crank up the heat since the temperature of the lab is a bit cold. Brushing the parts was very successful except for the uniformity issue.
Now, let's address these issues and see what happens.
As we can see, vapor smoothing is a great way to enhance the look of your FDM 3D printed parts without changing the geometry too much.
I hope you found this intro to vapor smoothing helpful. Learn more about 3D printing below.
3D Printing as a Service

GoEngineer offers comprehensive 3D printing services across multiple U.S. labs, equipped with cutting-edge Stratasys FDM, PolyJet, Stereolithography, and SAF technologies for 3D printed prototypes or production parts. Request your quote online today!
More 3D Printing Articles
Insight Tutorial: Reuse Custom Groups
Proven Performance: The Stratasys FDM Advantage
How to Get the Configuration File (CFG) From a Stratasys FDM 3D Printer
3D Printing In-house and Outsourcing: Why a Hybrid Approach Works

About Robert French
Robert is an Senior Digital Manufacturing Application Engineer based out of the San Diego, CA office. He is also a Certified SOLIDWORKS Expert (CSWE) and Certified CAMWorks Support Tech (CCWST).
Get our wide array of technical resources delivered right to your inbox.
Unsubscribe at any time.