SOLIDWORKS Mold Tools - Draft Analysis and Scale
Using SOLIDWORKS Draft Analysis and Scale
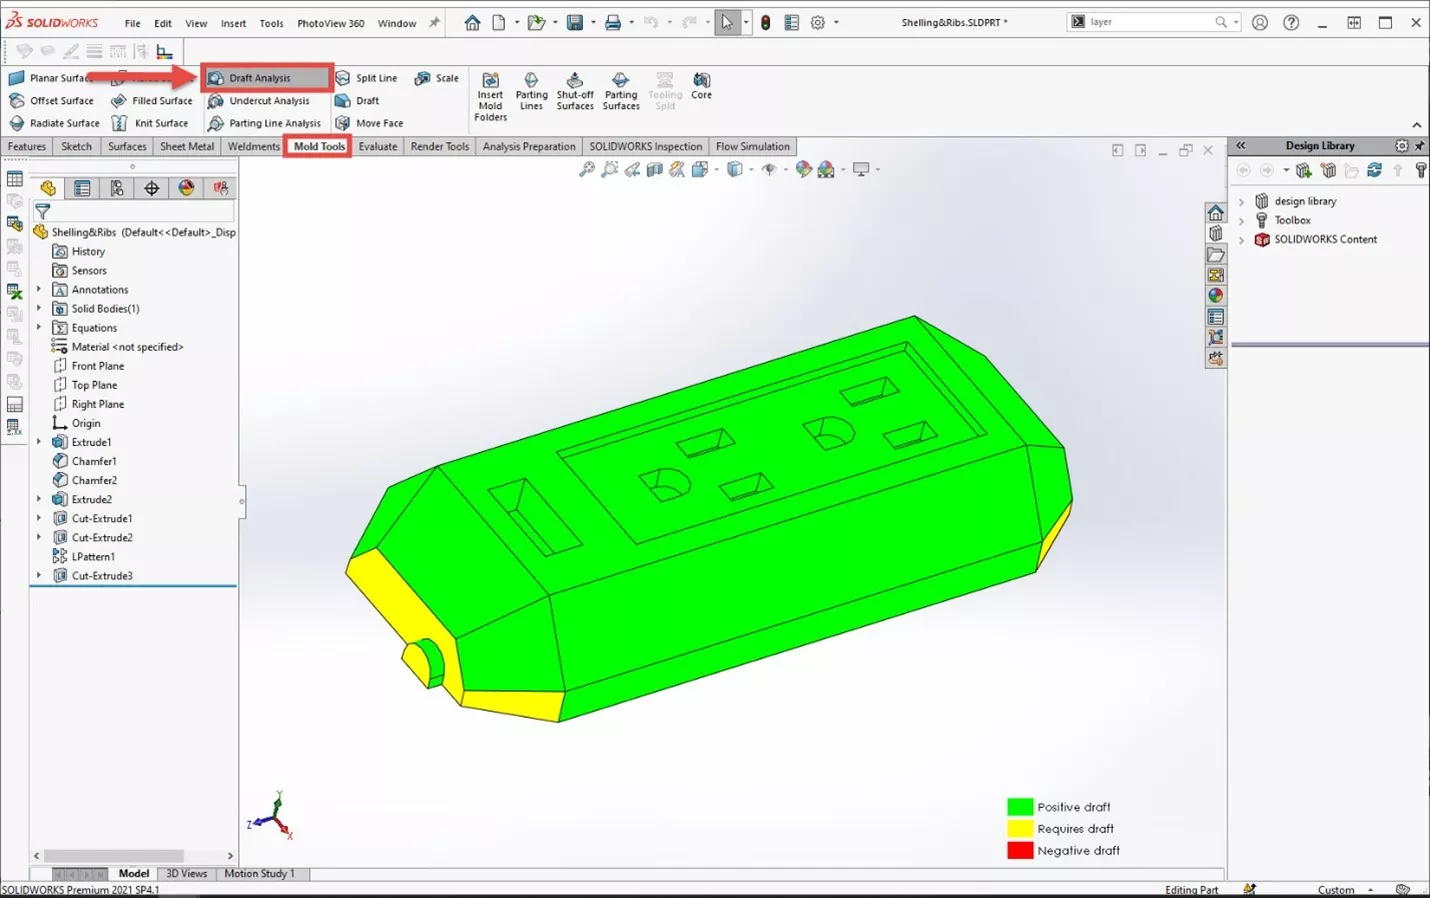
SOLIDWORKS Draft Analysis lets us determine if a part is ready to be molded. It uses color highlighting to indicate which faces of a model have an adequate draft to be easily released from a mold. We can specify our own tolerance and direction of pull, and we can view which faces have positive draft, negative draft, or still require draft. Scaling lets us enlarge a part to account for shrinkage.
Where is the Draft Analysis Tool Located in SOLIDWORKS?
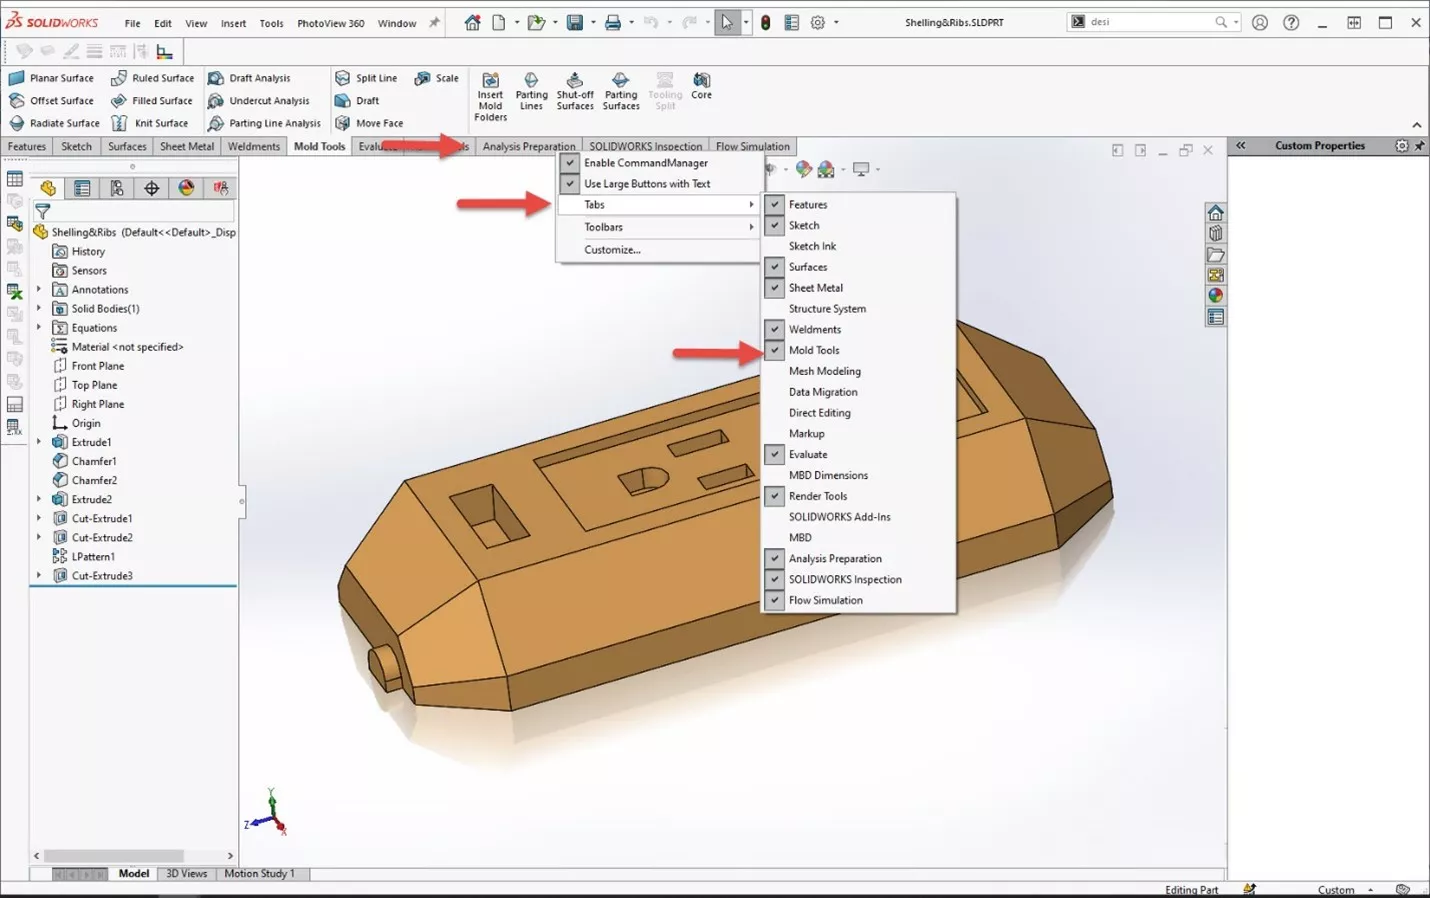
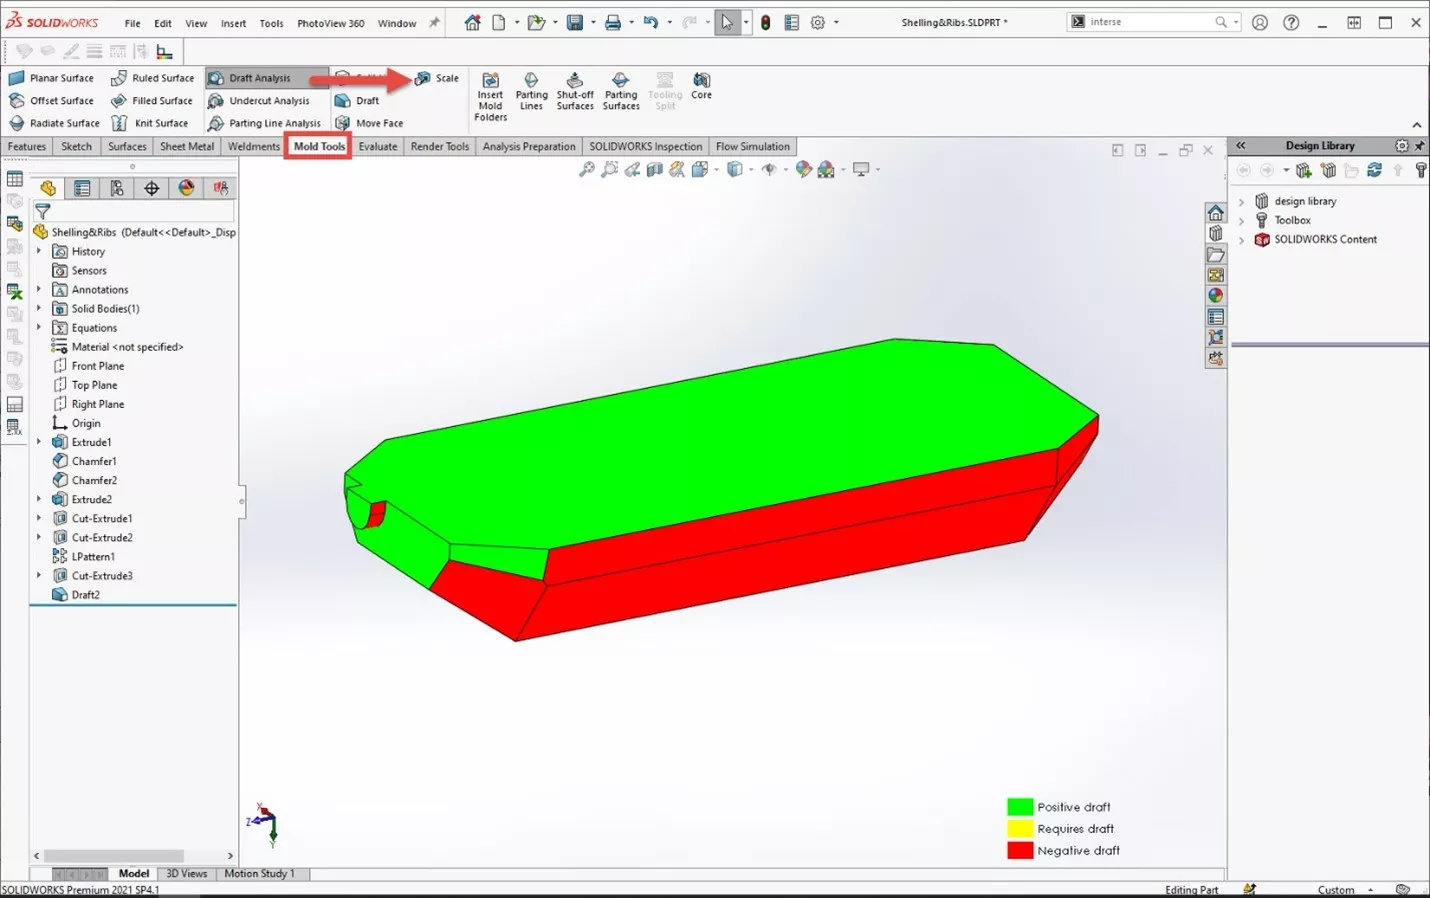
Draft Analysis is located under Mold Tools > Draft Analysis in the CommandManager. If the Mold Tools tab is not visible, simply right-click on any of the existing tabs and select Mold Tools from the flyout menu to enable it.
Using Draft Analysis
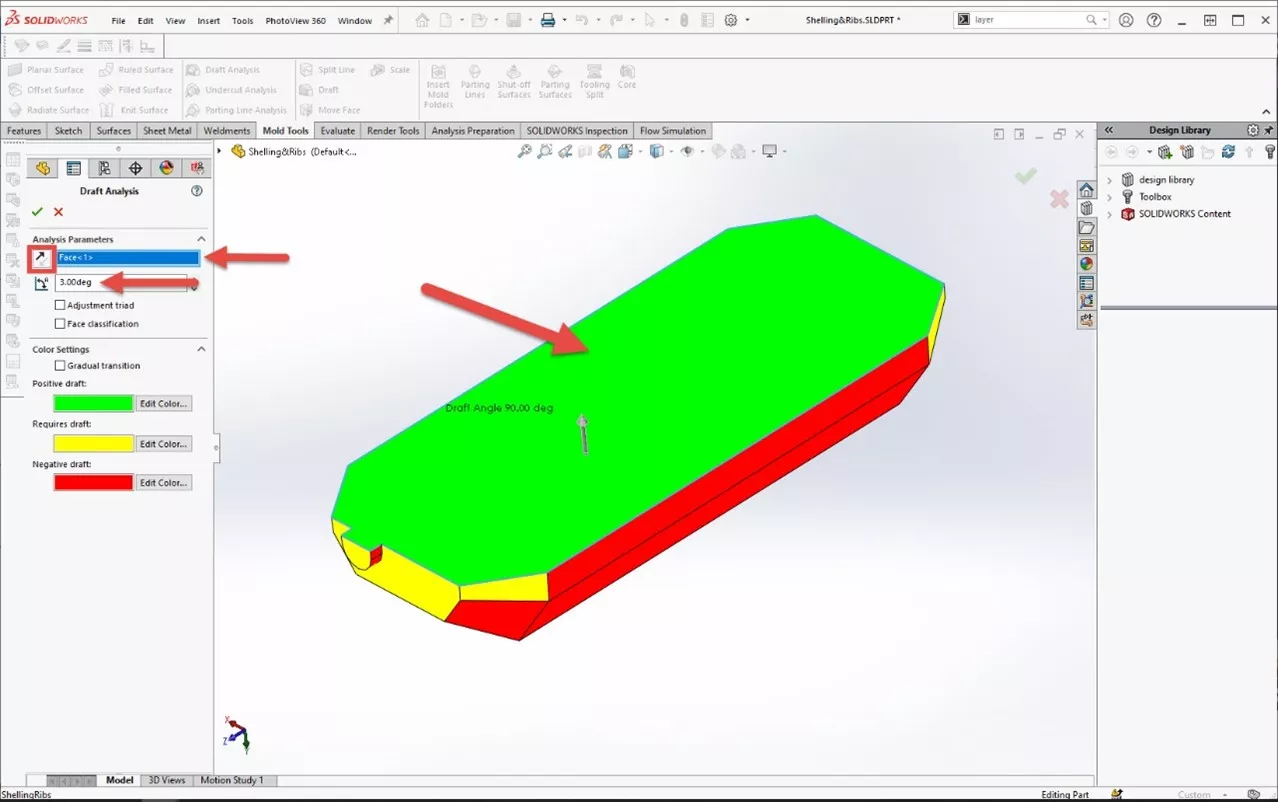
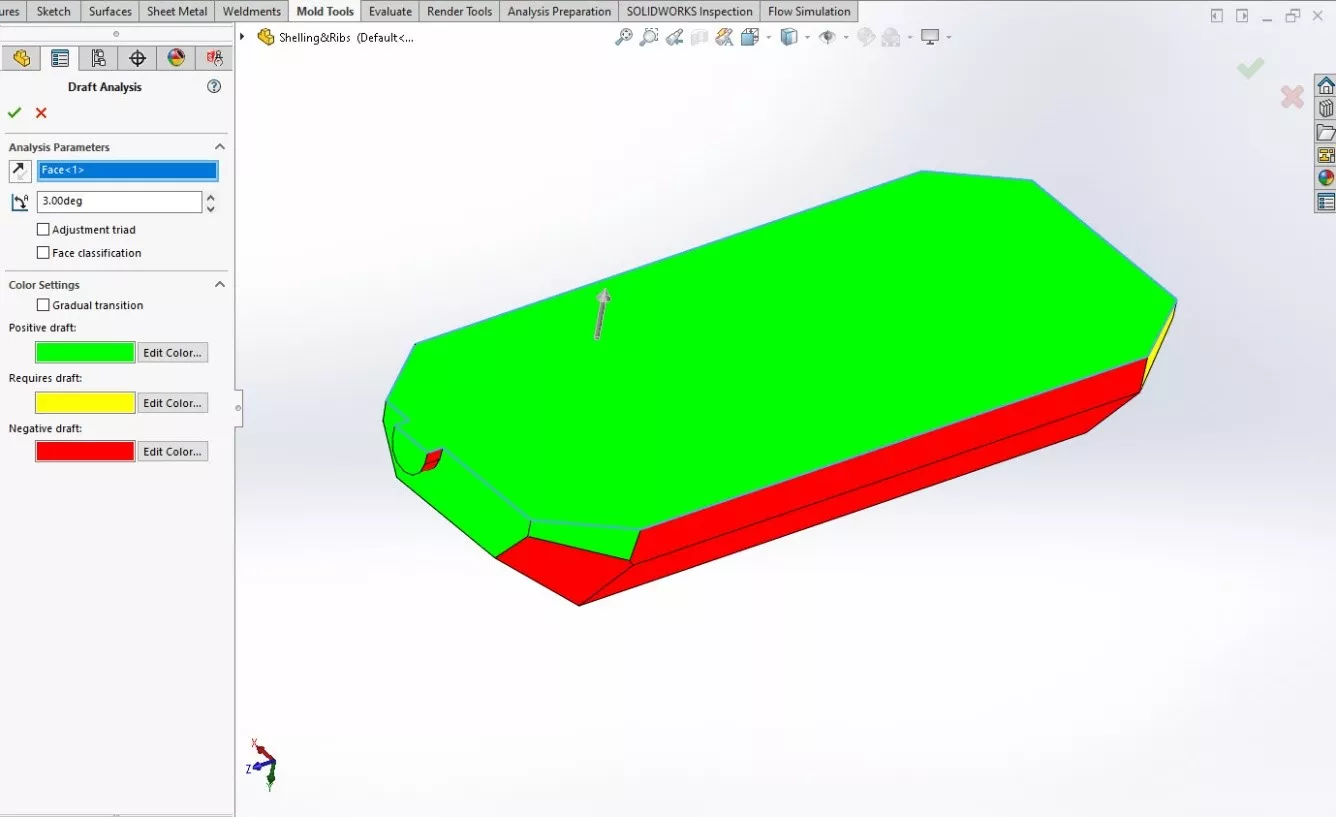
With Draft Analysis activated, all we need to do is select a direction of pull and specify the minimum draft angle needed for a clean release from the mold. First, select a face to use as a reference. The part will be pulled perpendicular to this face, and we can change the direction by toggling the arrow to the left of the face selection under Analysis Parameters.
After selecting the face and direction of pull, specify the required angle. The default is 3 degrees, but we can change this to anything we want. Faces will be highlighted in the graphics area as follows: green means positive draft, red means negative draft, and yellow means draft is required. Hitting the green check leaves the surfaces highlighted and lets us edit the model.
Editing Draft
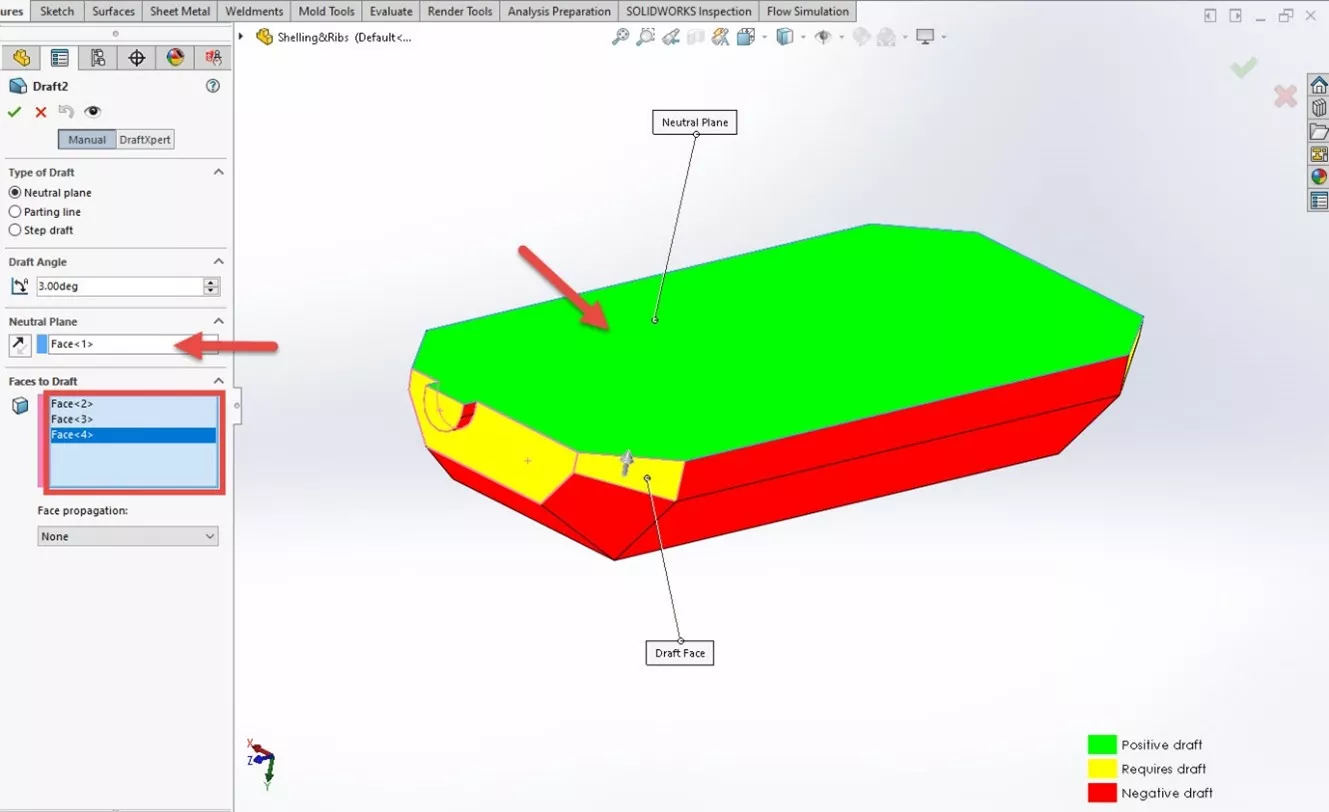
We can leave Draft Analysis turned on while we edit or add drafts to verify our work. To add a draft, select the Features tab and then Draft in the CommandManager.
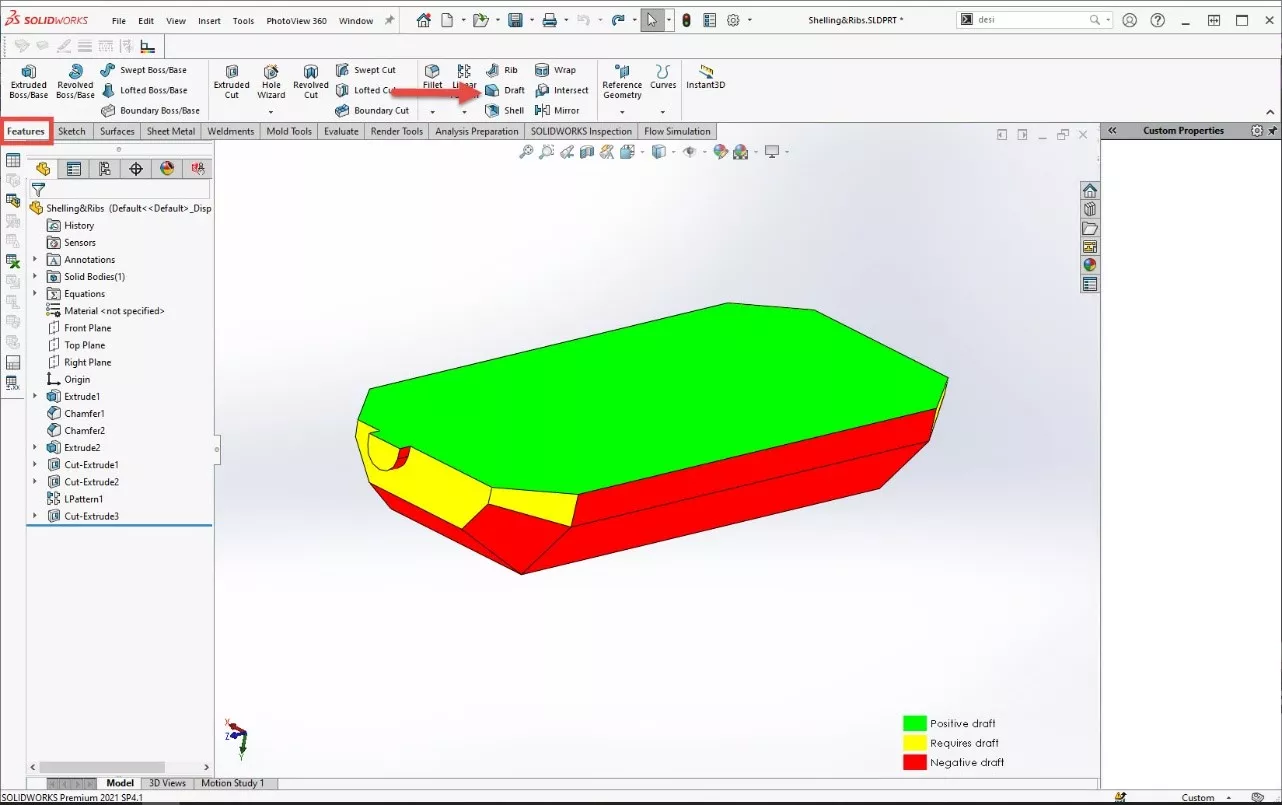
Using the Draft tool, simply select a reference plane (I chose the same plane that we used for the analysis) and then the faces to draft. Here, I selected the 3 yellow faces visible in the graphics area. Hit the green check and these faces turn green! We can add additional drafts in this same manner until the part meets our requirements.
To turn off Draft Analysis, just click it again in the CommandManager (where you first clicked to begin the analysis).
Scaling a Part in SOLIDWORKS
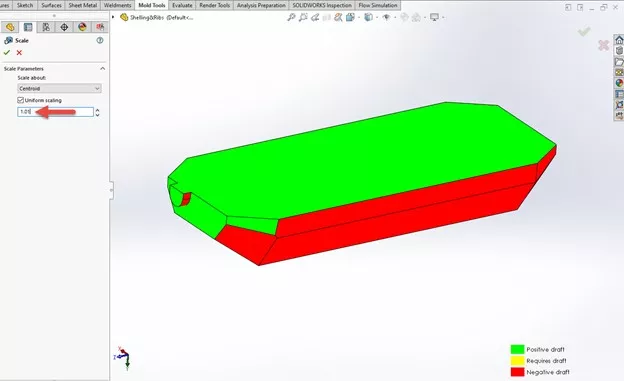
Parts can sometimes shrink as part of the manufacturing process. The Scale tool in SOLIDWORKS lets us scale the part up or down as needed, which is particularly helpful for when parts shrink with molding or 3D printing. To open the Scale tool, select the Mold Tools tab and then Scale in the CommandManager.
Suggested Article >> Scale a Part in SOLIDWORKS
We can scale about the centroid, origin, or coordinate system. In this example, I’ll leave the setting of the centroid and enter a multiplier to scale with: the number entered is multiplied by the total volume of the part. Here, I chose 1.01 to increase the part volume by 1%. Hit the green check and we’re done!
Want to expand your SOLIDWORKS skillset? Check out more tips and tricks below.
More SOLIDWORKS Tutorials
SOLIDWORKS Copy and Paste Features: Same or Different Parts
SOLIDWORKS Convert to Sheet Metal Command Explained
How to Create a Lip/Groove Feature in SOLIDWORKS
SOLIDWORKS eDrawings Professional vs Viewer
Scanto3D Add-in Explained: Activation, Wizards, and Tutorial
SOLIDWORKS MOLD DESIGN TRAINING
Learn manual mold creation techniques and mold tools by enrolling in training with GoEngineer. Learn more below.


About Gary Ballentine
Gary Ballentine is a Mechanical Engineer based out of our Headquarters in Salt Lake City, Utah. He earned a Bachelor’s degree from the University of California, Davis, a certification in Technical Writing from San Francisco State University, and a Bachelor’s degree in Mechanical Engineering from the University of Utah. Gary has been part of the GoEngineer family since April 2019 as a Support Engineer and Certified SOLIDWORKS Instructor.
Get our wide array of technical resources delivered right to your inbox.
Unsubscribe at any time.