SOLIDWORKS Sheet Metal Tutorial Using Flat Pattern and Sketched Bend
Many companies that use SOLIDWORKS Sheet Metal also do Progressive Bend Operations. Documenting those operations has been an issue over the years, as most folks don’t know where to go to make it work. This is addressed to some degree in our SOLIDWORKS Sheet Metal Training course.
The part I am using in this tutorial was first made by making the flat pattern and then using a single sketch to make one Sketched Bend feature. We need to make configurations for each operation and use the individual SketchBend(s) listed under the Sketched Bend feature to make this work.
Set up
Estimate how many operations you will need, and make a new Configuration for each separate operation. In my example, I made five configurations and just used numbers for the names. Make your configuration names meaningful so they are easy for someone else later.
Having the PropertyManager area on the left split so that both the Configuration Tab and FeatureManager Design Tree tab display is handy.
For each of these operations, you will need to expand Flat-Pattern and then Flat-pattern1, to be able to see the Flatten- through however many bends are listed to manipulate the various bend operations as necessary.
My simple example has only four Sketched Bends, done in a single sketch. I also created a Named View, so all my views were the same orientation and size and showed my model as I wanted to see it.
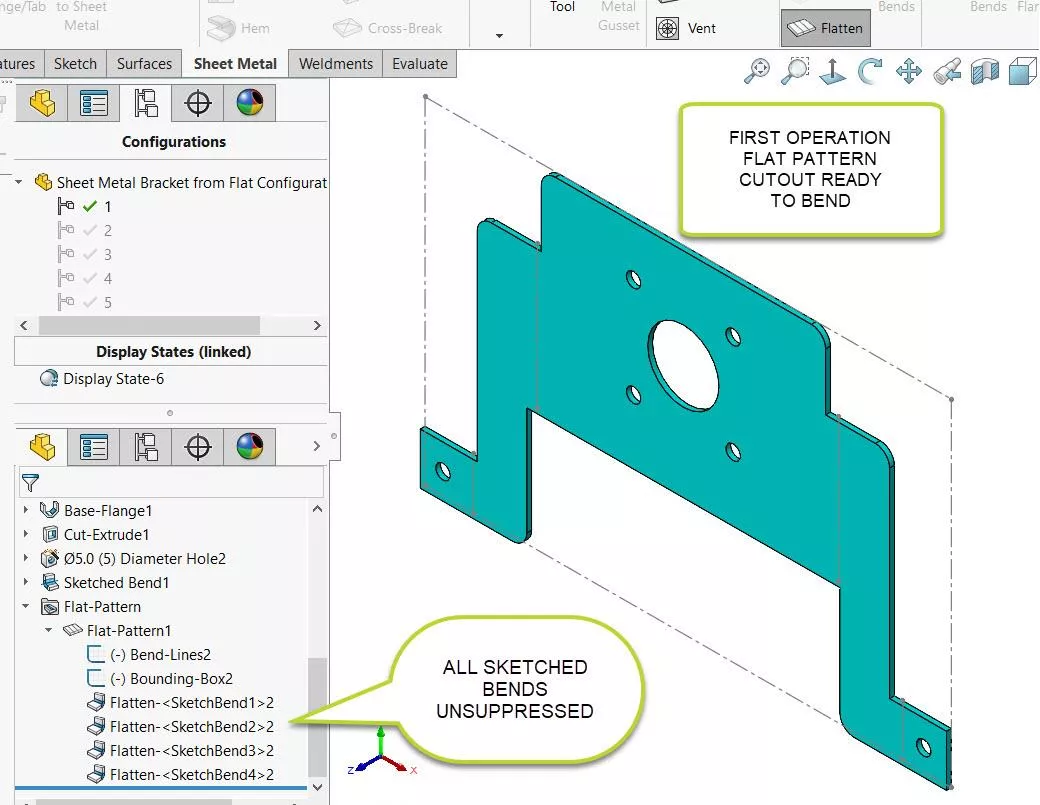
Figure 1
For the First Operation (Figure 1), I showed the Flat Pattern with my Named View in configuration 1 using the Flatten Icon in the Sheet Metal tab in the Command Manager.
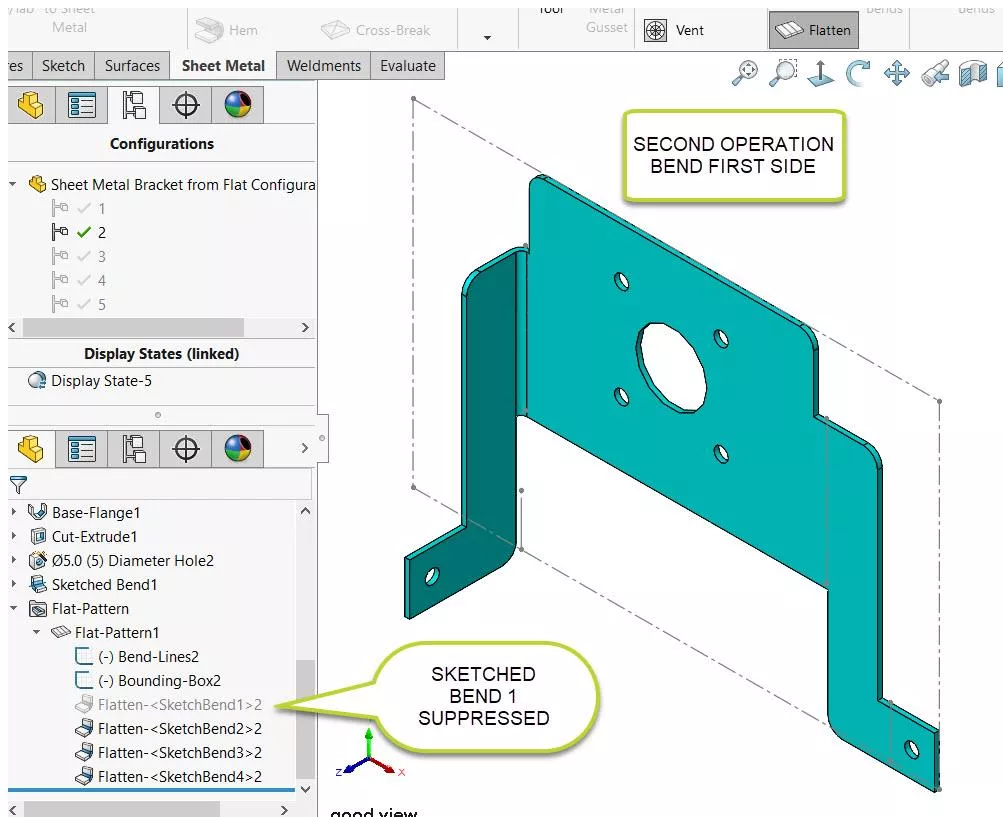
Figure 2
For the Second Operation (Figure 2), I used the exact named view in configuration 2 and suppressed Flatten-2.
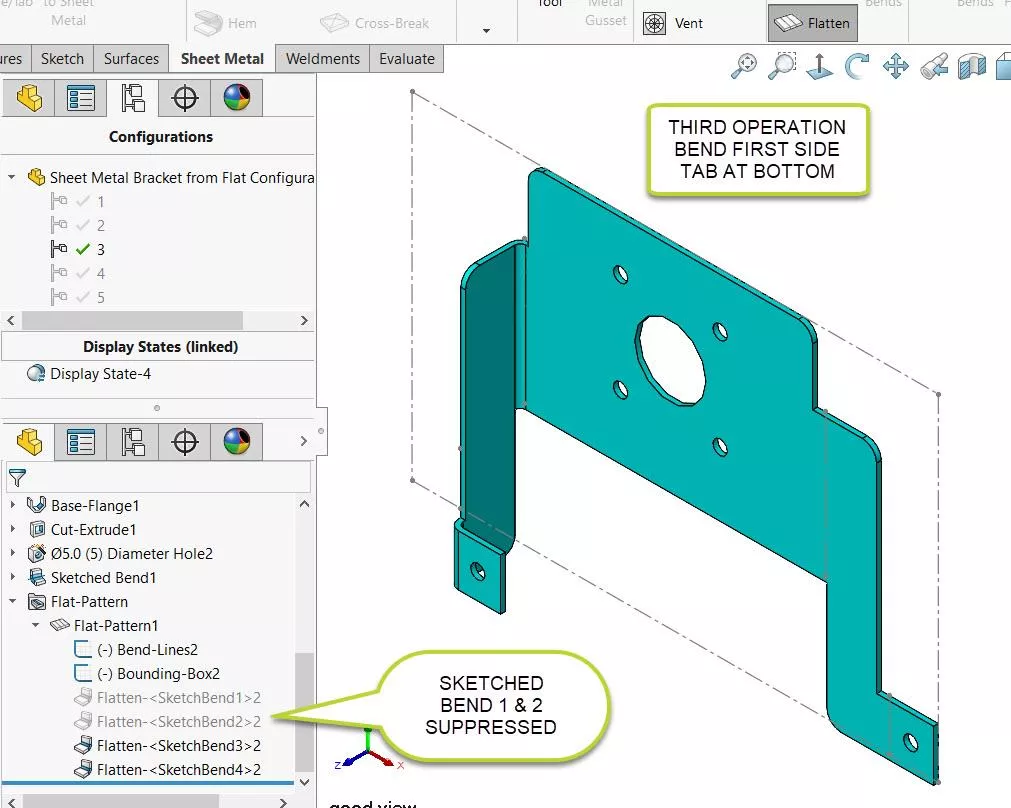
Figure 3
For the Third Operation (Figure 3), I used the exact named view in configuration 3 and suppressed Flatten-2.
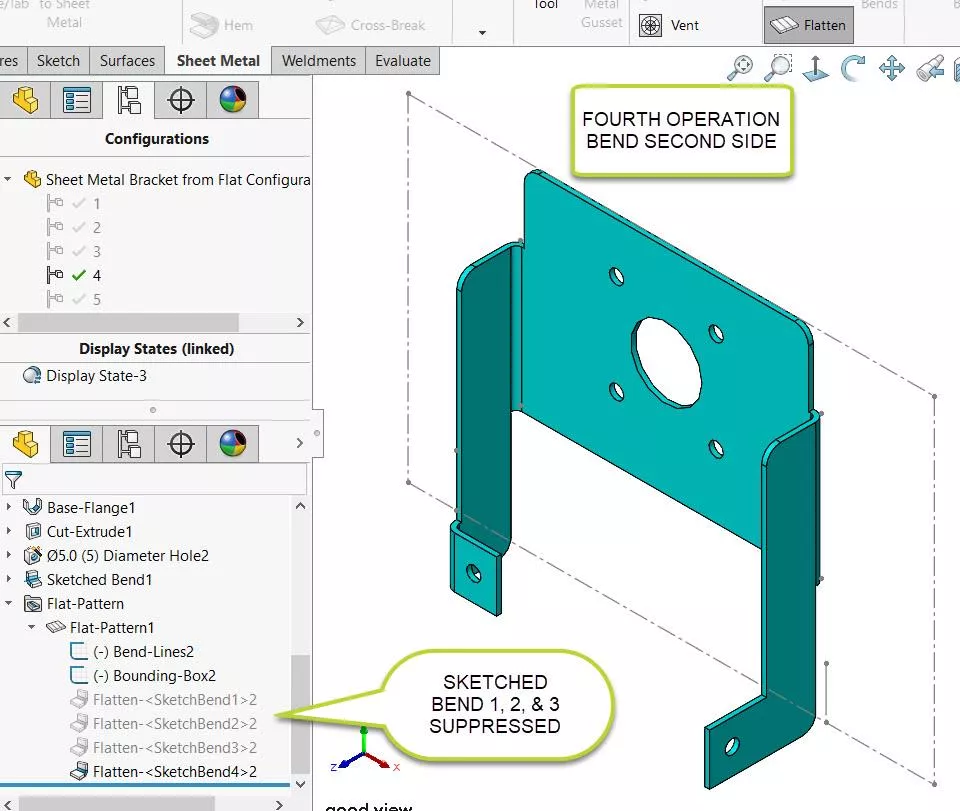
Figure 4
For the Fourth Operation (Figure 4), I used the exact named view in configuration 4 and suppressed Flatten-2.

Figure 5
For the Fifth Operation (Figure 5), I used the exact named view in configuration 5 and suppressed Flatten-2.
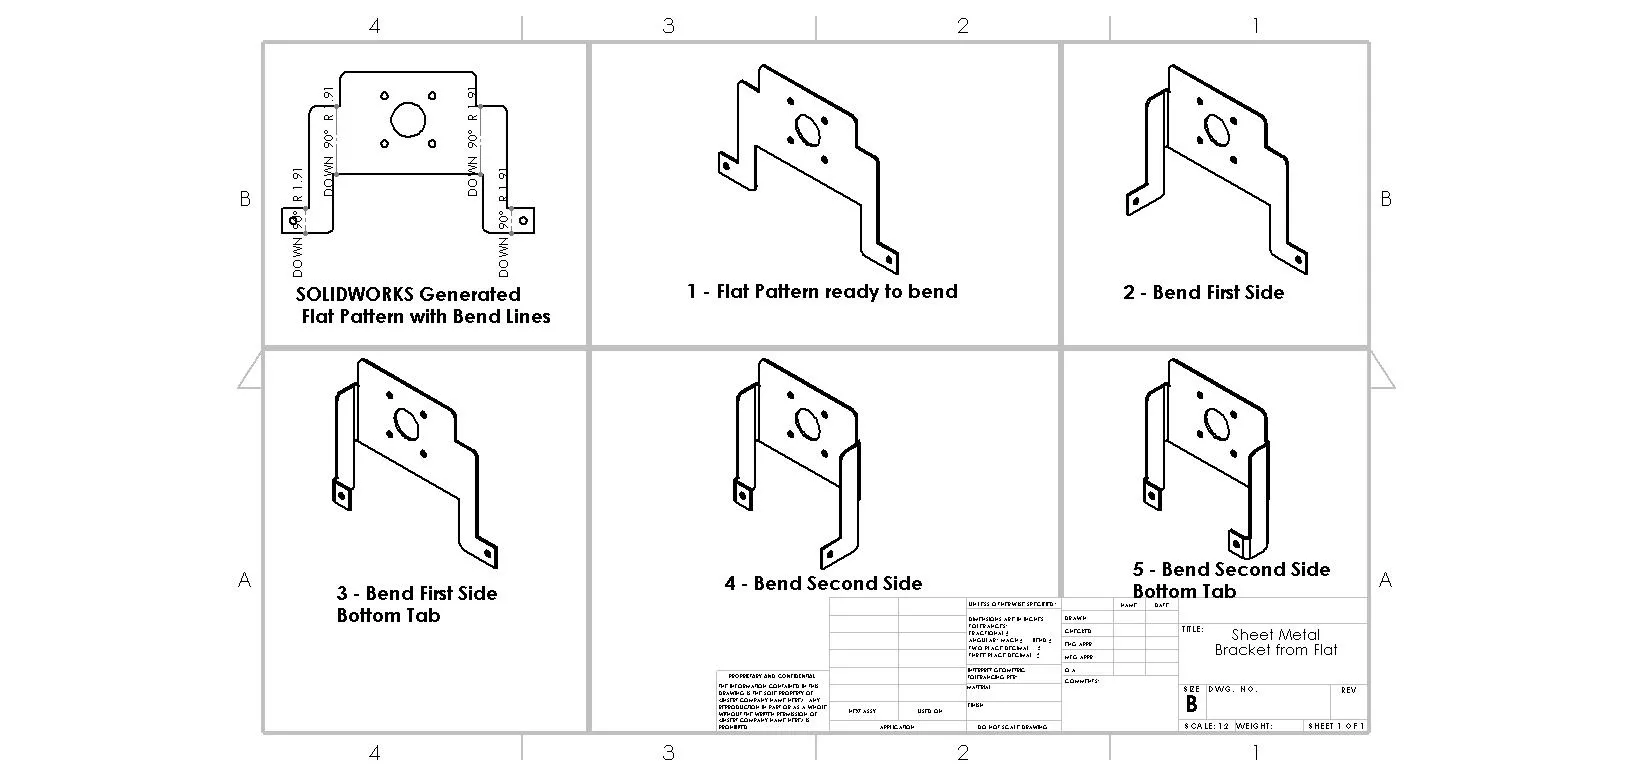
Figure 6 shows a possible drawing sheet with Flat Pattern and the 5 configurations of the Progressive process.
I hope you found this SOLIDWORKS Sheet Metal tutorial helpful. Learn more about SOLIDWORKS Sheet Metal in the articles listed below.
More SOLIDWORKS Sheet Metal Tutorials
SOLIDWORKS Convert to Sheet Metal Command Explained
Using Sheet Metal Bodies in SOLIDWORKS Simulation
SOLIDWORKS: Creating Normal Cuts in Sheet Metal
SOLIDWORKS Multibody Sheet Metal Flat Pattern Drawing
![]()
About GoEngineer
GoEngineer delivers software, technology, and expertise that enable companies to unlock design innovation and deliver better products faster. With more than 40 years of experience and tens of thousands of customers in high tech, medical, machine design, energy and other industries, GoEngineer provides best-in-class design solutions from SOLIDWORKS CAD, Stratasys 3D printing, Creaform & Artec 3D scanning, CAMWorks, PLM, and more
Get our wide array of technical resources delivered right to your inbox.
Unsubscribe at any time.