SOLIDWORKS Warning Workaround: The Specified Auto-Recover Folder Does Not Exist and Cannot Be Created
Are you getting SOLIDWORKS warning messages about your auto recovery folder and don’t know how to correct it? Fear not, this guide will show you what this means and how to fix it.
This warning message, Figure 1, is SOLIDWORKS’ core functionality, regardless of what add-in or what product you are using inside of it. It pops up when SOLIDWORKS boots up or when you load a file.
It is a specific message geared to ensure the auto-recover folder exists, there is enough storage on the drive where that folder is located, and you have write access to it.
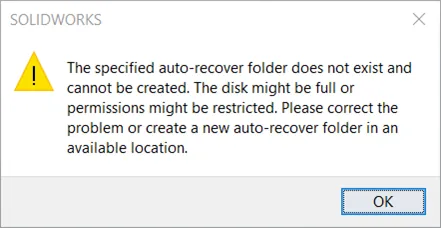
Figure 1: ‘The specified auto-recover folder does not exist and cannot be created. The disk might be full or permissions might be restricted. Please correct the problem or create a new auto-recover folder in an available location’
Related Article >> SOLIDWORKS Warning: A Journal File Could Not Be Created
The probable causes
- There was a recent SOLIDWORKS upgrade, and the auto-recover folder path got mixed up.
- The auto-recover folder was deleted, or the security settings were changed so that you do not have write access.
- The drive where the folder is has run out of storage.
The Solutions
First, let’s ensure the auto-recover folder exists.
Go to Tools > Options > Backup/Recover > Auto Recover > Auto-recover folder. See Figure 2. Make note of the Auto-recover folder location and use Windows Explorer to browse to that folder. If you cannot find the Auto-recover folder, there is the problem. Simply designate a new folder by clicking the browse-to icon in the Auto-recover folder settings. See Figure 3.
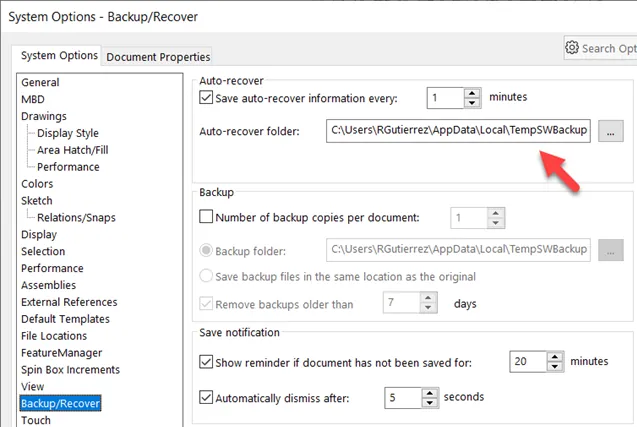
Figure 2: Auto-recover options in System Options
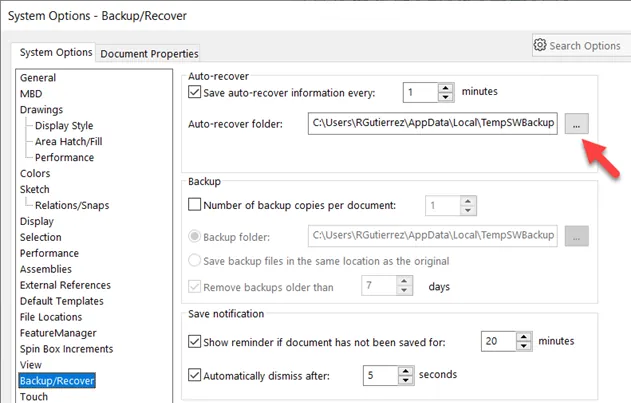
Figure 3: Browse-to icon to designate a new Auto-recover folder
Second, we need to ensure there is write access to the Auto-recover folder.
Go to the Security settings for that folder (right-click the folder and choose properties) and ensure that your user profile has Write access. You might have to get with your IT department for this. See Figure 4.
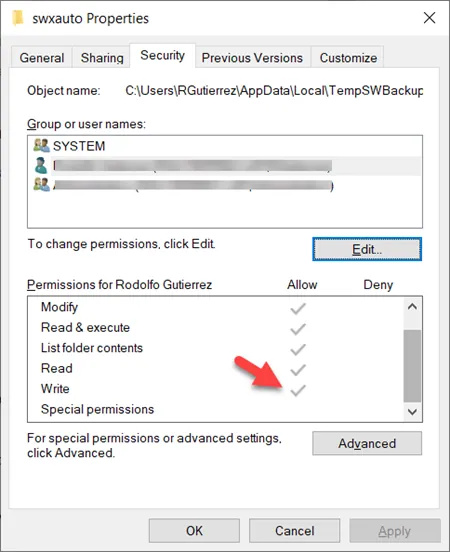
Figure 4: Auto-recover folder security settings
Third, check the drive storage space.
Browse to the drive in Windows Explorer and right-click > Properties and check the Free Space. If your drive has run out of storage, designate a new Auto-recover folder in a drive with sufficient free space. See Figure 5.
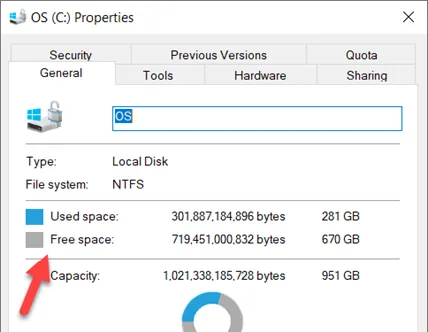
Figure 5: Drive for the Auto-recover folder
Related Article >> What Causes the Low Resources Warning in SOLIDWORKS?
Bonus: How to check if the Auto-recover functionality works properly.
- In SOLIDWORKS, go to Tools > Options > Backup/Recover > Auto Recover and reduce the Save auto-recover information every setting to 1 minute. Hit OK.
- Start a new part in SOLIDWORKS and leave it empty.
- With the part file open in SOLIDWORKS, open Windows Explorer and browse to the Auto-recover folder.
- Go back to your new part and hit CTRL-Q or create a simple sketch and wait for 1 minute.
- After 1 minute, you should see a file named: ‘AutoRecover Of [PART_NAME].SLDPRT.swar’ created in the auto-recover folder.
This simple test ensures the SOLIDWORKS Auto-recover functionality works correctly.
If you have tried the steps above and the file is not generating in the Auto-recover folder, try these steps next:
- Ensure the part is in a ‘dirty’ state. See Figure 6. SOLIDWORKS will NOT generate a new Auto-recover file if it sees that the file is identical to its last save. Do a force-rebuild or change the model, DO NOT save, and wait 1 minute to force the file creation.
- Ensure that a Windows function, such as UAC (User Access Control), is not meddling with the folder. To test this, open Windows Explorer and create a new folder on the C: drive (C:\Test for example). Then change the Auto-recover folder location to this folder. See Figure 3. Try the steps above to test functionality again.
- If all else fails, try to open SOLIDWORKS in a “safe” mode, using the SOLIDWORKS RX tool (here), to rule out corruption with the settings. If after opening SOLIDWORKS, the Auto-recover functionality works, then you can safely say that it is a corruption in the settings. For that, you can reset the SOLIDWORKS registry (here) or do a clean uninstall (here).
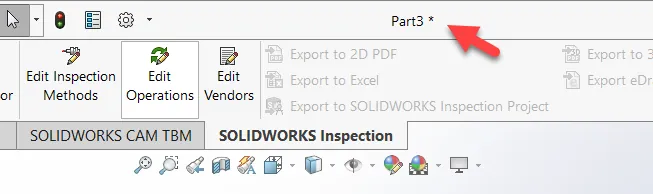
Figure 6: Asterix showing a file in a dirty state to force creation of Auto-recover file
Learn More About SOLIDWORKS
Simple Way to Rename SOLIDWORKS Files
Creating a Non-Circular Helix in SOLIDWORKS with Surfacing Commands

About Rodolfo Gutierrez
Rodolfo Gutierrez is a Mechanical Engineer by profession specializing in SOLIDWORKS, Routing, PDM, Sheet Metal, and Weldments. Lucky husband and goofy dad. Loves productivity hacks.
Get our wide array of technical resources delivered right to your inbox.
Unsubscribe at any time.