SOLIDWORKS Path Mate Motion Analysis Tutorial
SOLIDWORKS assemblies let you choose from four categories of mates: Standard, Advanced, Analysis, and Mechanical. Advanced Mates allow us to create Path Mates that force assemblies and components to move along a specified path. When this mate is applied, we can perform a Motion Analysis study of the part or assembly along the path. This creates a short video that we can then export.
- Suggested Article >> Introduction to SOLIDWORKS Mates
Creating a Path Mate in SOLIDWORKS
To create a path mate in SOLIDWORKS, we need a part or assembly that we can move (not fixed) and a path for it to follow.
The first part inserted into an assembly is automatically fixed in place. If we are moving this part, we need to remove this constraint. To do so, right-click on the part in the design tree and select float. The (f) next to the part name will be replaced with a (-) to indicate that it is no longer fixed in place.

- Suggested Article > Using the SOLIDWORKS Temporary Fix/Group Command
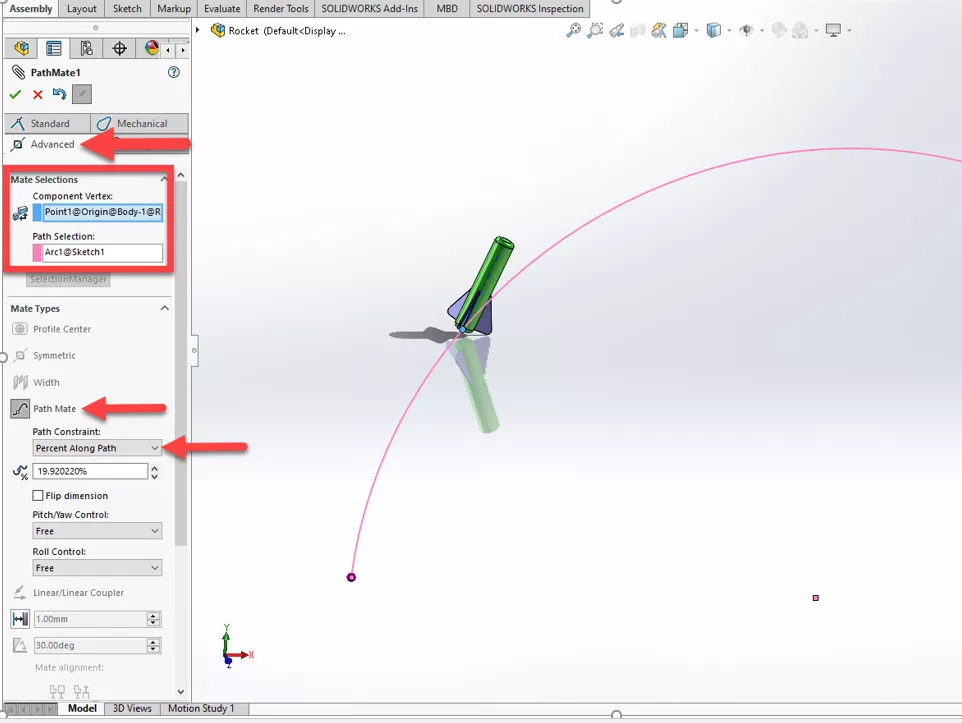
A simple sketch created at the assembly level can be used for the path. Once we have the path inserted, click on Mates in the Assembly CommandManager, and select Advanced. We then want to select Path Mate.
At this point, we can select a vertex or point on our part to lock onto the path as well as the path itself. To create the Motion Analysis study, we should set Path Constraint to Percent Along Path.
Creating a Motion Analysis Motor Study
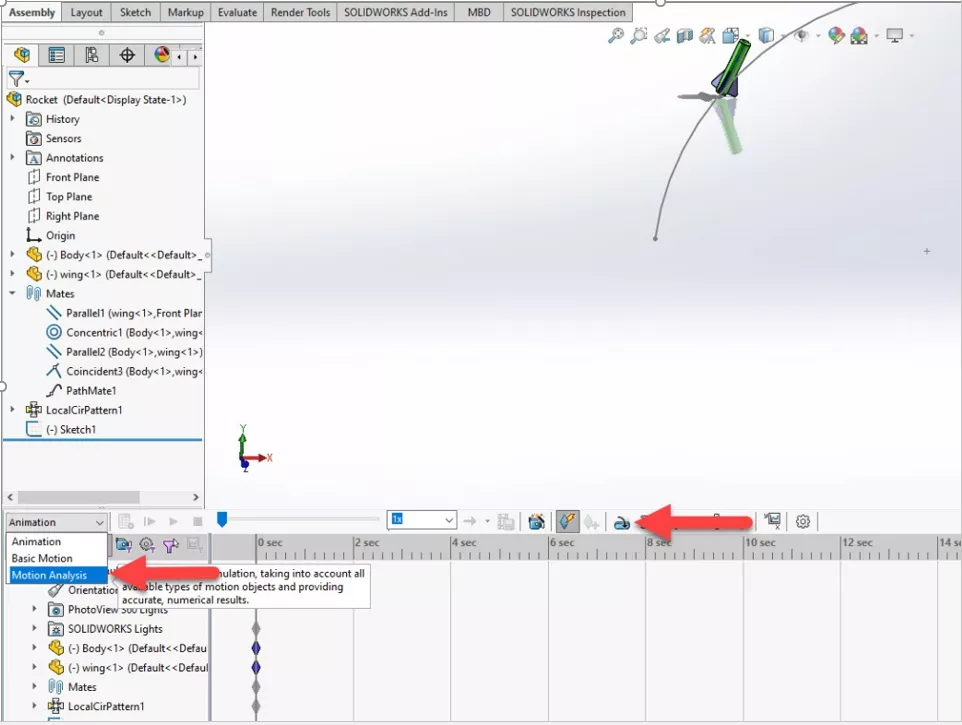
Before creating the Motion Analysis study, we want to make sure that the SOLIDWORKS Motion add-in is turned on. This add-in is found under Tools > Add-Ins.

To begin the Motion Analysis study, click on the motion study tab at the bottom. You can also right-click this tab and select Create New Motion Study if you already have an existing study.
Change the type to Motion Analysis and select the Motor icon to specify the type of movement.
After selecting the motor icon, select Path Mate Motor in the PropertyManager. Select the path mate from within the animation window. This will automatically grab the path and part. We can now specify the speed.
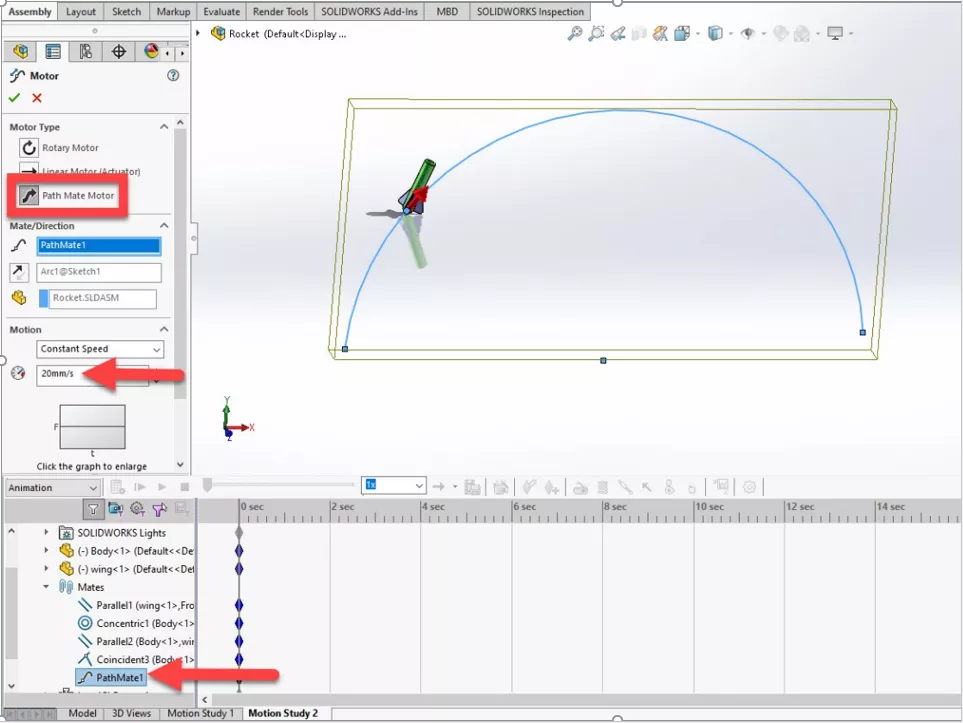
When you click the green check, a five second study is created automatically. Drag the sliders to adjust the time to your preference.
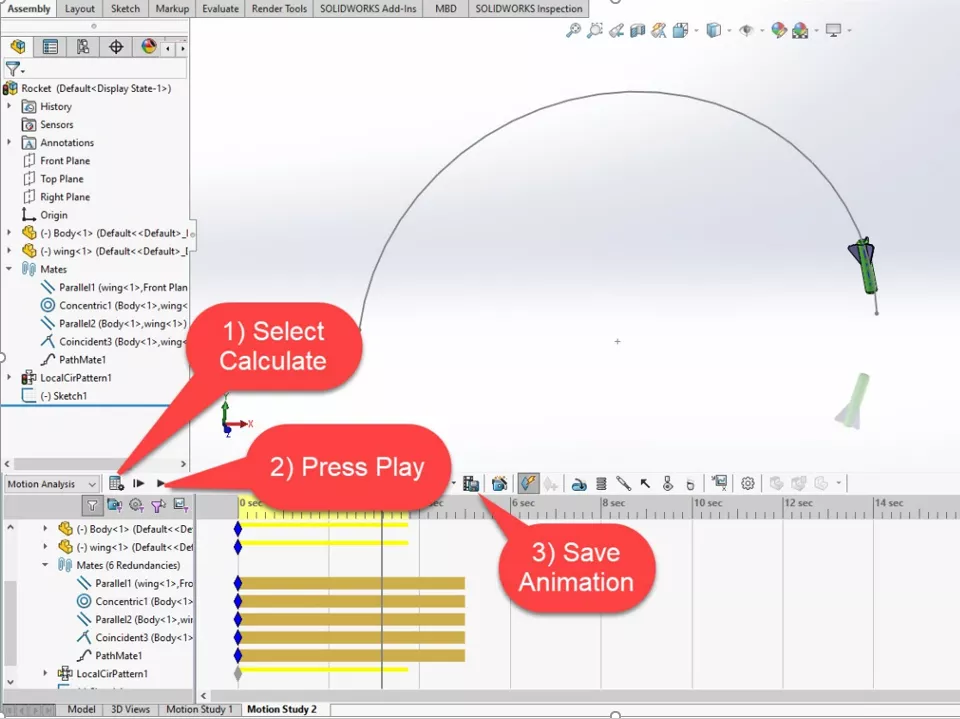
Select Calculate to generate the motion analysis.
To view the study, press Play and you can export the video by clicking Save Animation.
Want more tips and tricks to get the most out of your SOLIDWORKS? Check out the GoEngineer YouTube channel. We have an extensive library of videos from tips and tricks to “What’s New” videos, in-depth webinars, and much, much more!
Most Recent SOLIDWORKS Tutorials
SOLIDWORKS Sheet Metal Gusset Tool Tutorial
Easy Ways to Model a Wye Pipe in SOLIDWORKS
SOLIDWORKS Variable Pattern Tool Explained
Create J-Slots in SOLIDWORKS on Cylindrical Parts
Display SOLIDWORKS Sheet Metal Surface Area in Your Bill of Materials

About Gary Ballentine
Gary Ballentine is a Mechanical Engineer based out of our Headquarters in Salt Lake City, Utah. He earned a Bachelor’s degree from the University of California, Davis, a certification in Technical Writing from San Francisco State University, and a Bachelor’s degree in Mechanical Engineering from the University of Utah. Gary has been part of the GoEngineer family since April 2019 as a Support Engineer and Certified SOLIDWORKS Instructor.
Get our wide array of technical resources delivered right to your inbox.
Unsubscribe at any time.