SOLIDWORKS Motion Study: Add a Torsional Spring
In this tutorial, we demonstrate how to add a torsional spring to a SOLIDWORKS Motion study. In order to affect how a hinge assembly responds to the forces of gravity and a motor, we'll add a damper, which dissipates energy, and a torsional spring, which stores it. Let's get started.
Creating a Torsional Spring
First, change the study type to Motion Analysis in the top lefthand corner of the MotionManager.
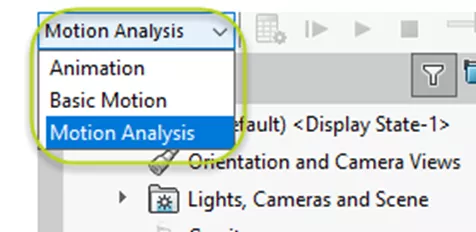
Figure 1: Motion study type dropdown
Motion Analysis is the most accurate and computationally intensive type of Motion study. If you don't see it listed in the Motion Study Type dropdown, ensure that SOLIDWORKS Motion is checked in Tools > Add-ins.

Figure 2: Add-ins dialog
Next, see if there are mate redundancies indicated on the Mates folder. Mate redundancies can cause the model to be over defined. A common practice to avoid them, is to delete all mates from this folder in your MotionManager design tree then re-mate the assembly.
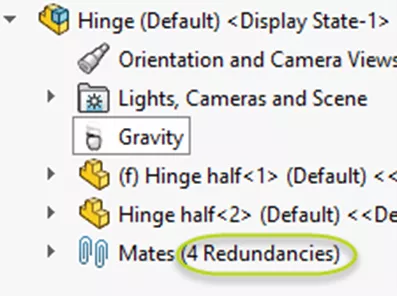
Figure 3: Mates folder in MotionManager design tree with Redundancies
At time 0 seconds, move the half of the hinge that isn't fixed so that it is raised at an angle.
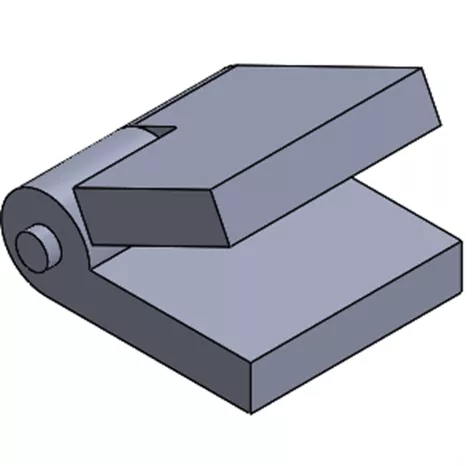
Figure 4: Starting position of hinge
Add gravity and calculate; this results in the half of the hinge that isn't fixed swinging back and forth.
In real life, we'd be losing energy as the hinge swings.
In our SOLIDWORKS Motion study, we can add a torsional damper to simulate that.
In this case, for the first selection, choose the cylindrical face of the moving component. This sets which component is moving and the torque direction.
Leaving the second selection box blank sets the other end of the damper to be the ground. If the component does not move after adding the damper, it's likely that the Damping Constant is too great and will need to be reduced.
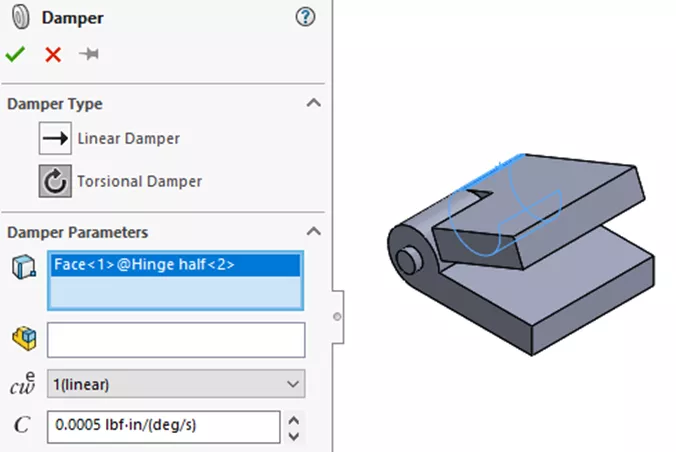
Figure 5: Damper PropertyManager
Now we want to create a spring.
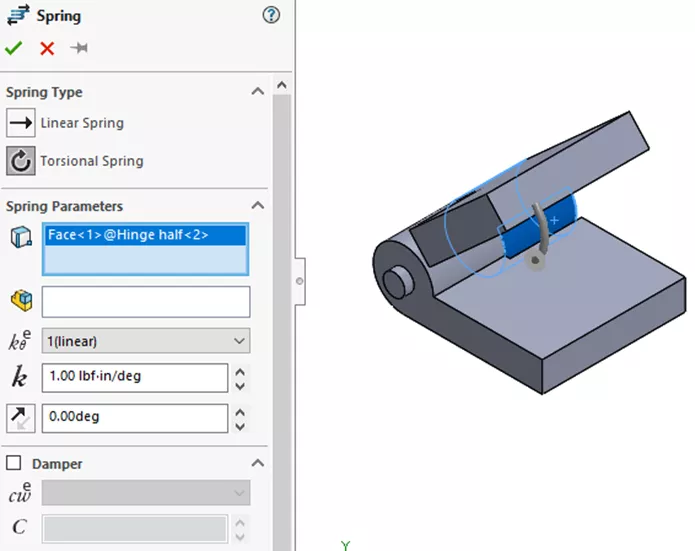
Figure 6: Spring PropertyManager
Again, the cylindrical face of the moving hinge-half is the first selection. The starting angle is the free angle - this can be altered in the Free angle text box. In the companion video below, we used default values and adjusted them as needed to obtain optimal results. As the analyst, you will know the properties of the spring you're trying to simulate and should make any necessary changes to factors (e.g., the spring and damping constants to obtain a more accurate result).
![]() Companion Video: SOLIDWORKS Motion - Torsional Spring
Companion Video: SOLIDWORKS Motion - Torsional Spring
With the spring defined, simulate pushing the hinge down with a motor. Select the cylindrical face of the moving component for the motor location. Instead of setting a speed, specify how far the spring is displaced and over what period that occurs.
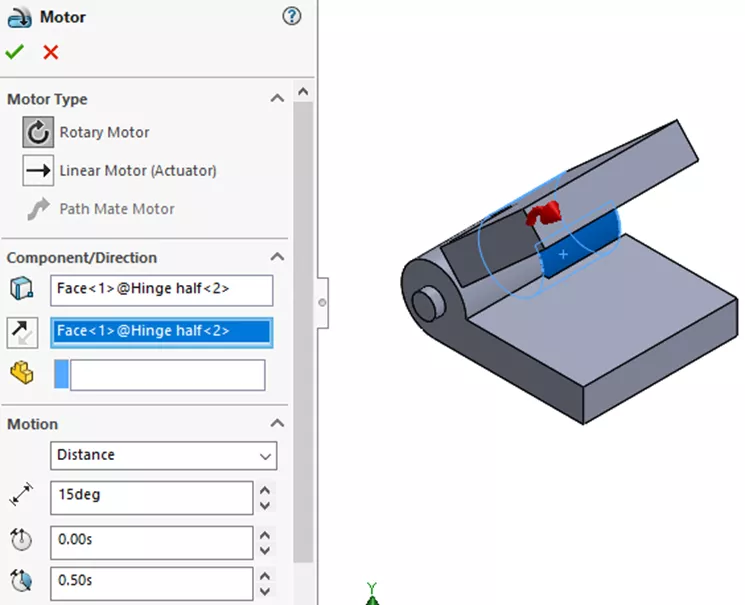
Figure 7: Motor PropertyManager
The goal is to press the hinge down, then observe how the spring causes it to bounce back to the starting position. To accomplish this, we only want the motor to run for part of the study and will set it to turn off at 0.5 seconds. Move time bar to 0.5 seconds, then right-click on the motor and select Off. This adds a key that sets the motor to be off starting at that time.
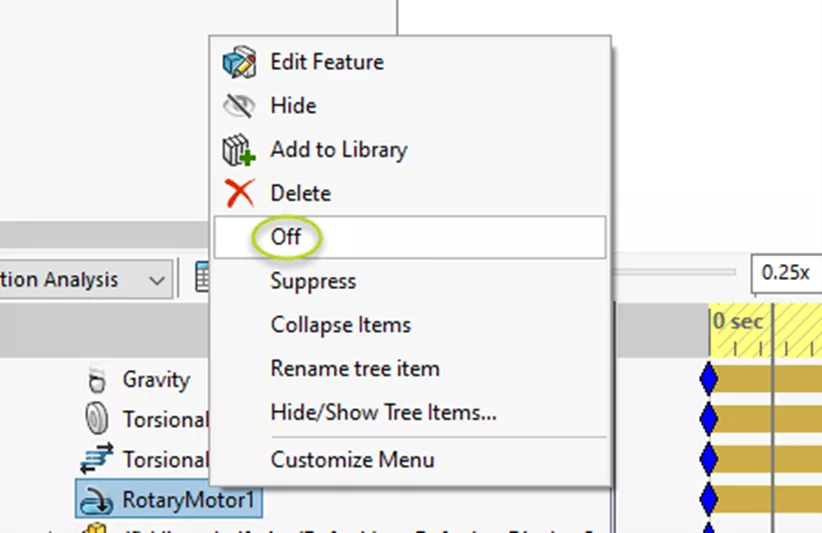
Figure 8: Creating Off key in timeline for motor
If you calculate at this point, you'll see that the spring causes the hinge to rock back and forth after the motor is turned off. To prevent or minimize this, add a damper to the spring. Edit the spring, check the box for Damper, and enter a value for the Damping Constant.
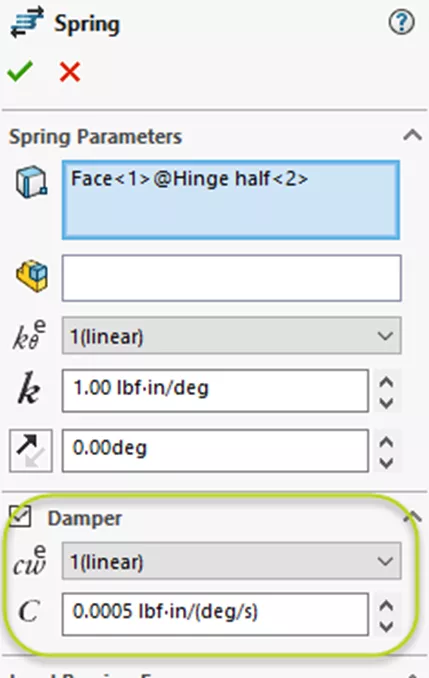
Figure 9: Damper section in Spring PropertyManager
Recalculate again, and you're ready to plot the results of the angle. Click the Results and Plots button above the Timeline to open the Results PropertyManager.
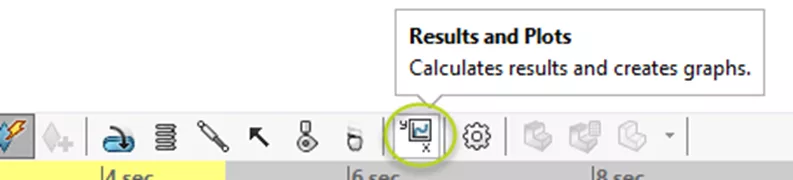
Figure 10: Results and Plots button
Select Displacement/Velocity/Acceleration as the category, Angular Displacement as the sub-category, then select the planar face from the moving hinge-half to create a plot of its angular displacement over time.
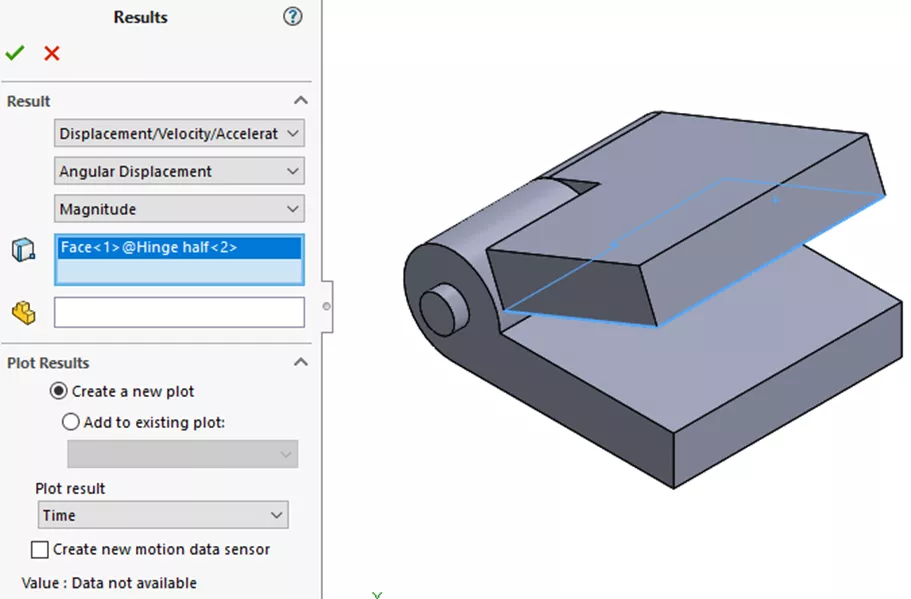
Figure 11: Results PropertyManager
SOLIDWORKS Motion Training
I hope you found this SOLIDWORKS Motion tutorial helpful. To learn more about the topics discussed in this article, enroll in the official SOLIDWORKS Motion Training Course and learn to study kinematics and dynamic behavior of your SOLIDWORKS assembly models.
Related Articles
SOLIDWORKS Motion Study Analysis and Setup Tutorial
SOLIDWORKS Motion Analysis Motor Torque & Power
Save SOLIDWORKS Motion Study Positions
SOLIDWORKS Path Mate Motion Analysis Tutorial

About Lauren McGarry
Lauren McGarry is a Certified SOLIDWORKS Expert based out of San Diego, California. She earned her Bachelor of Science degree from Case Western Reserve University and has been with GoEngineer as a Technical Support Engineer since 2016.
Get our wide array of technical resources delivered right to your inbox.
Unsubscribe at any time.