DraftSight Dimension Tools: Auto Dimension and Smart Dimension
In this quick tip, learn how to quickly add dimensions to your DraftSight drawings using two very helpful tools: Auto Dimension and Smart Dimension.
Auto Dimension
The Auto Dimension tool creates Baseline, Continued, and Ordinate dimensions for your selected entities.
Before using the Auto Dimension tool, you must create a Bounding Box around your sketch entities. (Figure 1)
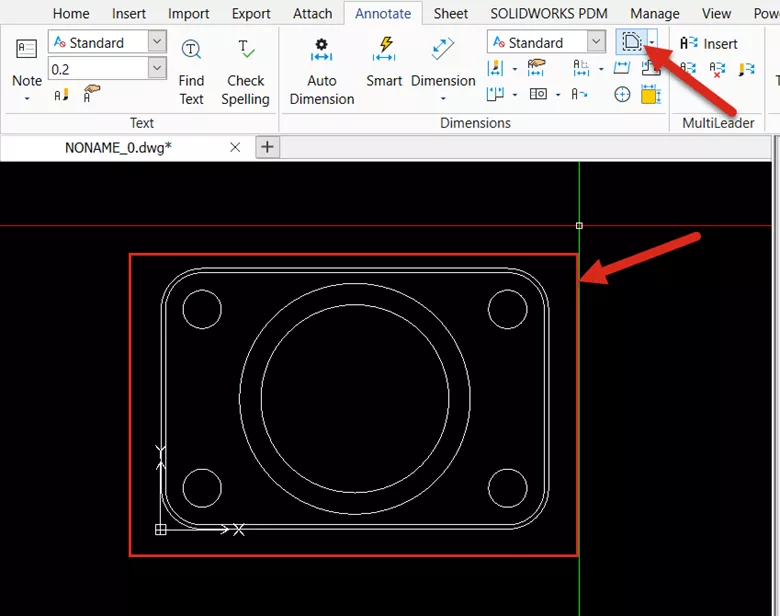
Figure 1: From the Annotate toolbar, click on the Create Bounding Box icon
After clicking Create Bounding Box (Figure 1), window-select all entities in the drawing view. This creates a dashed line surrounding the sketch representing the Bounding Box. (See Figure 2)
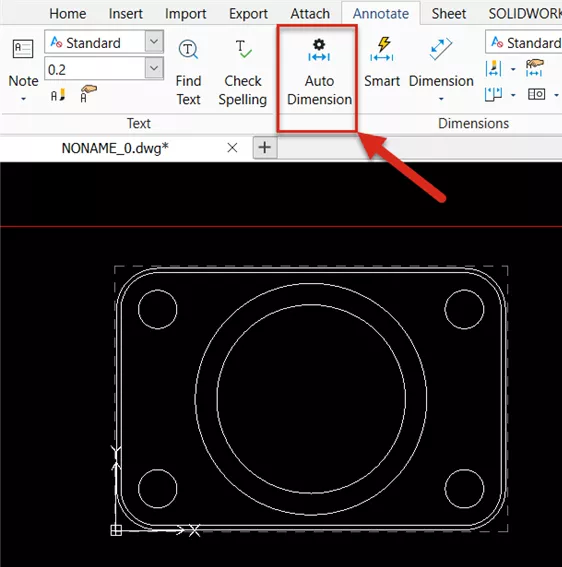
Figure 2: Completed Bounding Box, ready for the Auto Dimension tool
After creating the Bounding Box, select the Auto Dimension tool (Figure 2). In the Auto Dimension Tool are three options for Vertical and Horizontal Dimension Schemes: Baseline, Continue, and Ordinate. (Figures 3, 4, & 5)
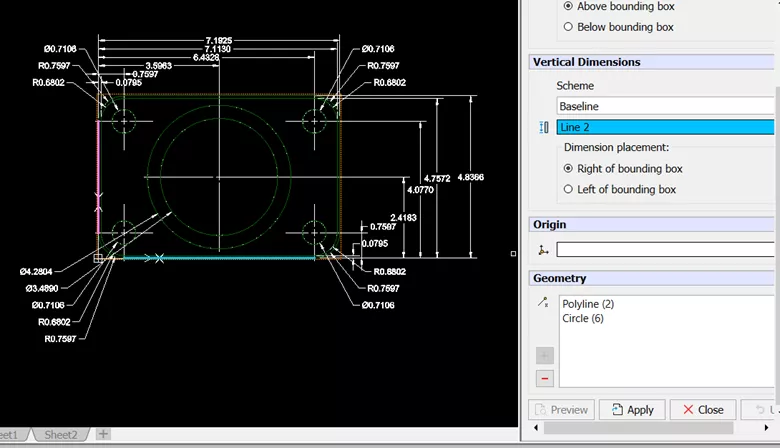
Figure 3: Baseline Dimension scheme
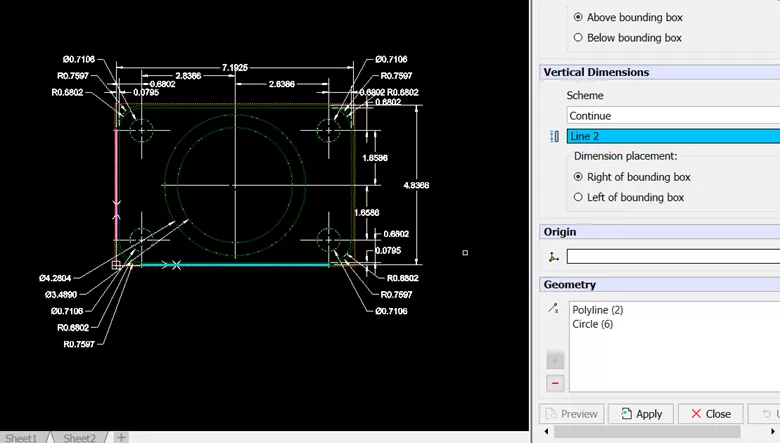
Figure 4: Continue dimension scheme, note the layout changes from that of the Baseline version
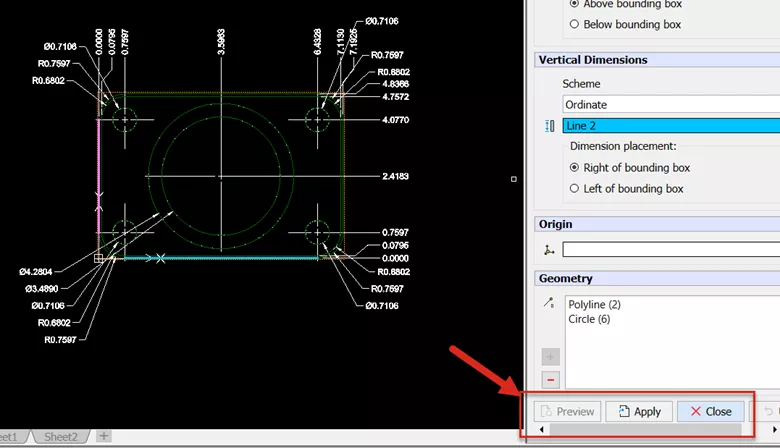
Figure 5: Ordinate Dimension Scheme
Prior to applying the dimension scheme, click Preview to test the Auto Dimension Scheme. In this example, we will select the Ordinate Dimension Scheme (Figure 5). When happy with the selection, click Apply and Close to complete the command.
After applying the dimensions, the Bounding Box is still visible in the model space.
As you can see in Figure 6, the Bounding Box will not be visible in the Sheet Space or printed drawing.
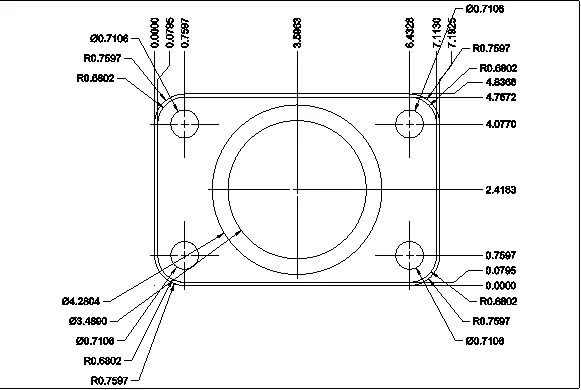
Figure 6: Sheet View – Verifying the Bounding Box is not visible
Smart Dimension
The next tool is the Smart Dimension Tool. The interface is like that of SOLIDWORKS. Click Smart Dimension in the Annotation Tools (Figure 7) and click on the sketch entities. The Smart Dimension tool automatically generates linear, diameter, and radius dimensions. (Figure 8)

Figure 7: Location of the Smart Dimension Tool
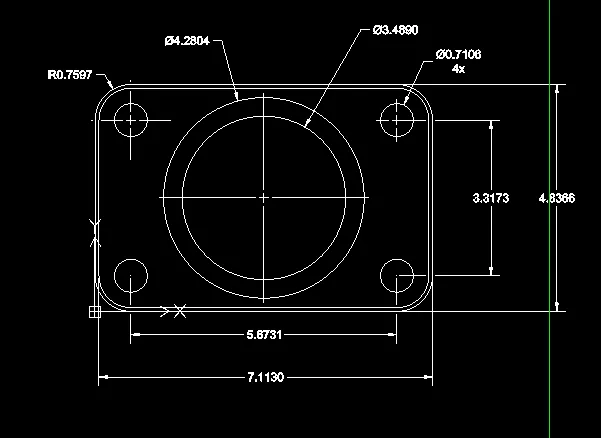
Figure 8: Easily detail drawings using Smart Dimensions
Easily Detail your 2D Drawings in DraftSight
Use either the Smart Dimension or Auto Dimension tools to quickly annotate your drawings. While the Auto Dimension tool quickly dimensions your drawing view in a few steps, the Smart Dimension tool gives you the ability to fine-tune the appearance of your dimension scheme.
I hope you found this DraftSight quick tip helpful. Check out more DraftSight tutorials below.
More DraftSight Tutorials
DraftSight Draw Compare Tool Explained
DraftSight Quick Access Toolbar Customization Tutorial
How to Transfer DraftSight Settings
DraftSight Enterprise Plus with 3D Modeling
![]()
About GoEngineer
GoEngineer delivers software, technology, and expertise that enable companies to unlock design innovation and deliver better products faster. With more than 40 years of experience and tens of thousands of customers in high tech, medical, machine design, energy and other industries, GoEngineer provides best-in-class design solutions from SOLIDWORKS CAD, Stratasys 3D printing, Creaform & Artec 3D scanning, CAMWorks, PLM, and more
Get our wide array of technical resources delivered right to your inbox.
Unsubscribe at any time.