How to Fade Geometry in SOLIDWORKS Visualize Professional
In this guide, we discuss how to fade geometry in and out within SOLIDWORKS Visualize Professional. When working with assemblies, it can be important to show internal functions. We can utilize the animation functions in Visualize Professional to fade away geometry and reveal internal components.
Getting Started
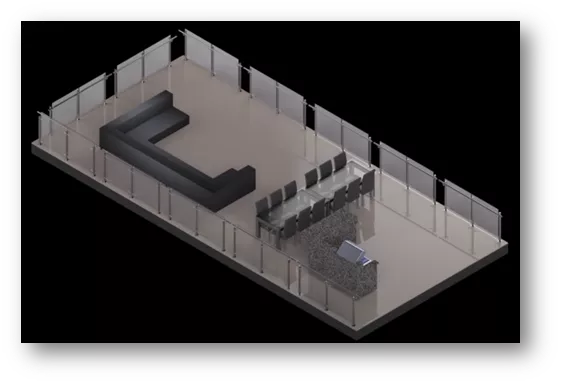
In this example, we have a layout of a patio with furniture. We will create an animation to fade out the furniture and zoom in on a handrail.
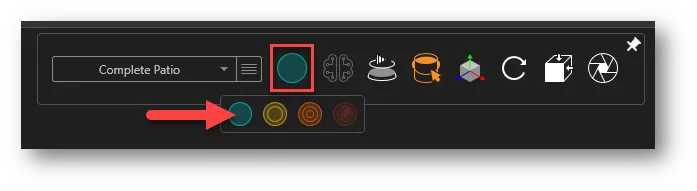
In Visualize, switch the 3D Viewport to Preview Mode. Doing so will allow for a more responsive interaction with the design and place less of a burden on the CPU.
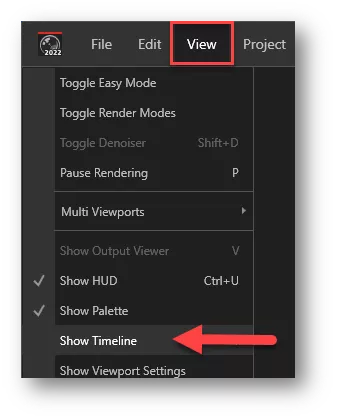
Because we will be working with animations, go to the View menu and choose Show Timeline. This will bring up the timeline at the bottom of the Visualize interface.
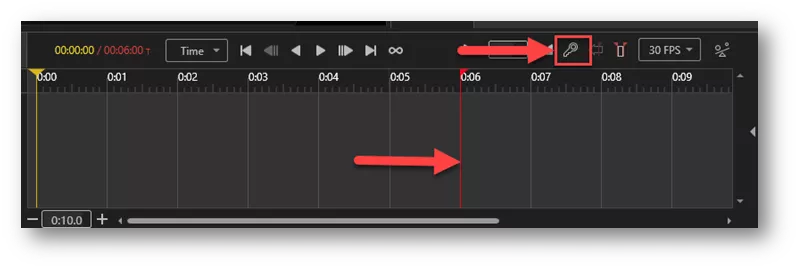
On the Timeline toolbar, turn off Auto Keyframing so we can manually set up key frames.
Drag the red flag to about 6 seconds on the timeline. Now we are ready to start adding key frames.
Creating the Annimation
For the remainder of this tutorial, we will create key frames to set the opacity and camera angles of components along the timeline.
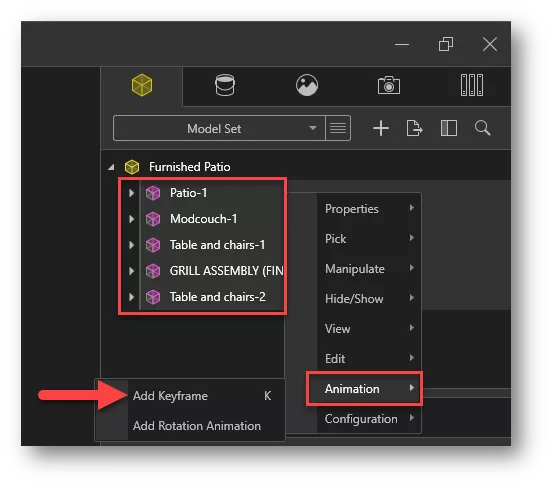
Switch to the Model Tab and hold SHIFT to select all the model groups, then right-click, go to Animation, and click Add Keyframe.
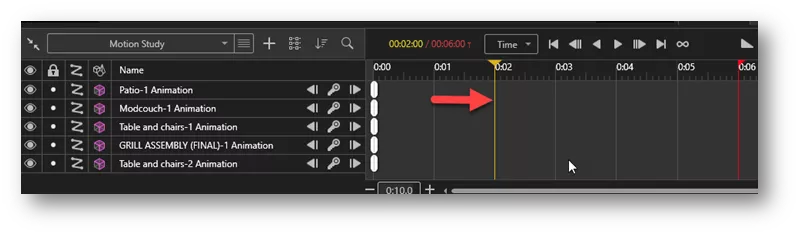
All the components are added to the timeline. Drag the yellow flag to about 2 seconds.
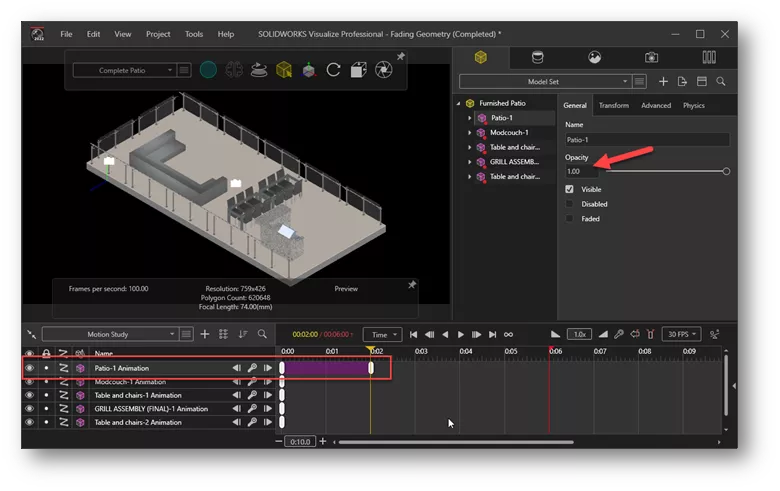
Click on the Patio-1 model and, under the General Tab, make sure the Opacity is set to 1.
Next, right click on the Patio-1 model and add another keyframe. This creates a new keyframe for the patio at 2 seconds with full opacity.
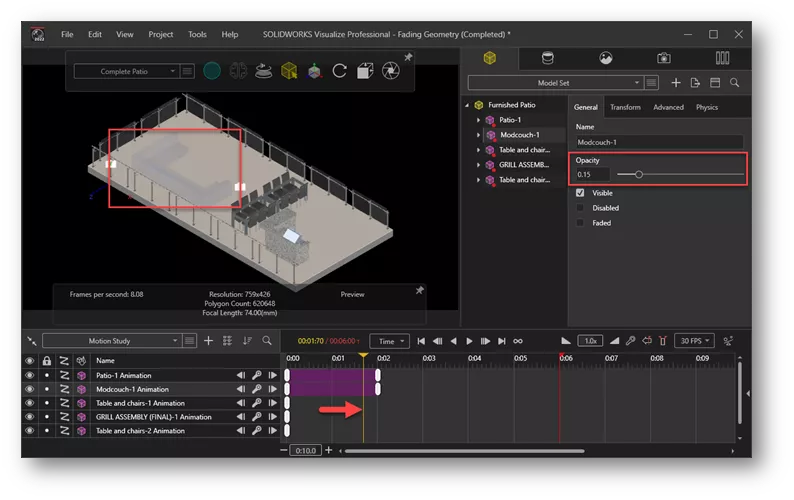
For the couch model, I will set the opacity to 0, then-right click on the model and add another keyframe. The couch disappears.
Moving the yellow slider from 0 to 2 seconds shows the couch fading out. Also, notice the opacity slider moving from 1 to 0 as the yellow slider moves along the timeline.
Repeat the steps of setting the opacity to zero and creating keyframes for the rest of the furniture.

For the next phase of the animation, we will zoom in on one of the handrail assemblies and hide all other components.
First, expand the Patio-1 group and add a keyframe for the Parts to Hide model.
Move the yellow flag to about 4 seconds on the timeline, set the opacity of Parts to Hide to zero, then right-click on the model and add a keyframe.
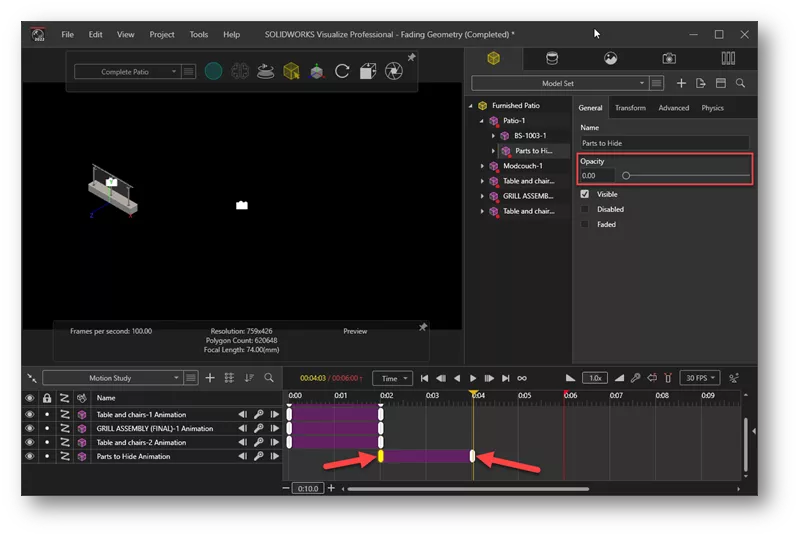
Moving the yellow slider from 2 to 4 seconds will show the patio and remaining handrails fading out completely.
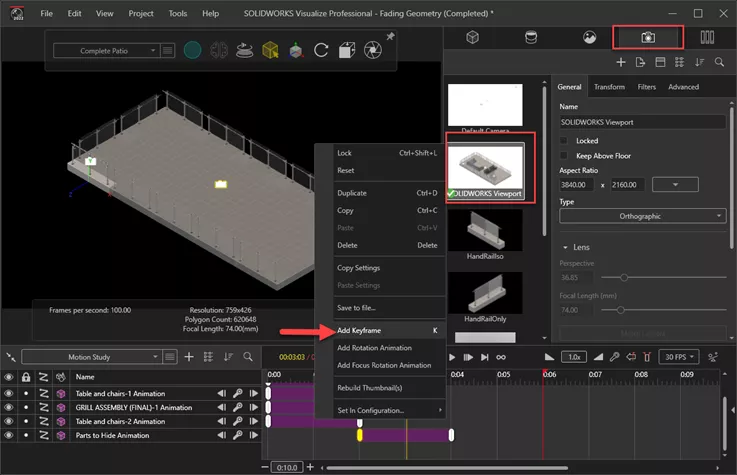
To zoom in on the handrail, switch to the Camera tab, move the yellow slider to about 3 seconds, then right-click on the active camera and add a keyframe.
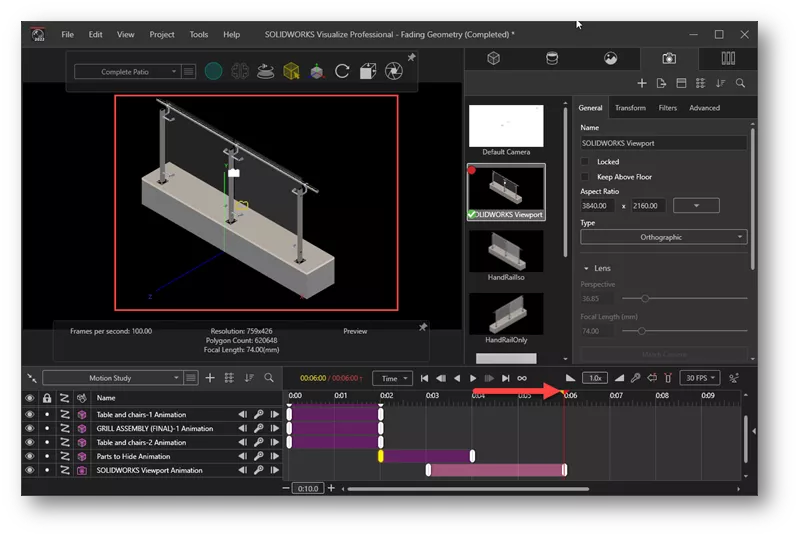
Move the yellow slider to the end of the animation (6 second mark) and hover over the 3D Viewport and use the middle mouse button to zoom into the remaining handrail.
Right-click on the active camera and create the last keyframe. Play the animation to see all the transitions.
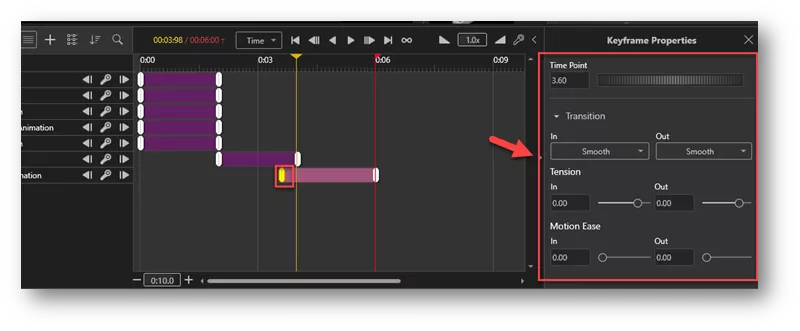
To make a change to the time point on one of the keyframes, click on the desired keyframe, then select the arrow beside the timeline to reveal the Keyframe Properties. From there, you can change the Time Point and tweak the Transitions as desired.
Video Demonstration
Check out our YouTube video for a demonstration of Fading Geometries.
![]() SOLIDWORKS Visualize - Fading Geometry
SOLIDWORKS Visualize - Fading Geometry
I hope you found this SOLIDWORKS Visualize tutorial helpful. Check out more tips and tricks listed below.
More SOLIDWORKS Visualize Tutorials
SOLIDWORKS Visualize Appearances and Hardware Utilization
SOLIDWORKS Visualize 2022: New Shadow Catcher, Camera Views, Animations, & More
SOLIDWORKS Visualize Error Unable to Connect to Queue
How to Use SOLIDWORKS Configurations in Visualize

About Zach Brown
Zach Brown is a certified SOLIDWORKS Expert and a Technical Support Engineer. Prior to working at GoEngineer, he spent 15 years as a mechanical designer, CAD support tech, and instructor using SOLIDWORKS. His hobbies include playing guitar, riding motorcycles, and skiing.
Get our wide array of technical resources delivered right to your inbox.
Unsubscribe at any time.