Introducing GrabCAD Print Support Generation for Origin One
In the latest release of GrabCAD Print , users with an Origin One 3D printer can now add support structures to their parts within the software. This is a major improvement from the previous workflow, which required numerous programs to properly add support structures and prepare print jobs. Additional functionalities have been included to the software, leading to more efficient processing of print jobs. In this article, we will cover the new workflow for preparing print jobs and supporting parts in GrabCAD Print for the Origin One.
Industrial Origin One users will benefit from these updates and have access (free of charge) upon upgrading to the latest version. Dental users will have access to these features and an even more improved workflow with one click to print.
Tray Settings
After a part has been properly loaded into GrabCAD Print, the material and support profile for the tray should be selected.
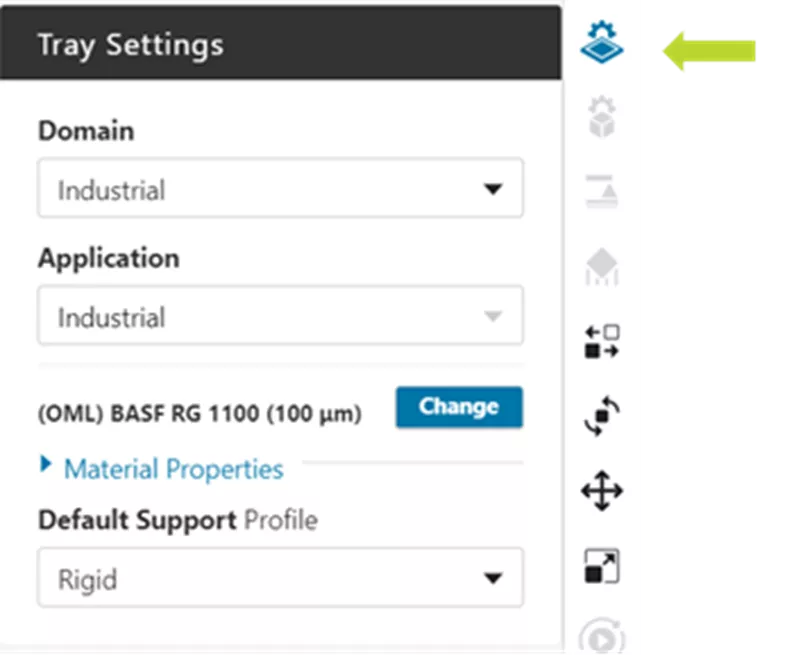
- Select the material using the blue change button.
- Select the support profile using the dropdown list. This will default the tray and all additional parts to this support strategy.
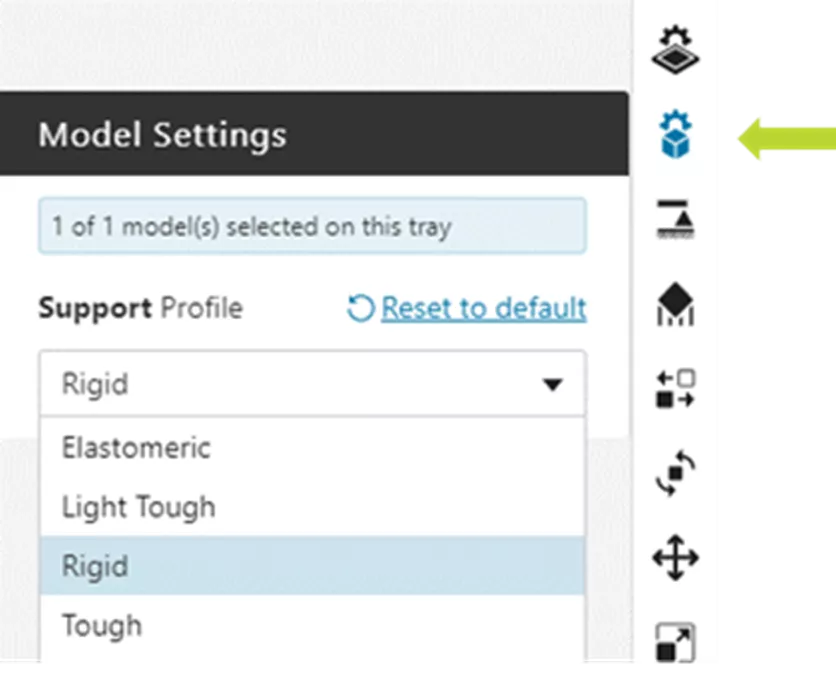
- Alternatively, individual parts may be selected and set to a different support profile using the model settings tab.
Orient Parts
Part orientation now offers the ability to automatically orient selected parts for minimum supported area, minimum height, or maximum models. The minimum supported area option is based on the support profile used and the minimum printable overhang angle. Traditional methods of manually entering values and orient face to plane still exist and can be used instead.

Tip : Don’t forget to enable Fit to Tray for large parts!
Generate Anchor Points
Anchor points tell the software where support structures should be placed on the part(s). By selecting the model and entering the anchor points tab, a visualization of surfaces less than the self-supporting angle will be displayed in blue.
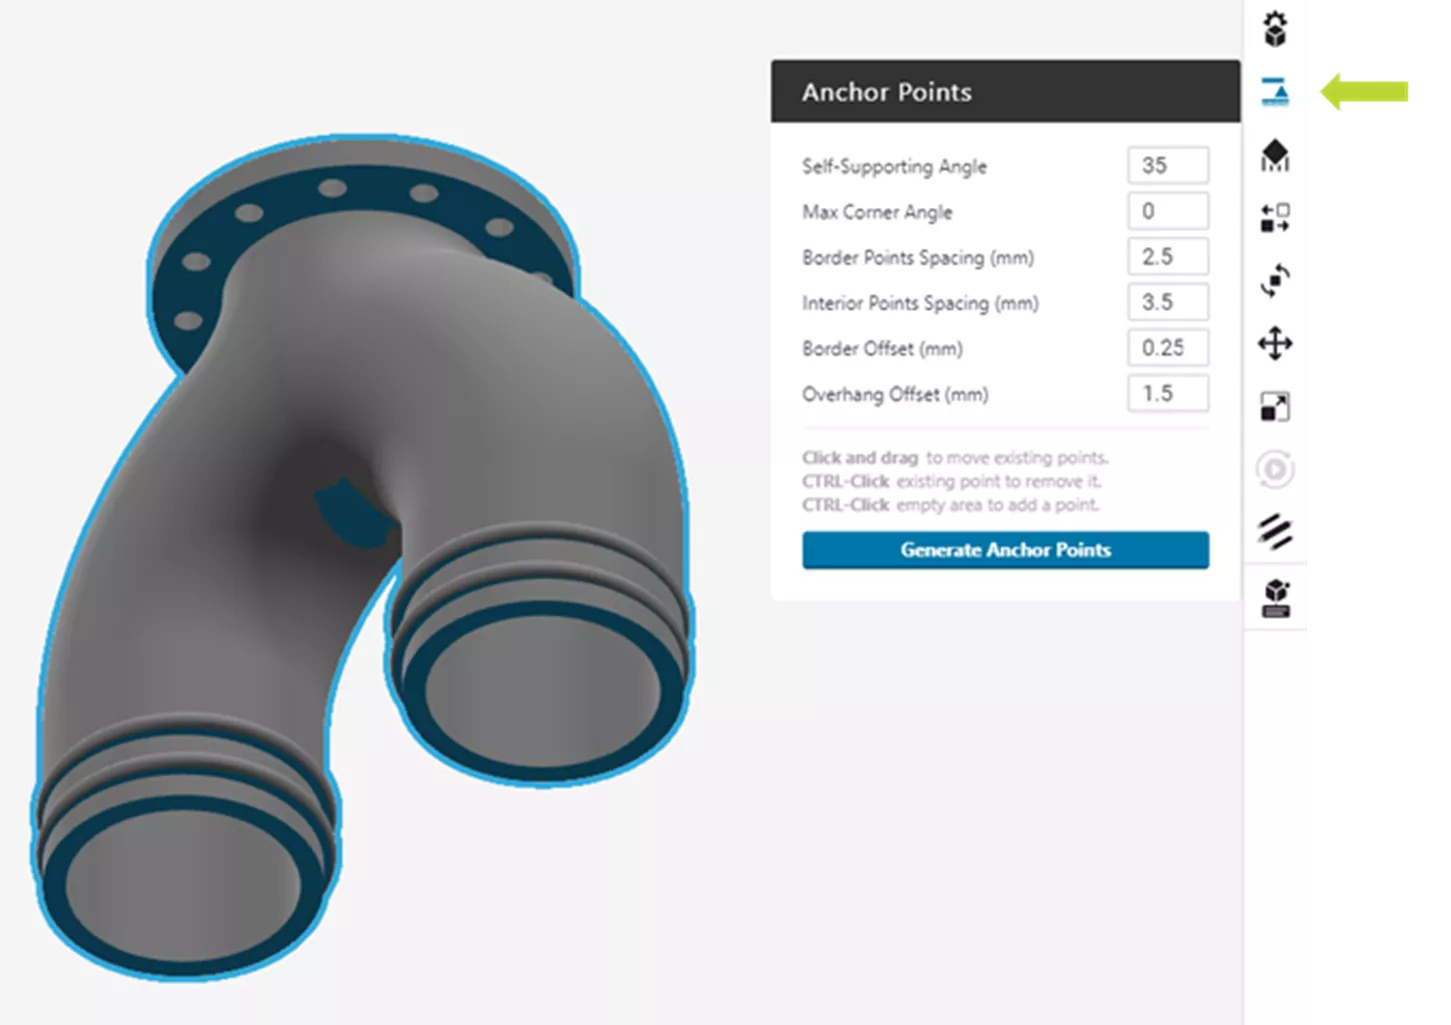
Click Generate Anchor Points to automatically have GrabCAD Print determine where anchor points should be placed within the respective regions.

Anchors can be
- Moved with left-click and drag
- Added with CTRL + left-click
- Removed with CTRL + left-click
Generate Support
Support structures will be generated from the anchor points by entering the support tab. The software will try to generate support structures extending to the build tray, but if the geometry prevents this, part to part geometry will be created.
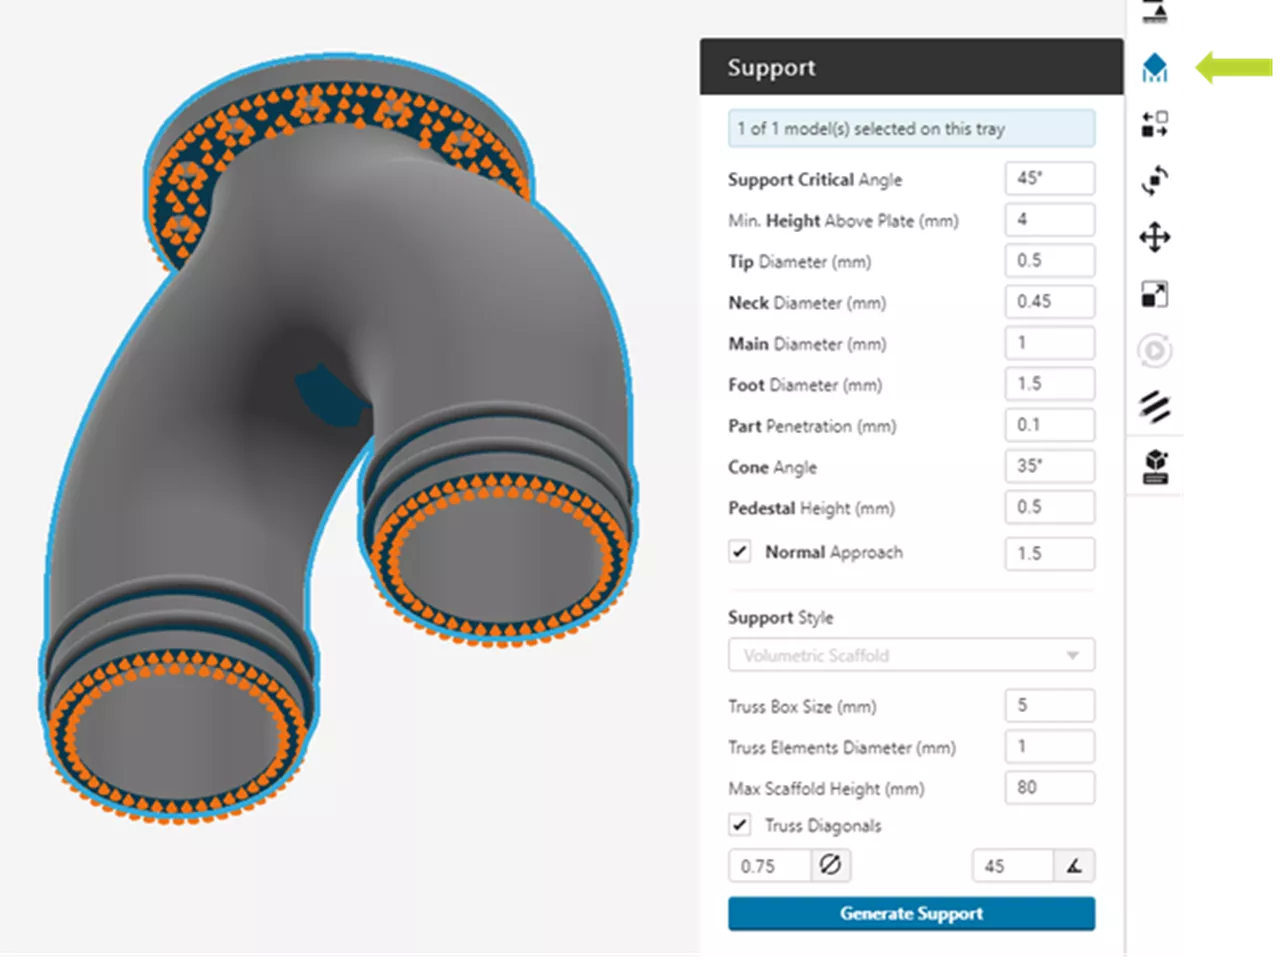
Click Generate Support to have GrabCAD Print automatically generate support structures from the placed anchors.
If the generated support does not appear adequate or needs modification, changing the field values will adjust the geometry (or robustness) of the supports - not the spacing or locations. If the anchor spacing/points need to be changed, head back to the anchor tab.
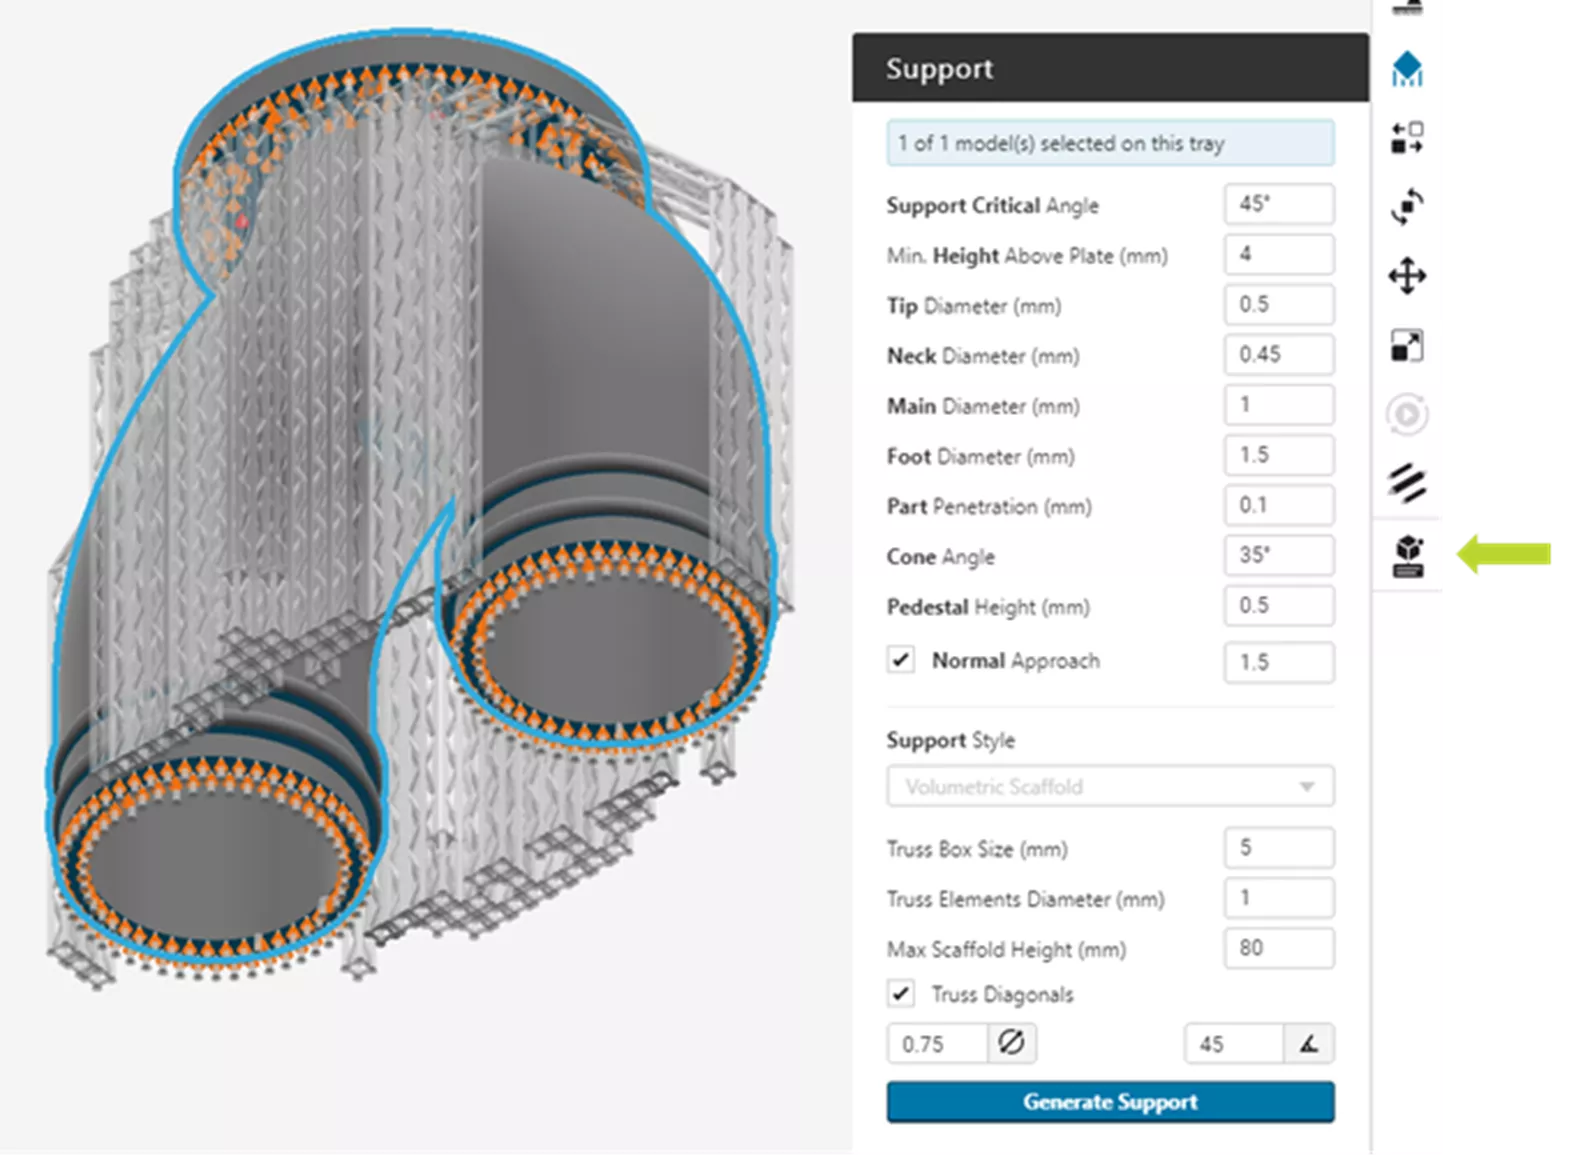
Tip: By right-clicking on the part, support structures may be edited or deleted.
Part to Part Support
Occasionally, part to part support structures will be required or preferred over generating the supports to the build tray. In the event that manual part to part support is needed, these should be created prior to letting the software automatically generate the remaining supports. Click Add to begin manually placing support structures on the part.
- Left-click on the desired area to place the first anchor.
- Left-click again to place the second anchor.
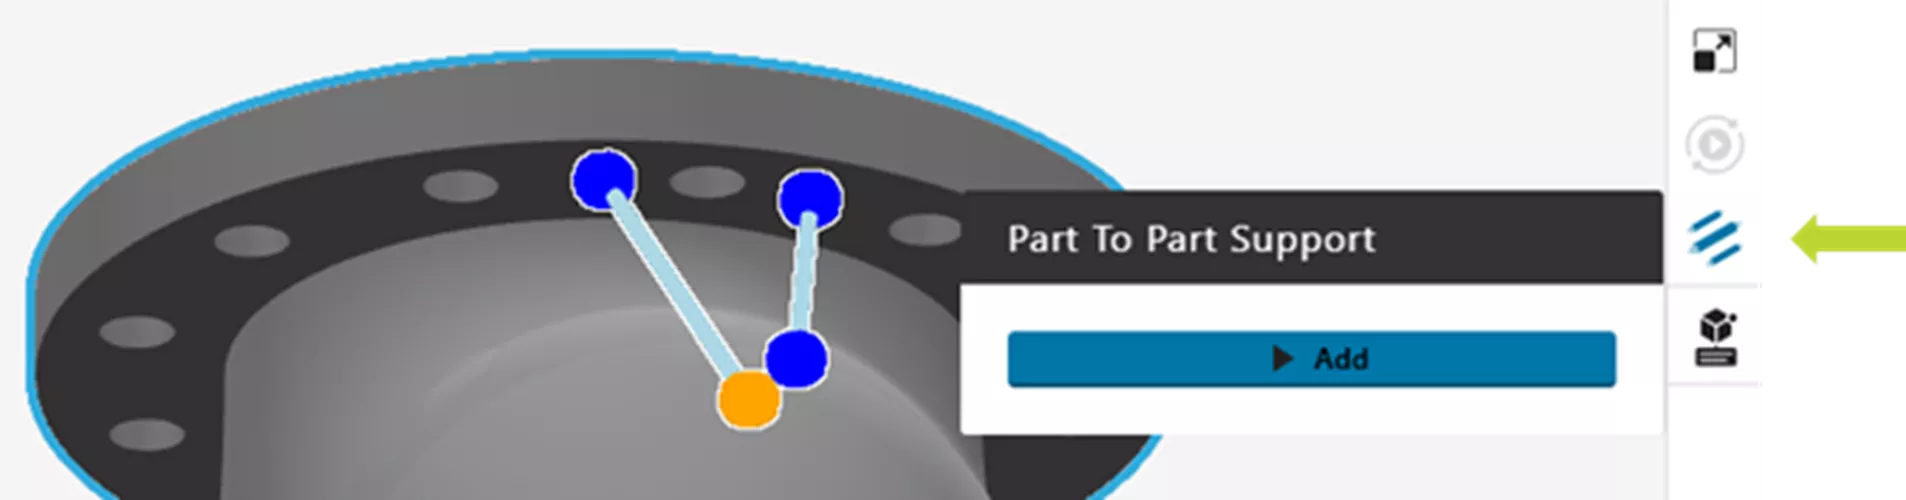
Click Pause Add to reposition the anchors and briefly exit the anchor placement screen. 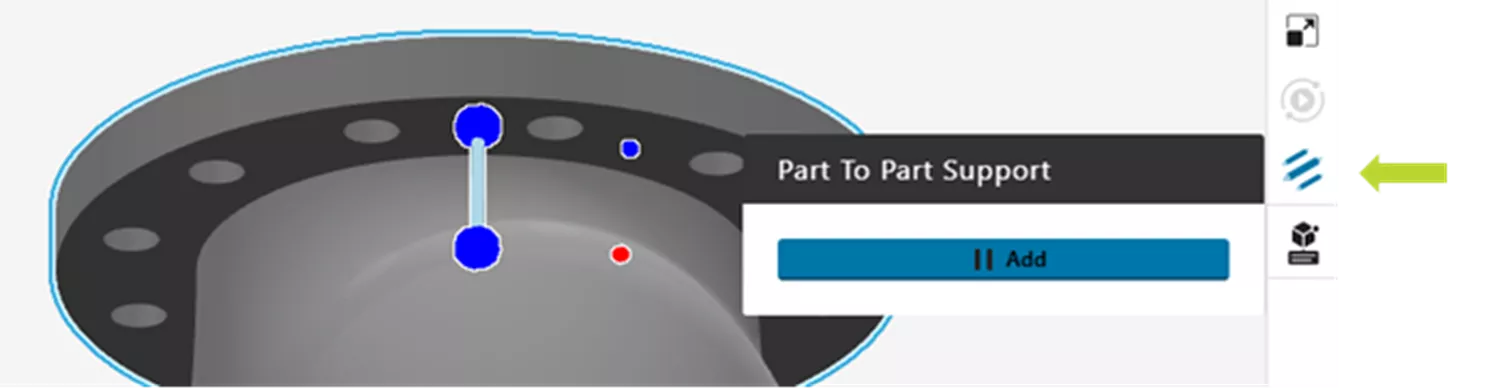
- Continue manually placing supports until satisfied. A pop-up will appear at the top of the screen prompting you to update the model geometry.
Print Parts
At this point, the model(s) should be properly supported and ready to print. If multiple copies of a part need to be made, they can now be duplicated after support is generated. Sending the job over is the same as before by using the blue print button. If there are any unsupported anchors or changes to the print settings, GrabCAD will have a pop-up acknowledgment alert which must be confirmed prior to printing.
If you are using the Origin One and GrabCAD Print and would like additional training or resources, contact the GoEngineer Additive Manufacturing team to provide who can provide the latest documentation and training. Stay tuned for more updates as new features will continue to be added to the software.
Related Articles
Stratasys Origin One Exploratory Open Materials
Concept to Production 3D Printing: How it Works
Experts in Additive: 3D Printing with GoEngineer
![]()
About Hunter Bernstein
Hunter Bernstein is an Additive Manufacturing Applications Engineer based out of Salt Lake City, UT. He joined GoEngineer in July of 2021 bringing with him nearly 10 years of knowledge and passion for 3D printing. Hunter graduated from the University of Utah with a Mechanical Engineering Degree, is a Certified SOLIDWORKS Professional, Certified Stratasys Application Engineer, and recognized by the NCEES. He has a professional background in solid mechanics, mechanical design, CAD/CAM, manufacturing processes, automation, and additive manufacturing.
Get our wide array of technical resources delivered right to your inbox.
Unsubscribe at any time.