Using Ground Planes in SOLIDWORKS Visualize for More Realism & Control

Table of Contents
SOLIDWORKS Visualize is an awesome tool for creating quick renderings of your CAD models. Adding shadows and reflections to the ground is only a click away in your scene options, but what if you need more control over what’s being rendered or reflected on the ground? This article demonstrates tips and tools you can use to make your floor look its best and tell a better story in your renders.
Floor Control
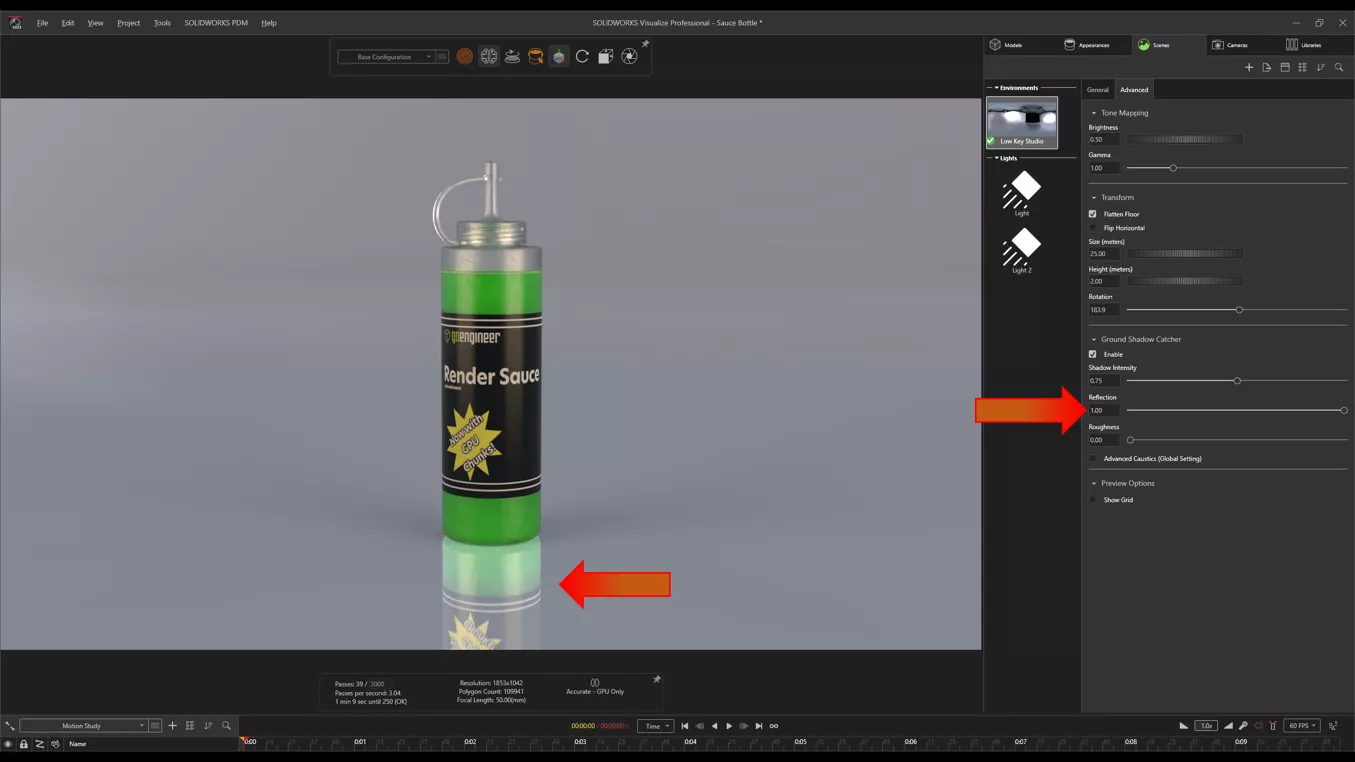
The Scene tab contains settings to turn on reflections, roughness, and even caustics. This default ground shadow catcher is infinite, meaning it will never show the edges of the floor in the background, no matter the camera angle.
Primitive Shapes
What if you want a specific material on the floor? Visualize can add primitive shapes to the scene and can use their own appearances.
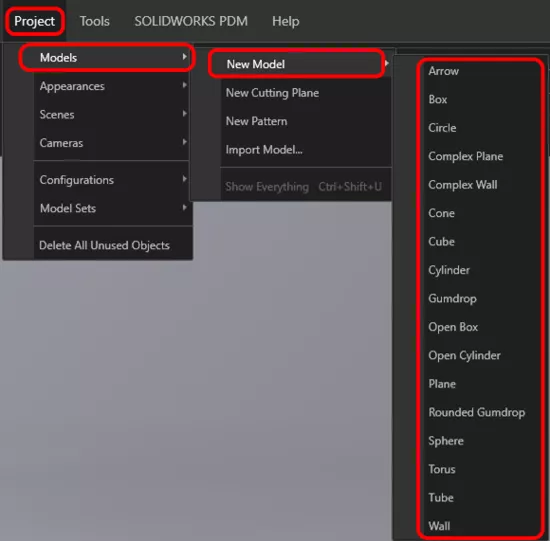
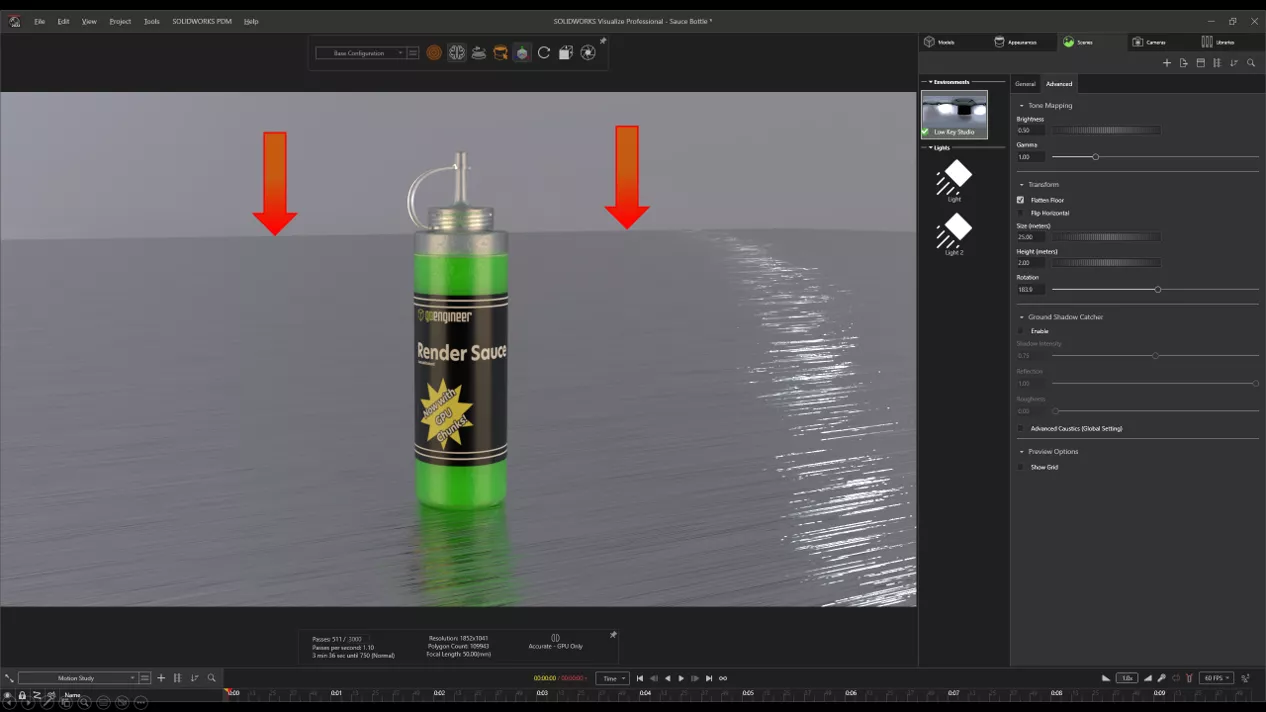
I added a "plane" primitive to the scene and snapped it to the floor, giving it a stainless steel appearance, which looks great. However, I can easily see the edge of the plane against the background when using lower camera angles. (Make sure to disable the scene floor shadow, as this new object will now receive shadows.)
Alpha Texture Masks
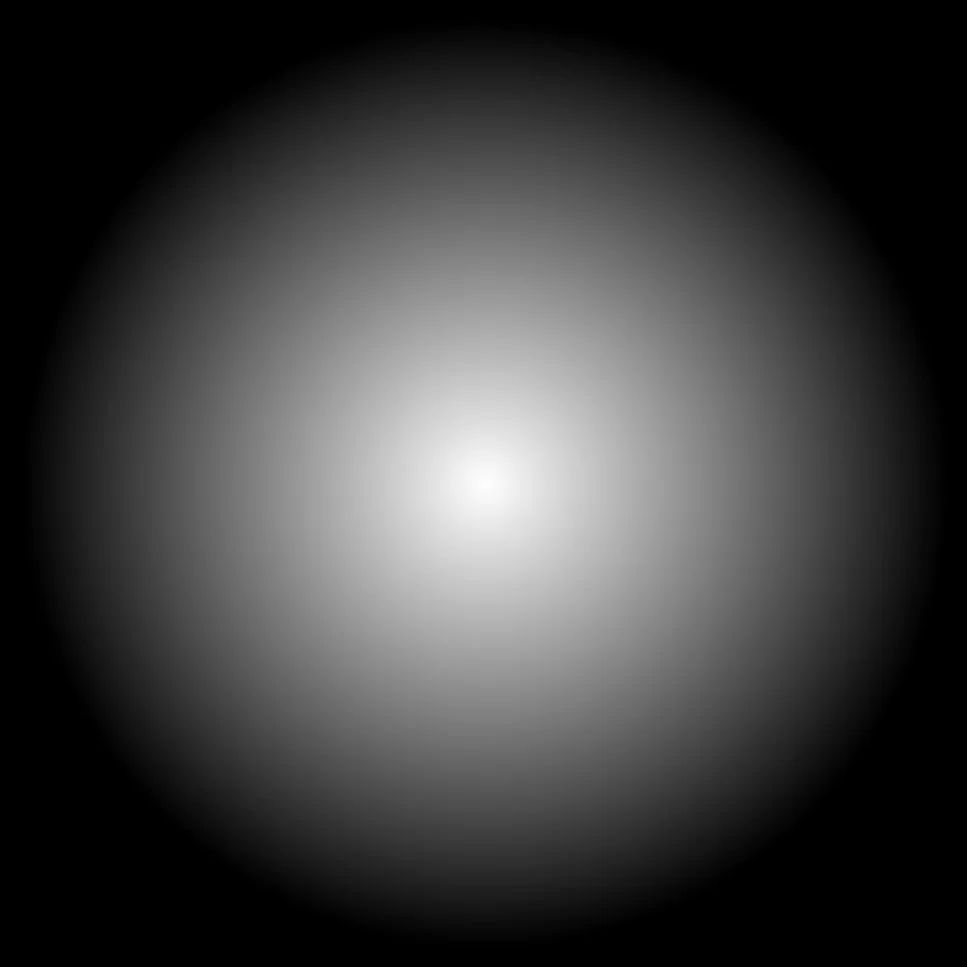
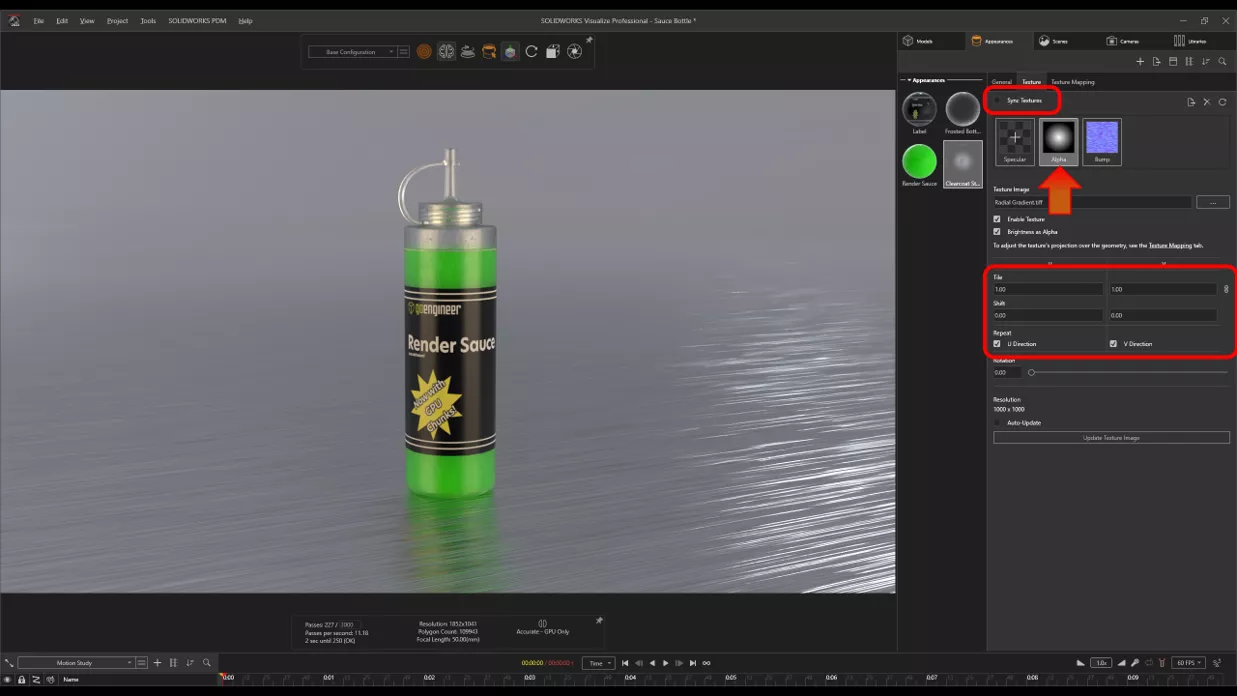
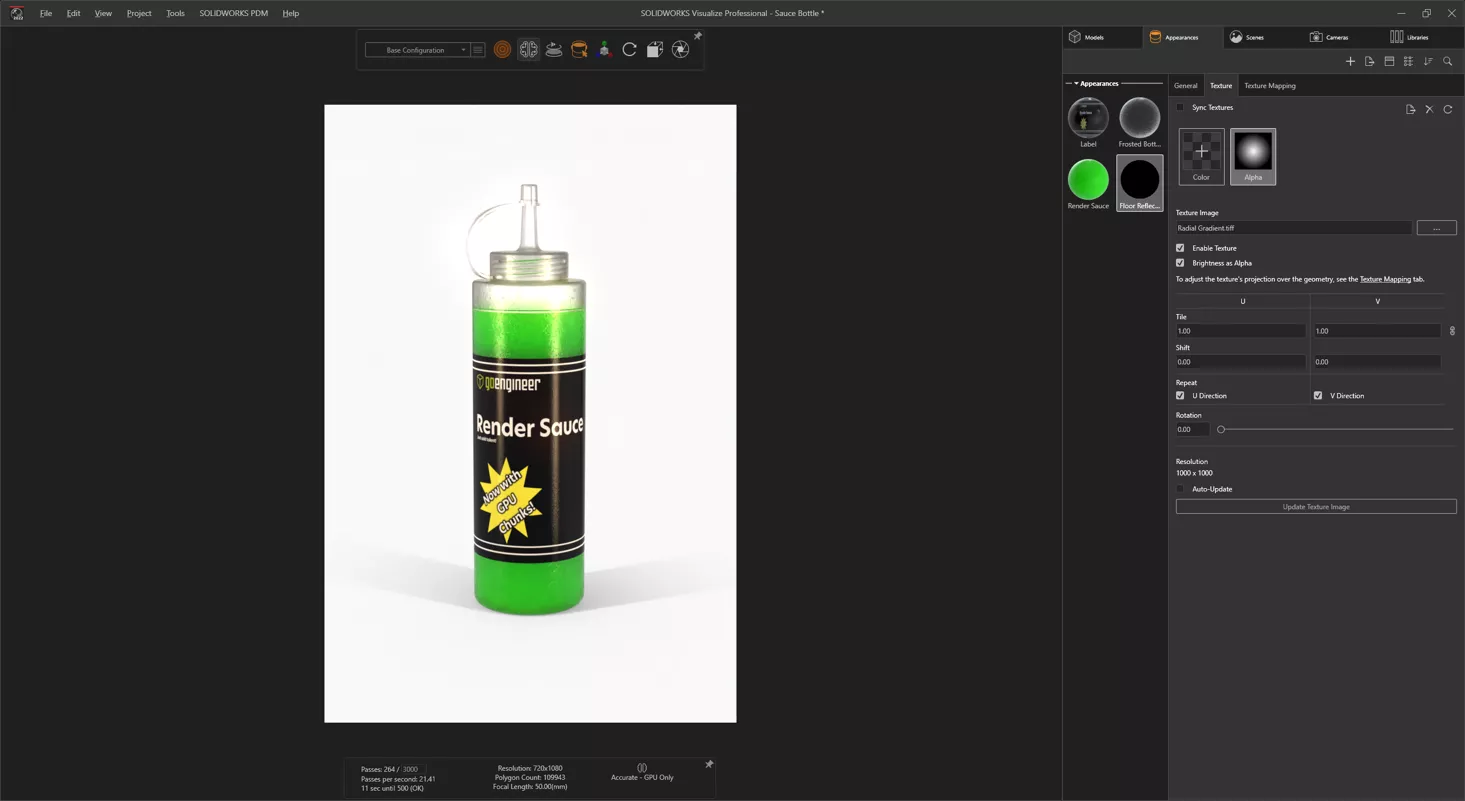
To blend out the horizon, I’ll add an alpha texture, giving the appearance that the floor disappears into the background. This mask is simply a white circle with a gradient to black at the edges. Anything black will be invisible, fading into the material at the center.
Make sure to disable sync textures so that you don’t scale the other textures in your appearance; in this case, a normal map for the stainless brushed surface. Now set tile scale to 1 for U and V with no Shift. This will make the alpha texture fit the object exactly.
Shadow Catcher Objects
What if you want to see the environment through the floor and use a custom roughness or water-like appearance? This is where things get interesting…
Primitive shapes can also be turned into shadow catcher objects that work similarly to the default scene floor, but can also use appearances and textures.
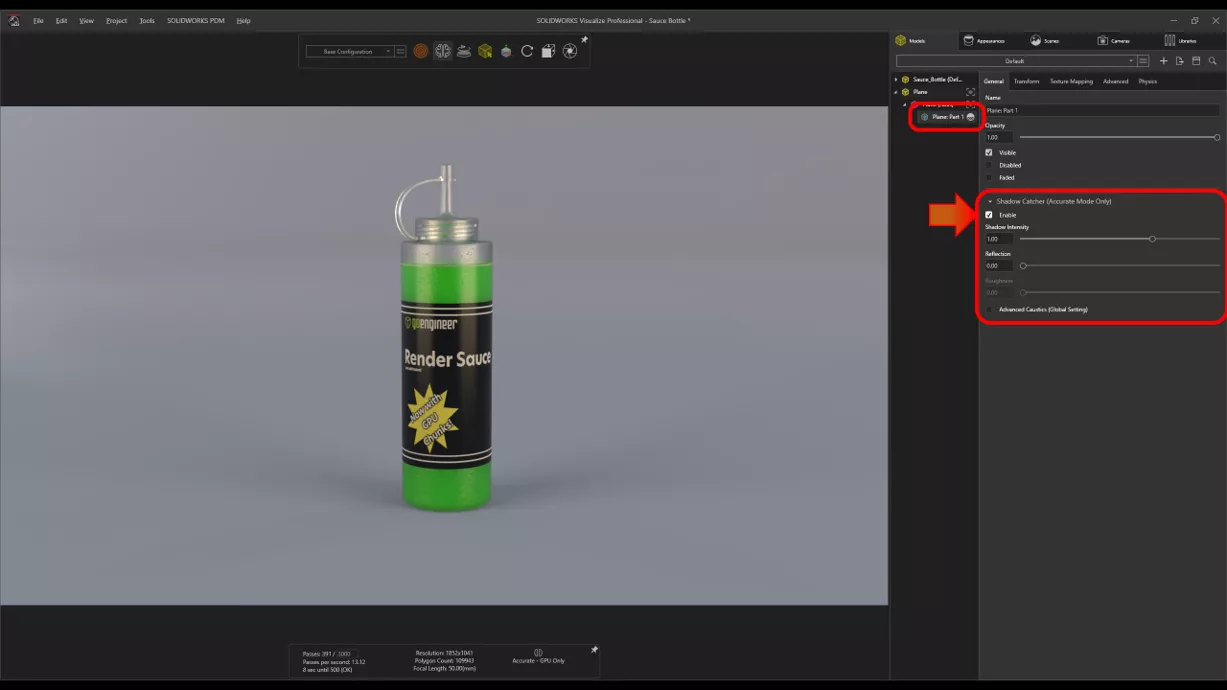
The best materials to use are glass and metal. Glass gives the appearance of water and is more subtle. Metal gives a very dramatic reflection like a mirror.
Custom Appearances with Shadow Catchers
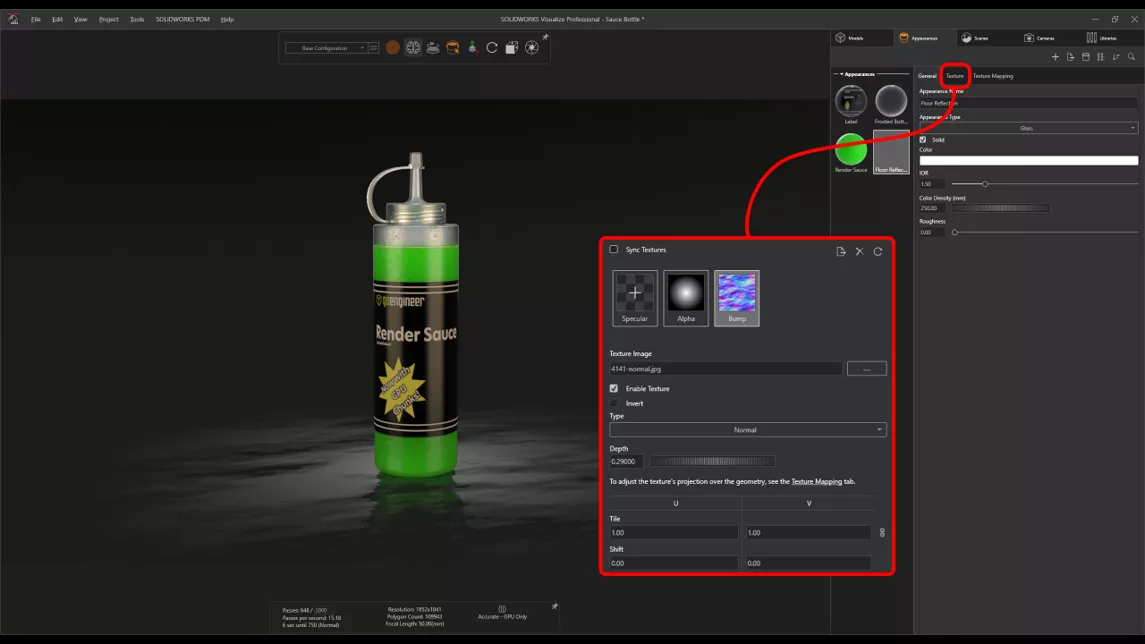
Using the bump texture channel, you can fine-tune the reflection to simulate the surface of water or wet asphalt, depending on the texture map used.
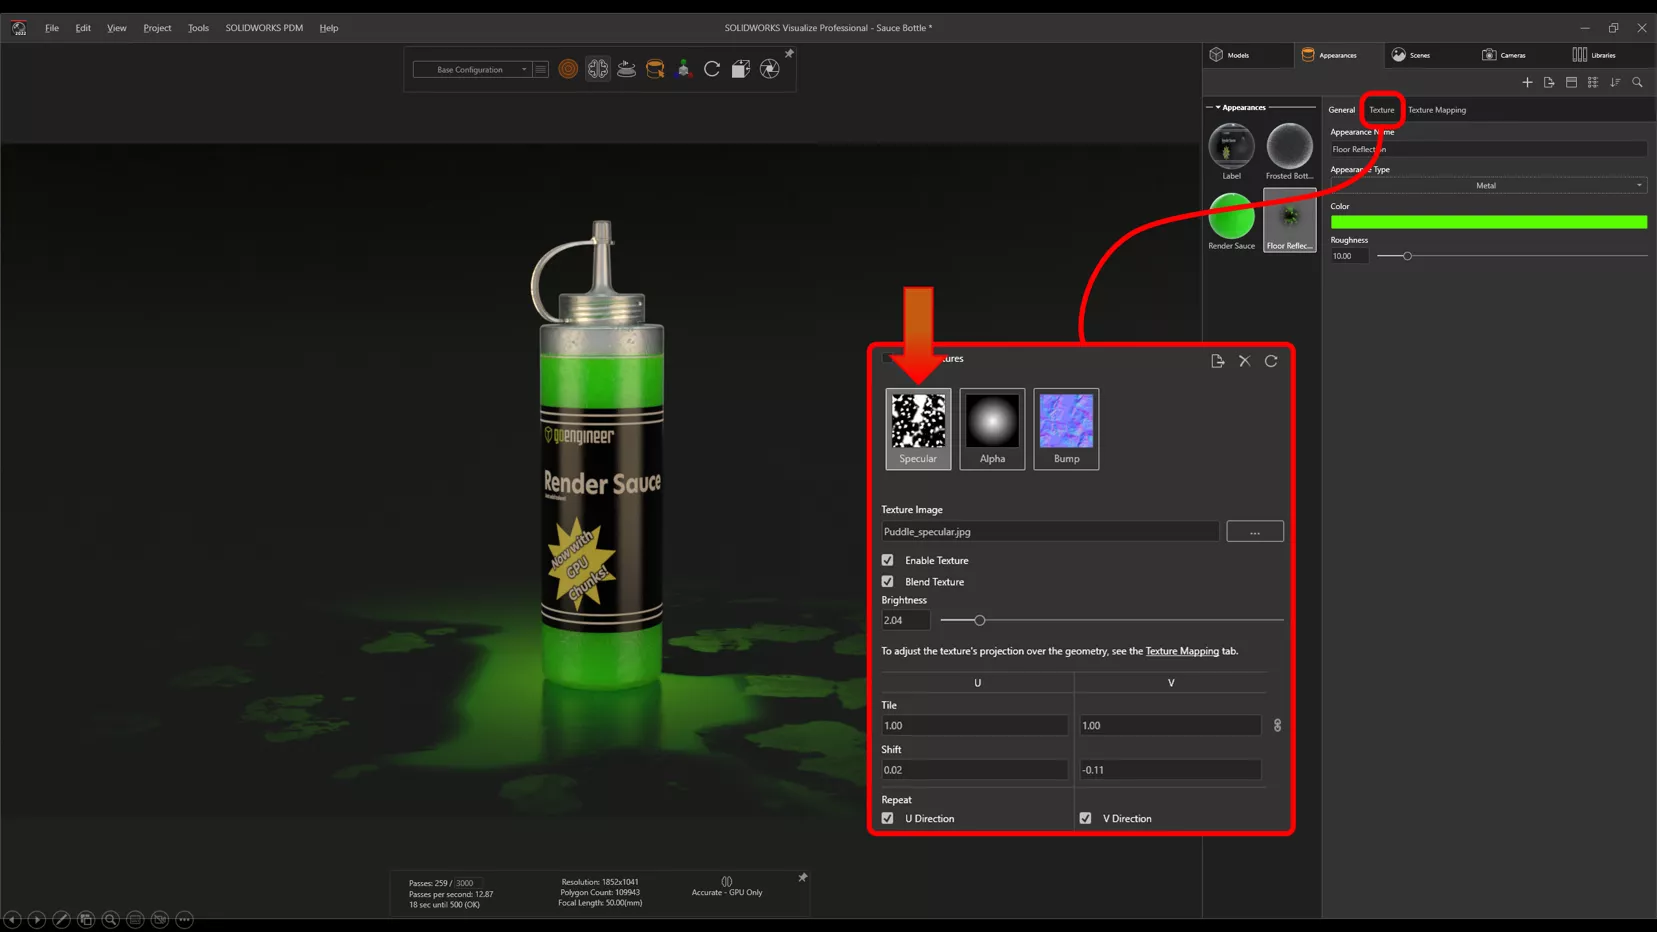
Adding a specular map will further refine the level of reflection for certain areas. The texture should be black and white or varying levels of grey, where black areas are perfectly rough (or zero reflection), and white is 100% reflective (with grey areas somewhere in between).
Limit Shadows
Another use for the alpha texture is to limit the reach of shadows on the floor. In this scenario, the shadows extend out of frame.
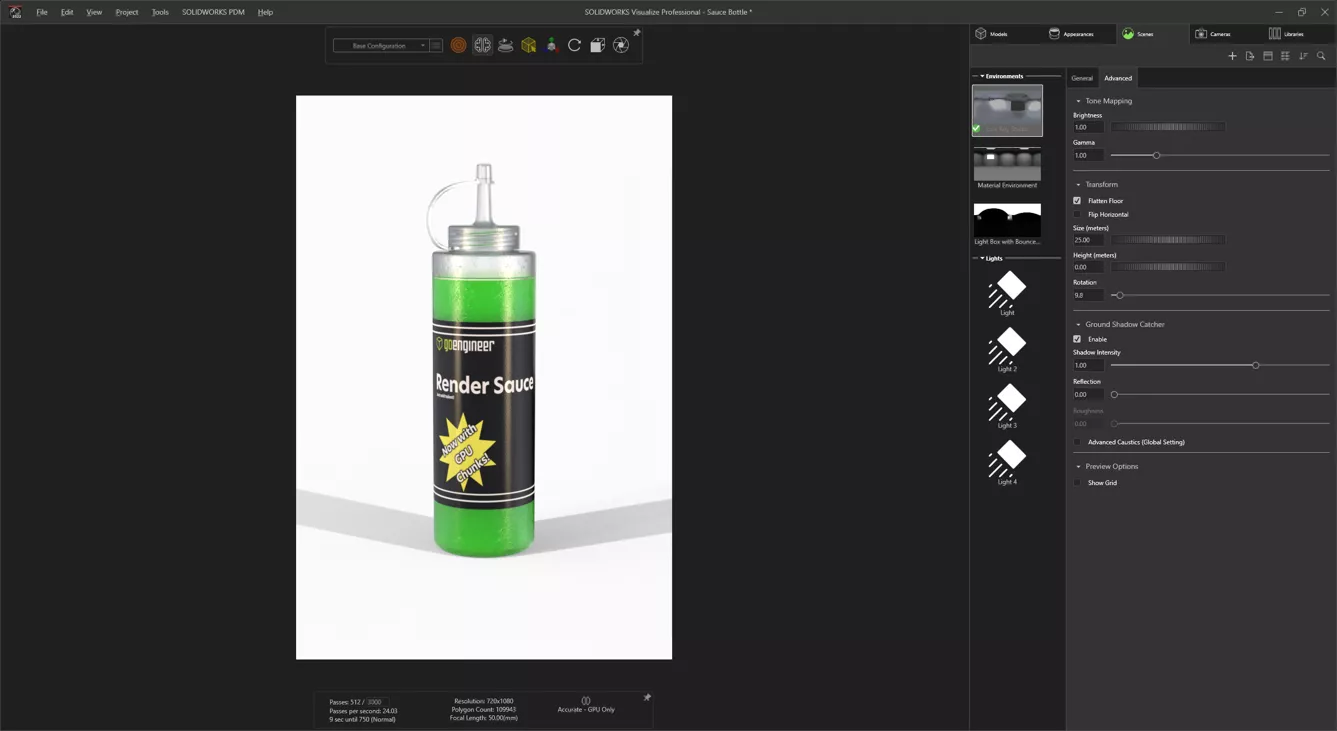
Using a shadow catcher object and an alpha mask, we can control the shadows precisely.
Now you have the knowledge to add some additional character to your renders! Want to learn more about SOLIDWORKS Visualize? Check out more tips and tricks from our team below. Additionally, join the GoEngineer Community to create forum posts and answer questions from other SOLIDWORKS users.
Related Articles
How to Create a Sunlight Environment in SOLIDWORKS Visualize
Adding Color to SOLIDWORKS Visualize Projects
SOLIDWORKS Visualize Appearances: DSPBR Base Parameter Group Explained
SOLIDWORKS Visualize Viewport Size and Resolution Settings

About Alex Worsfold
Alex Worsfold is a Certified SOLIDWORKS Expert (CSWE) and Sr. Application Engineer at GoEngineer.
Get our wide array of technical resources delivered right to your inbox.
Unsubscribe at any time.