How to Install 3DEXPERIENCE CATIA
In this tutorial, we provide step-by-step instructions for how to install 3DEXPERIENCE CATIA. If you encounter any problems following these steps, do not hesitate to submit a support ticket on the GoEngineer customer portal or email our support team at support@goengineer.com.
This installation guide will demonstrate the following information:
- Retrieve Installation Files
- Install 3DEXPERIENCE CATIA
- Install 3DEXPERIENCE Content
- Install the Dassault Systèmes License Server (DSLS)
- Enroll the .LICZ File(s)
- Create DSLicSrv.txt File (For Privately Hosted DSLS)
- Enabling Port Access Through Firewall (for Privately Hosted DSLS)
- First Launch of CATIA
Retrieve Installation Files
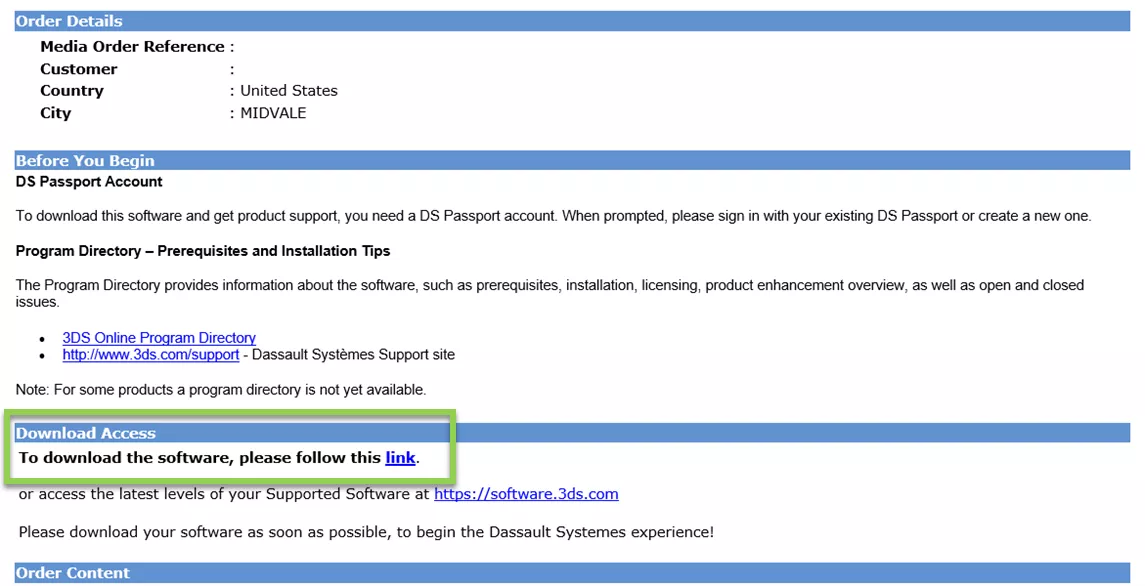
Step 1: After your order is complete, the primary contact for your company will receive an email from “AG.MOC@3ds.com,” which provides a link to the installation content. If you do not know who the designated primary contact is within your company, reach out to the Sales Representative at GoEngineer who assisted you with your 3DEXPERIENCE CATIA purchase.
The link can be found in the Download Access section of the email. After opening the link, you will be prompted to create a 3DS login. Please use the same email address that is on file for your company’s primary contact with GoEngineer. If you are unsure which email to use, contact your GoEngineer Sales Representative.
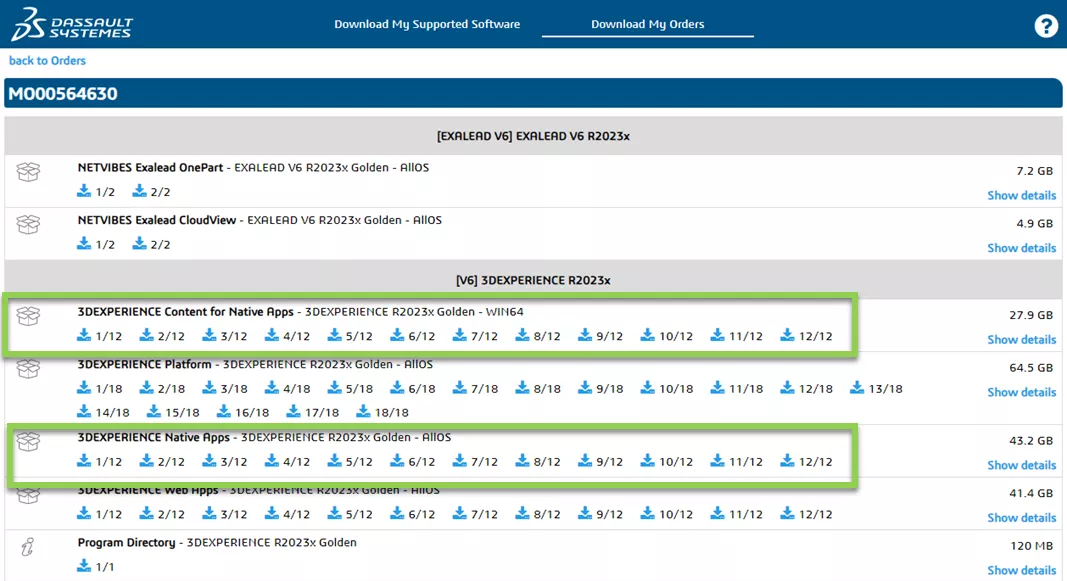
Step 2: Once the primary contact has created a 3DS account, they will be redirected to their Media Order Page. Once on this page, you may have to select Download My Orders on the topmost banner to see your files. At this stage, you will need to download each attachment for the data listed as “3DEXPERIENCE Native Apps” and (optionally) “3DEXPERIENCE Content for Native Apps.”
Install 3DEXPERIENCE CATIA
Step 1: Before installing your 3DEXPERIENCE CATIA software, ensure that the machine you plan to install CATIA on meets the requirements for a Dassault Certified Workstation here.
Note: The use of Remote Desktop Connections can work to run CATIA. However, you may be limited by the configuration of the remote connection software. A certified machine, as per the link above, cannot be guaranteed to run CATIA properly when accessed through a remote connection.
Step 2: Create a directory on your local drive. Move all downloaded installation files to this directory. Avoid using special characters and spaces when naming the folder. The directory path cannot exceed 180 characters in length. You may place these files on your Desktop to help avoid this. This folder (including all installation files) may be deleted after completing the installation processes.
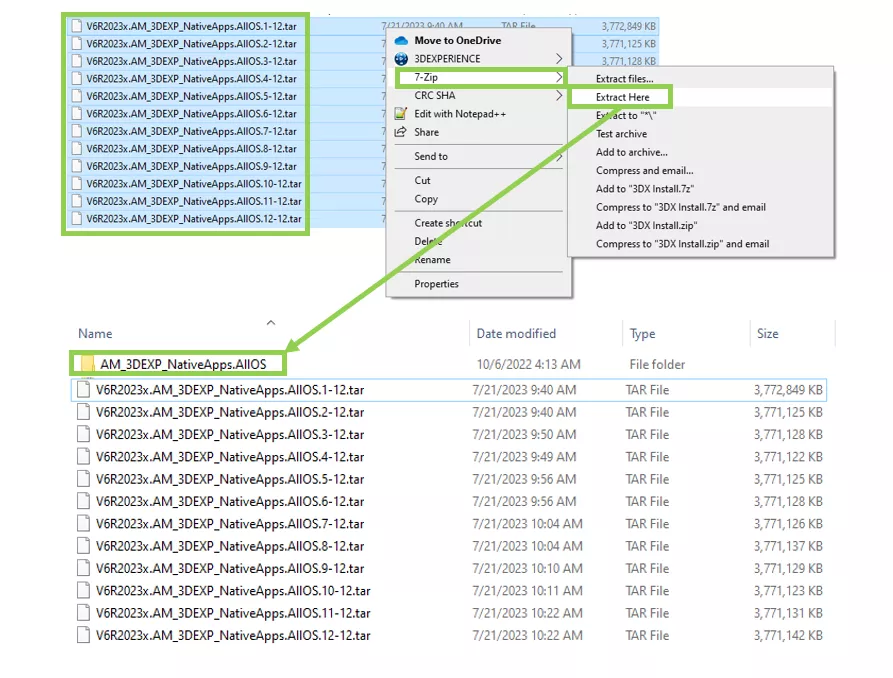
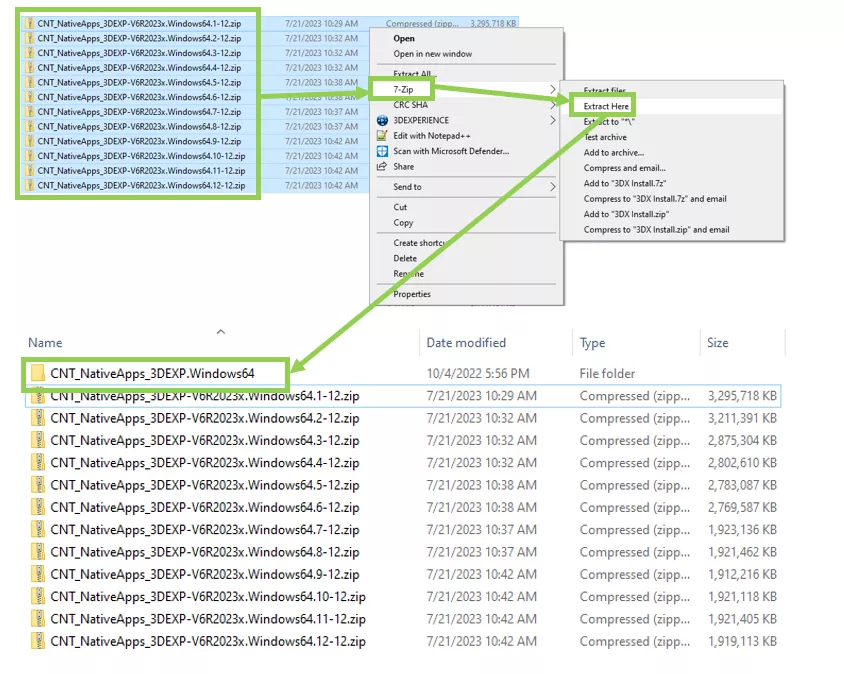
Step 3: Multi-select all folders pertaining to the Native Apps portion of your install and extract them. To ensure you are selecting every folder, pay attention to the numbers at the end of the file name. For example, in the image below, the first .tar file is “V6R2023x.AM_3DEXP_NativeApps.AllOS.1-12.tar.” In this file name, the “1-12” denotes that this file is 1 of 12 and that we would expect 11 more files to be associated with Native Apps and to be extracted simultaneously.
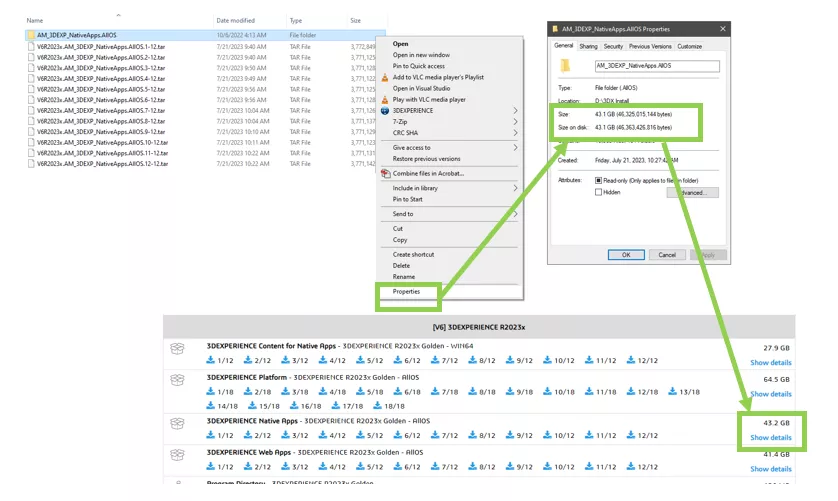
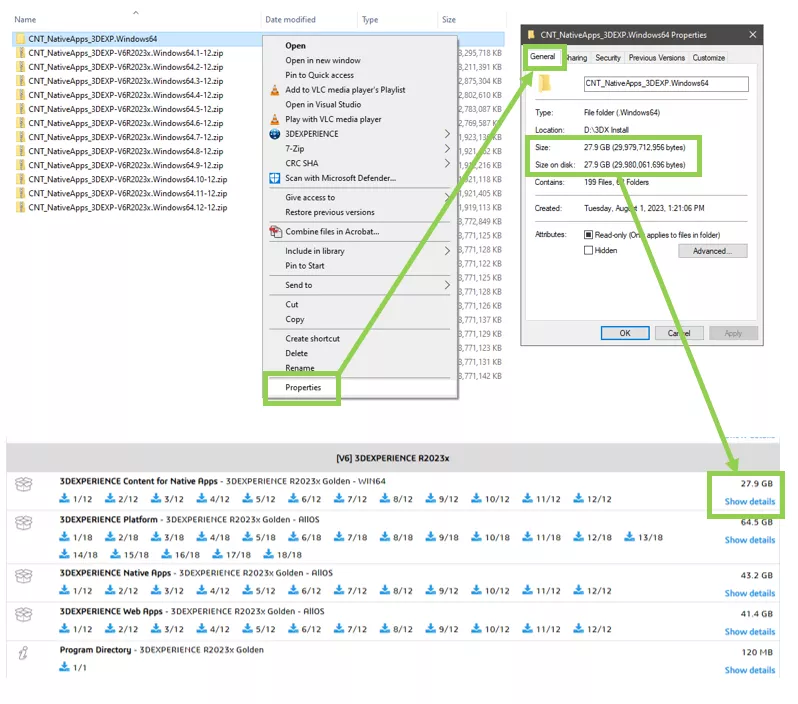
If done correctly, all zip folders selected will be extracted into a single folder. The size of this folder will approximately match what is listed within your media download link. To display the size of the folder, right-click the folder, select Properties, and navigate to the General tab. Notice in the example below that the Size/Size on disk of the folder is 43.1GB and is listed as 43.2GB on media download page. If the difference is more than ~0.1GB, you should attempt to re-download the software.
Note: You may need a third-party unzipping tool to do this properly. We suggest using 7-Zip, which can be downloaded here: https://www.7-zip.org/download.html. When using 7-Zip, you can right-click after multi-selecting and choose 7-Zip > Extract Here.
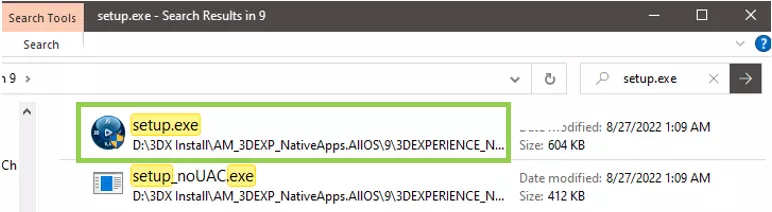
Step 4: Open the resulting folder from the previous step. Using the Search bar at the top right of the window, search for a folder named 3DEXPERIENCE_NativeApps. Open this folder.
Within the folder, use the Search bar to search for setup.exe. Double-click on the setup file to start the installation.
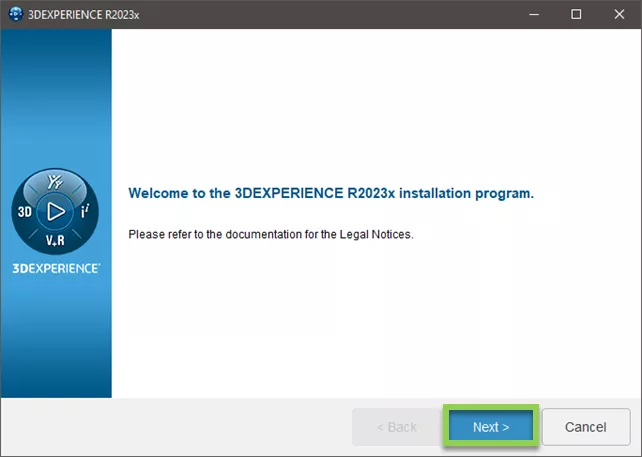
Step 5: The install wizard for 3DEXPERIENCE CATIA will now open. You can proceed with the default inputs provided within the install wizard. If you wish to modify any input from the default, you may do so at your own discretion. However, we cannot guarantee that your software will function as intended. If you wish to do this, it may be advisable to contact catiasupport@goengineer.com for guidance.
Note: You may be asked throughout the following prompts to create some directories. You must accept these prompts to proceed with the installation.
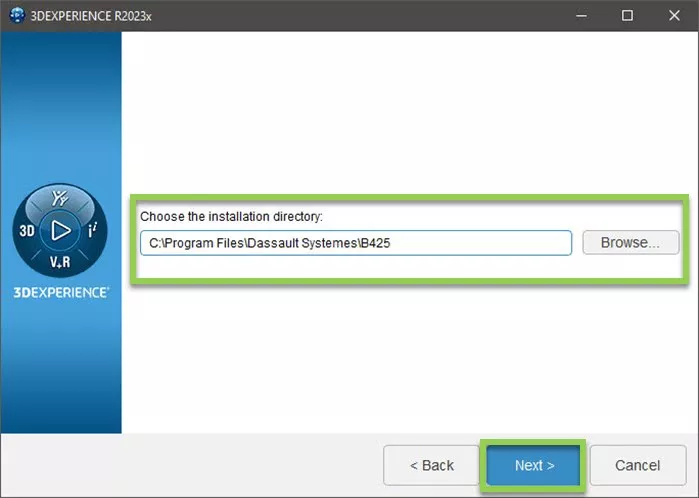
Here, you will choose where to install your 3DEXPERIENCE software. You may choose any location to install it. However, we do recommend installing it in the default location.
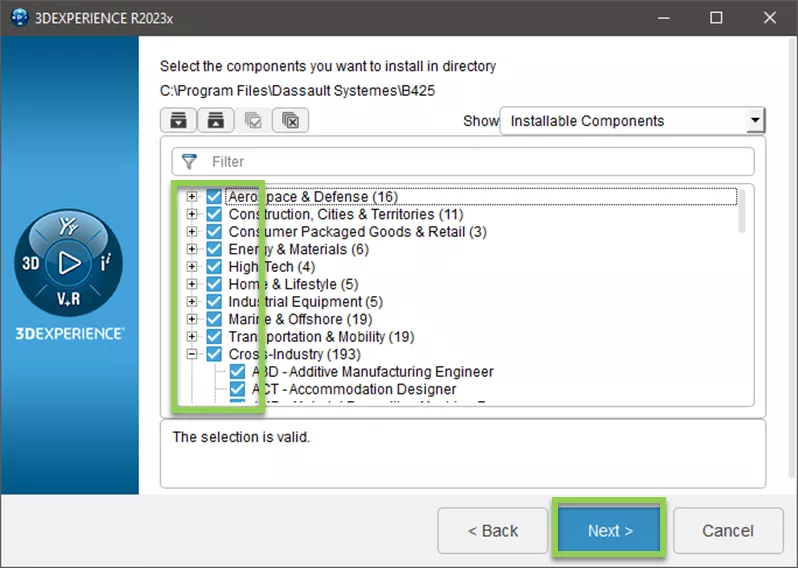
Select the components as they are relevant to your license(s). You can reference your license delivery email from “DoNotReply.ag.license-keys@3ds.com” to confirm which licenses to check. You may choose to install all components here, even if you do not own them.
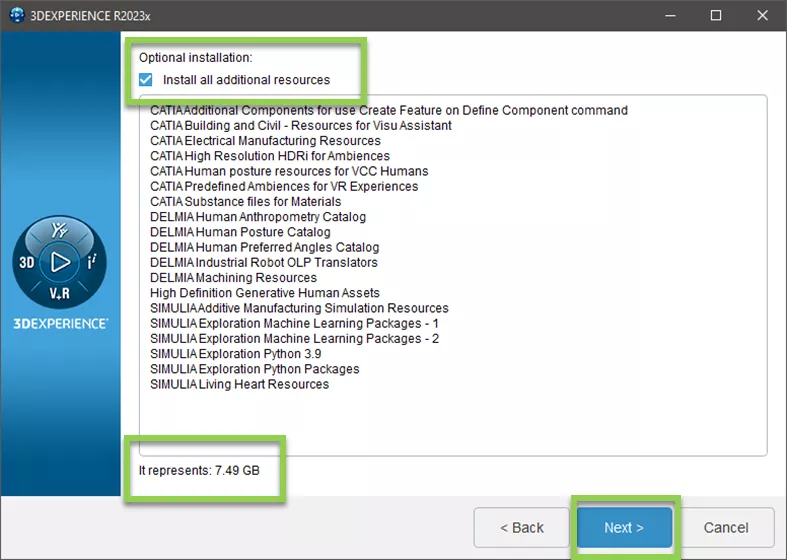
Additional resources may be chosen to be installed by checking the box next to Install all additional resources. The amount of space the resources will consume is listed at the bottom of this window.
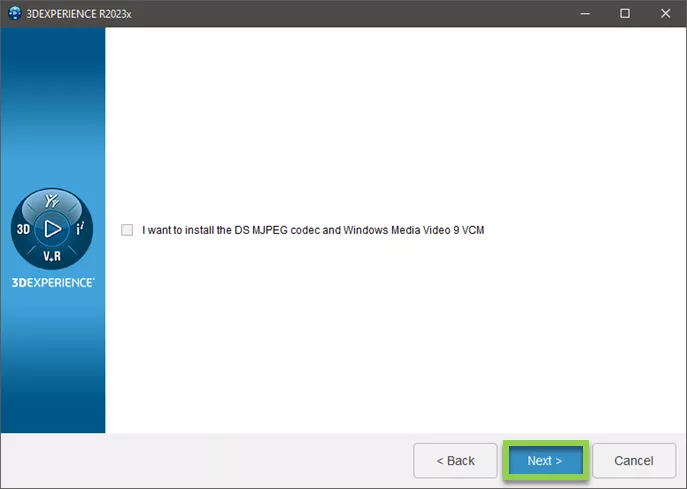
Selecting the below option will allow for videos recorded within 3DEXPERIENCE to be played on Windows Media Player.
Selecting where shortcuts are implemented is up to you. We suggest choosing at least one of the selectable options.

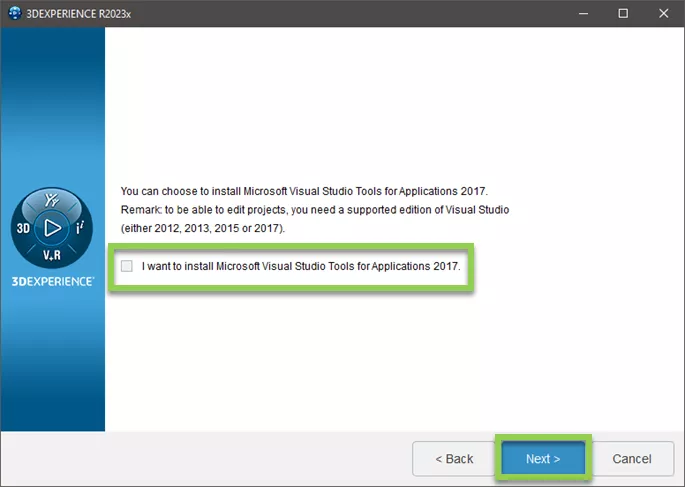
Select the option below to install Microsoft Visual Studio Tools for Applications 2017.
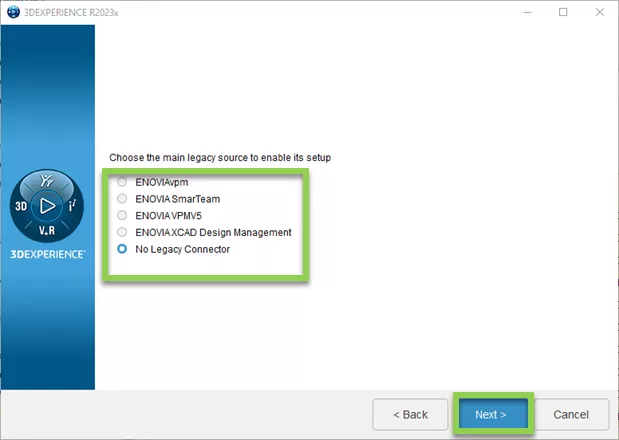
If you have an ENOVIA client you would like to connect with, please discuss implementation with your ENVOIA Application Engineer. Otherwise, choose No Legacy Connector.
Space available versus space required is shown at the bottom of this screen.

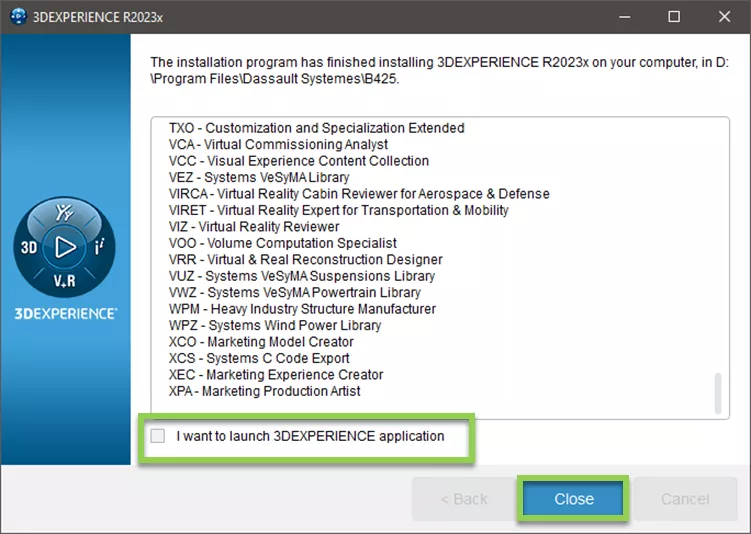
Step 6: When the installation has finished, you will be prompted to launch the software., however, the software is not ready to be launched yet. Please uncheck “I want to launch ……. now” and select Finish.
Install 3DEXPERIENCE Content
Note: This section is optional and can be performed later.
Step 1: Multi-select all folders pertaining to the 3DEXPERIENCE Native Apps Content and extract them. If done correctly, all zip folders selected will be extracted into a single folder and the size of this folder will approximately match what is listed within your media download link. To display the size of the folder, right-click the folder, select Properties, and navigate to the General tab. Notice in the example below that the Size/Size on disk of the folder is 27.9GB and matches what is listed on the media download page. If the difference is more than ~0.1GB then you should attempt to re-download the software.
Note: You may need a third-party unzipping tool to do this properly. We suggest using 7-Zip, which can be downloaded here: https://www.7-zip.org/download.html. When using 7-Zip, you can right-click after multi-selecting and choose 7-Zip > Extract Here.
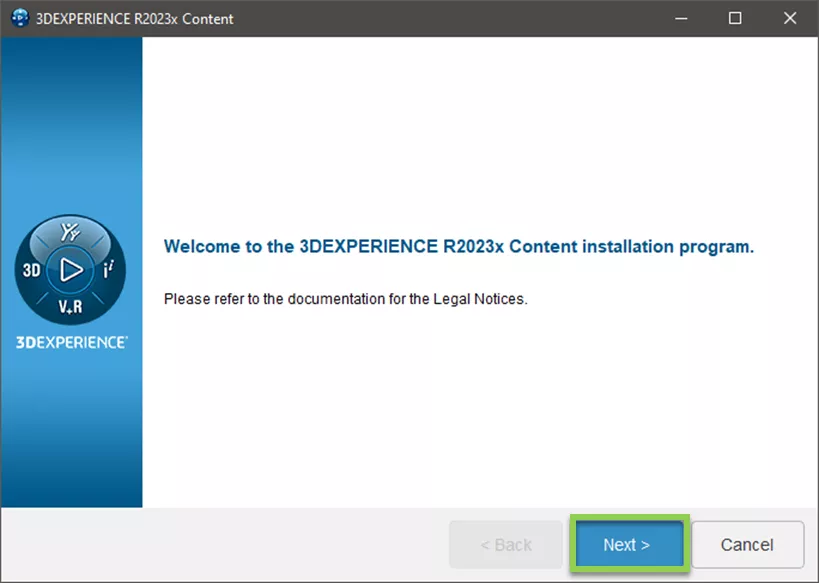
Step 2: Open the resulting folder from the previous step. Using the Search bar at the top right of the window, search for setup.exe. Double-click on the setup file to begin the installation.

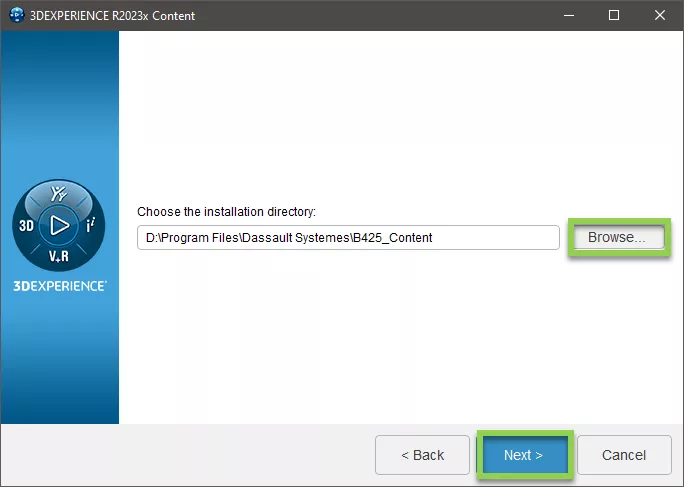
Step 3: The install wizard for 3DEXPERIENCE CATIA will open. Please proceed through the prompts as instructed below.
The Native Apps Content should be installed into the same Dassault Systèmes folder that you chose for the base software during Step 5 of the Install 3DEXPERIENCE CATIA section.
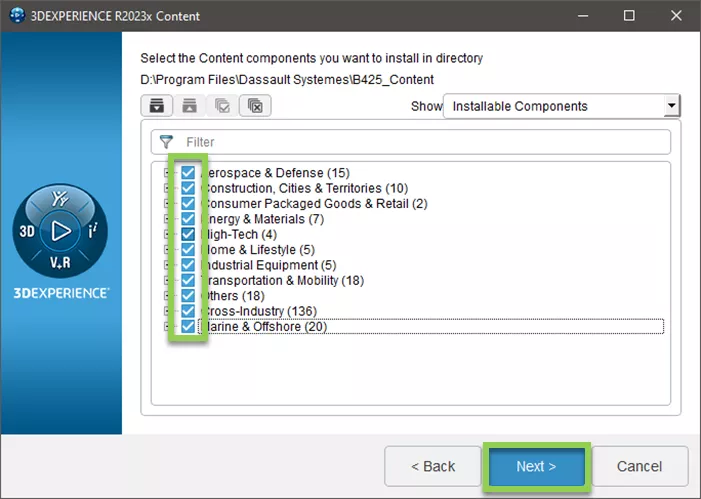
Select the components relevant to your license(s). You may reference your license delivery email from “DoNotReply.ag.license-keys@3ds.com.”
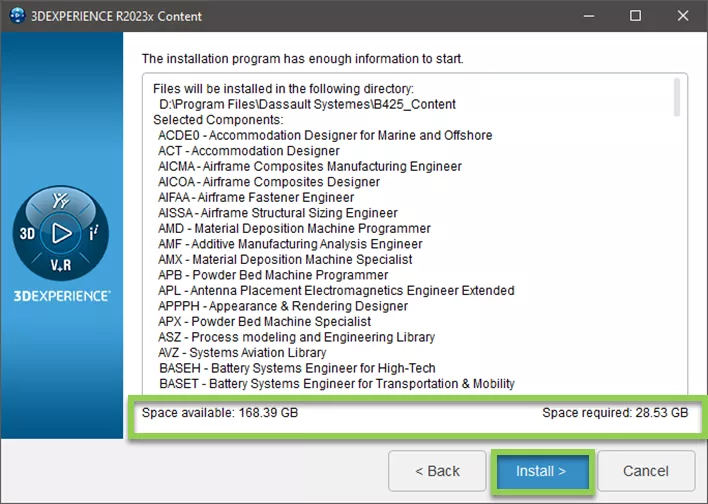
Before starting the installation, review the amount of space required versus the amount of space you have available.
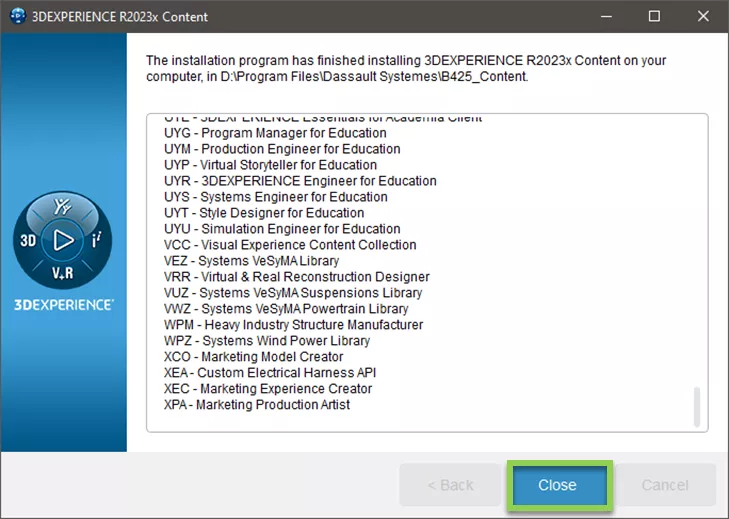
Once the installation is complete, you may close the install wizard.
Install the Dassault Systèmes License Server (DSLS)
Note 1: If your company opted for a DS Managed License Server, this portion can be skipped. Please proceed to the section labeled Configure DS Managed DSLS.
Note 2: This will need to be performed on the machine that is hosting the DSLS only. If there is only one machine running CATIA, the DSLS can be installed on that same machine. If there is more than one machine running CATIA, it is suggested that the DSLS be installed on a dedicated machine.
Step 1: Log into the machine that will be hosting the Dassault Systèmes License Server (DSLS) program. When selecting the machine to host this program, ensure the following:
- It is highly recommended that the machine running the DSLS is a physical machine, not a Virtual Machine. Software installed on Virtual Machines is not supported by Dassault Systèmes and will not receive support should any issue arise.
- The machine will be powered on whenever a user needs to run CATIA.
- The machine has a static IP address.
- The machine is connected to a network that all designated CATIA users can access. For example, if there are CATIA users who are working remotely, it is suggested that the machine running the DSLS be located onsite at the company, connected to the company’s network and that the company’s network be accessible via a VPN connection. Users working remotely must therefore be logged into the company’s VPN to run CATIA remotely.
Step 2: Within Step 3 of the portion labeled Install 3DEXPERIENCE CATIA, you extracted your install files into a singular folder. Reopen this folder.
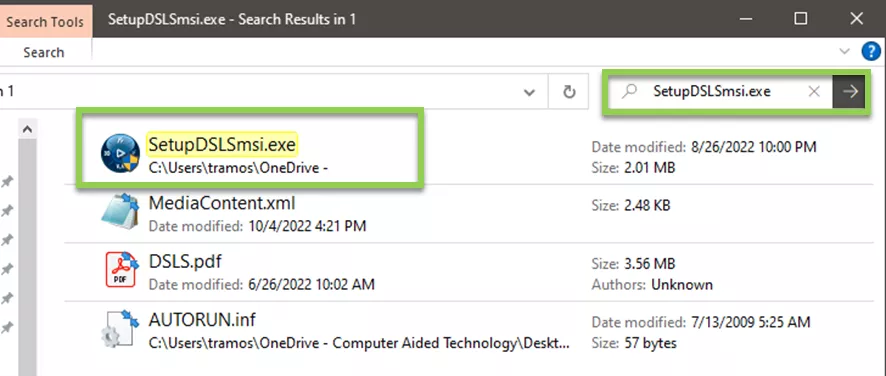
Step 3: Using the Search bar at the top right of the window, search for SetupDSLSmsi.exe. Double-click on the setup file to begin the installation.
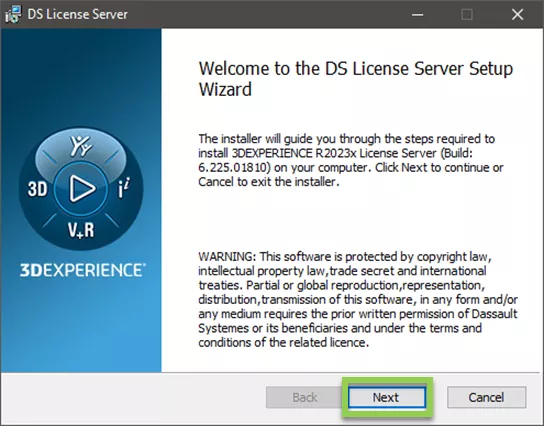
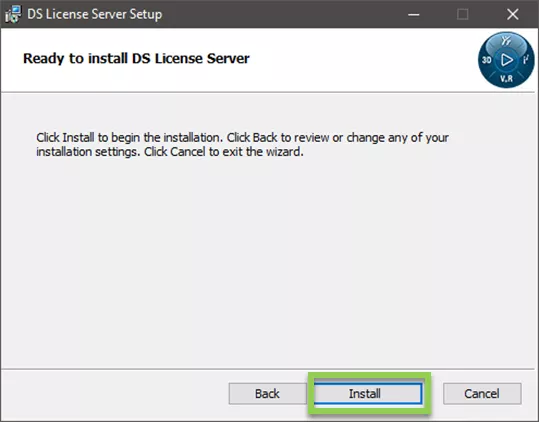
Step 4: Follow the instructions to install the DSLS using the defaults provided by the install wizard.
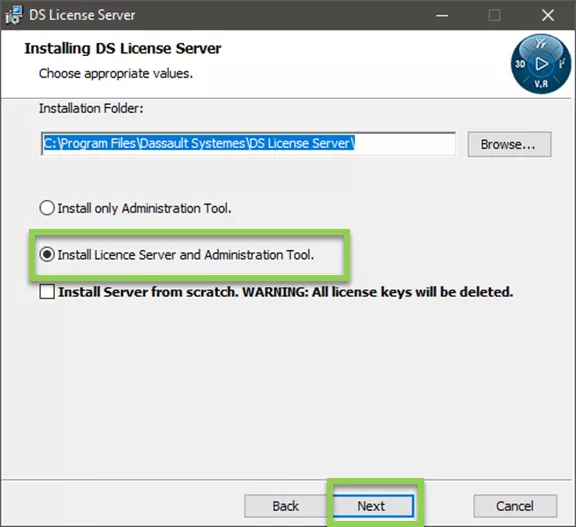
Note: Ensure the option Install License Server and Administration Tool is checked before continuing this portion of the installation. If the option Install Server from scratch…. is available, DO NOT select it unless specifically instructed by GoEngineer or Dassault Systèmes.
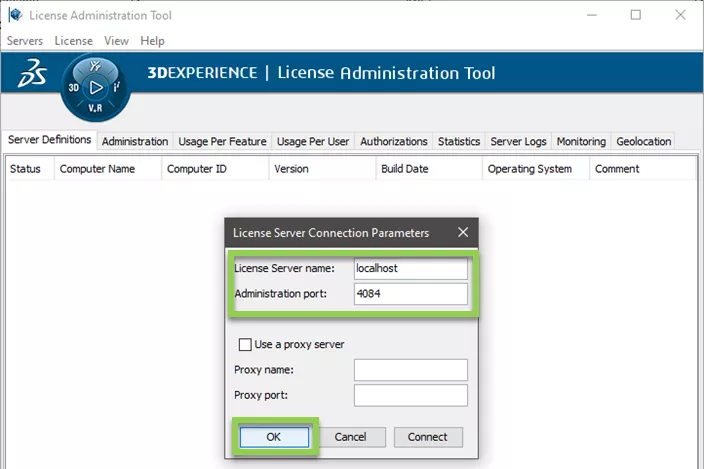
Step 5: Once the installation is complete, you will be prompted to declare a License Server name and Administration port. Leave both as default and select OK. Leave the License Administration Tool open and proceed to the next section.
Enroll the .LICZ File(s)
Note: If your company opted for a DS Managed License Server, this portion can be skipped. Please proceed to the section labeled Configure DS Managed DSLS.
Step 1: Soon after you purchased your licenses, you should have received an email from “DoNotReply.ag.license-keys@3ds.com” which contains your license keys as files with a .LICZ extension. Save these files to a known location locally on the machine that the DSLS was installed on.
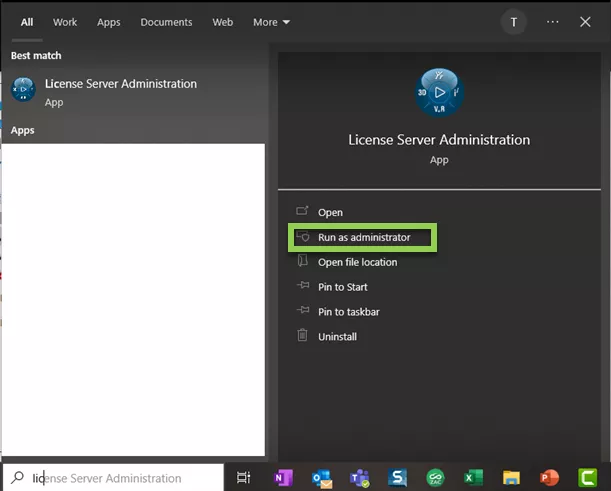
Step 2: If not done so already, open the Dassault Systèmes License Server by using the Windows search tool to search for and open License Server Administration.
Alternatively, the tool can be opened by running DSLicSrv.exe from <C:\Program Files\Dassault Systemes\DS License Server\win_b64\code\bin>
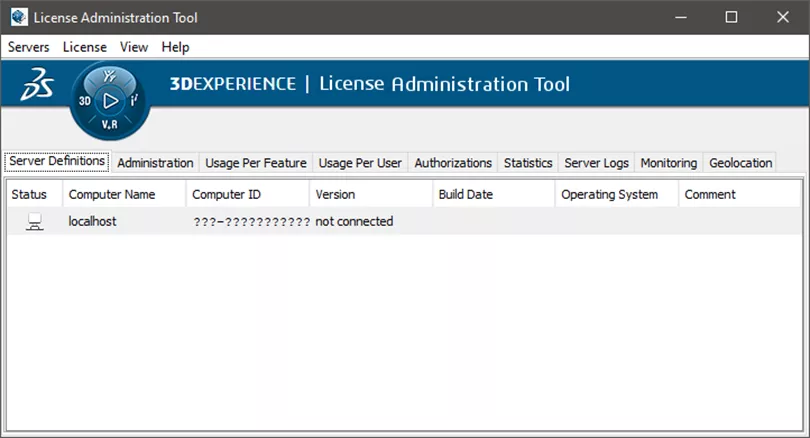
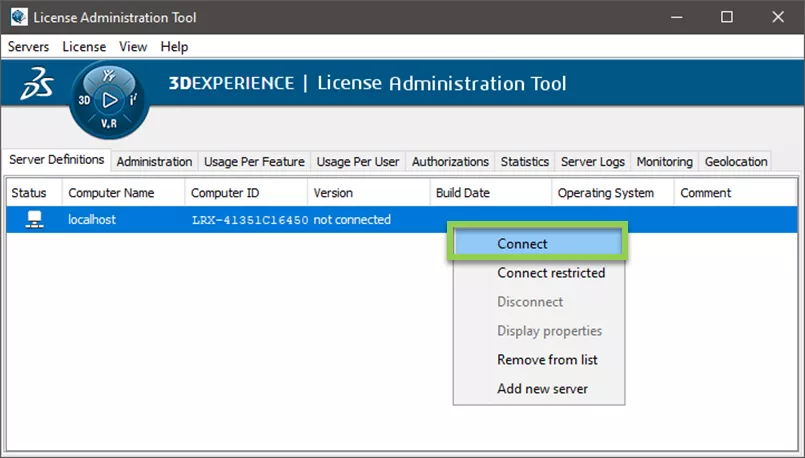
Step 3: With the tool open, right-click on the line containing the not connected note and select Connect.
Step 4: Once connected, navigate to the top banner and select License > Enroll. At this point, Windows Explorer will pop up. Navigate to the location where you stored your .LICZ file, highlight it, and select Open. If there is more than one .LICZ file that was delivered to you from DoNotReply.ag.license-keys@3ds.com, they must be enrolled individually by repeating this step for each subsequent .LICZ file.

Create DSLicSrv.txt File (For Privately Hosted DSLS)
Note 1: If your company opted for a DS Managed License Server, this portion can be skipped. Please proceed to the section labeled Configure DS Managed DSLS.
Note 2: This file will enable users to check out licenses by telling CATIA what machine to find the DSLS and through which port to make the connection. Therefore, this must be performed on every machine that CATIA is installed on.
Step 1: Navigate to < C:\ProgramData\DassaultSystemes> and create a new folder. Name this folder Licenses. If the ProgramData folder is hidden, you can show it by checking the box for Hidden Items located in the Show/hide section of the View tab of your Windows Explorer.
Step 2: Open the Licenses folder. Here, create a new .txt file and name it “DSLicSrv.” Open this file to edit it.
Step 3: Within this file, we will input an alpha-numeric string that will conform to one of two syntaxes. The choice of syntax will depend on whether the machine running the DSLS is the same as the one running CATIA.
If the machine running the DSLS is the same as the one running CATIA:
- In this scenario, there is only one user running CATIA and is the only person who needs to check out a license.
- The .txt file will contain the machine name followed by 4085 which denotes the port the machine will communicate through. For example, if the machine name were “DENCOM-TP” then the .txt file would read as: DENCOM-TP:4085
If the machine running DSLS is NOT the same as the one running CATIA
- In this scenario, the machine(s) running CATIA need to communicate with the machine running the DSLS.
- The .txt file will contain the IP address of the machine running the DSLS followed by 4085 which denotes the port the machine will communicate through.
- For example, if the machine running the DSLS has an IP address of 12.3.4.56, then the .txt file would read as: 12.3.4.56:4085
Note: For both scenarios, it is critical that the .txt files contain only the string as noted above and that there are no empty spaces or lines before or after. If there are any empty spaces or lines in this file CATIA will not open properly.
Enabling Port Access Through Firewall (for Privately Hosted DSLS)
In this portion, we will open the 4084 and 4085 ports from the Windows Defender Firewall so that they can be used to allow communication between CATIA and the DSLS.
Note 1: If your company opted for a DS Managed License Server, this portion can be skipped. Please proceed to the section labeled Configure Dassault Systèmes (DS) Managed DSLS.
Note 2: This portion is required for the scenario where CATIA and the DSLS are installed on separate machines. For this scenario, this portion must be performed on the machine running the DSLS as well as any machine running CATIA. If there is only one machine running CATIA and it is the same machine that the DSLS is installed on, this portion can be skipped.
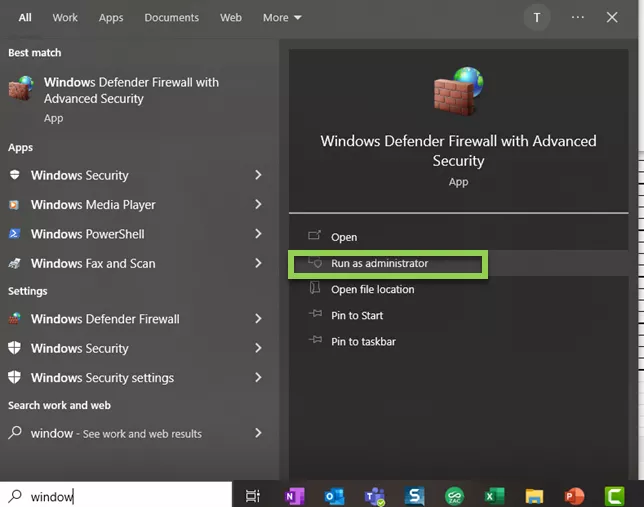
Step 1: Use Windows Search to open Windows Defender Firewall with Advanced Security. Run this as Administrator.
Step 2: On the left-side menu, highlight Inbound Rules, then in the right-side menu, select New Rule.

Step 3: Follow the prompts below as they correspond to the Steps for the Rule Wizard
- Rule Type: Select Port and hit Next.
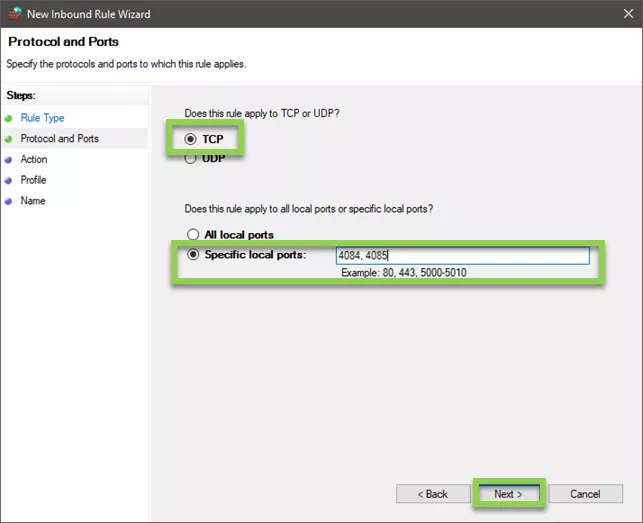
- Protocol and Ports: For Does this rule apply to TCP or UDP, select TCP. Then, select Specified local ports: Input 4084, 4085, and hit Next.
- Action: Check the option to Allow the connection and click Next.
- Profile: Check the boxes to apply this rule to Domain, Private, and Public.
- Name: Name this Rule either DSLS or CATIA.
Step 4: On the left-side menu, highlight Outbound Rules, then in the right-side menu, select New Rule. Repeat the previous step by following the same prompts to create the Outbound Rule for the same ports (4084, 4085).
Configure Dassault Systèmes (DS) Hosted DSLS
This file will enable users to check out licenses by navigating CATIA to the DS Managed server that manages your licenses.
Note: If your company opted for a Privately Hosted DSLS you may skip this step.
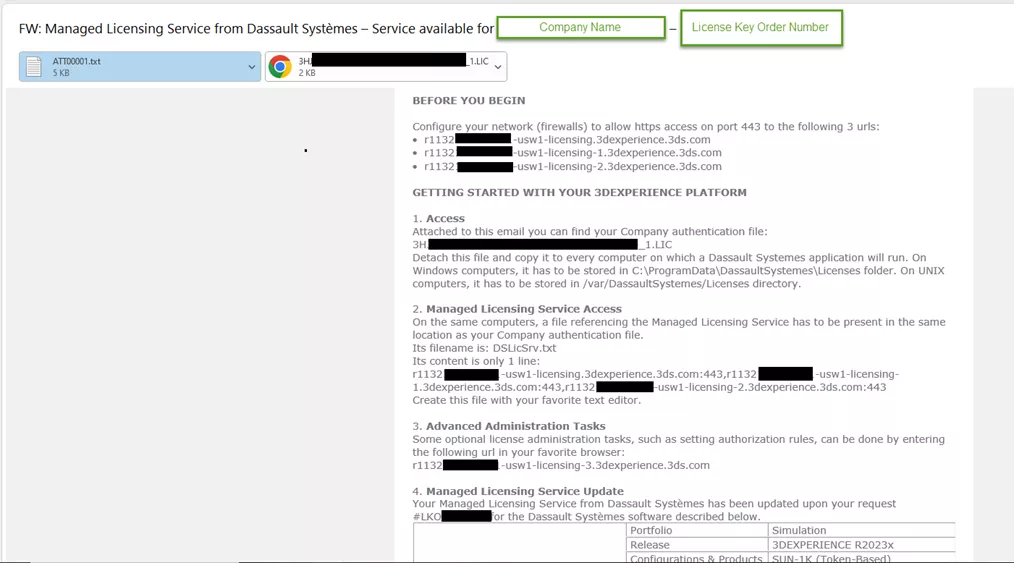
Soon after you purchased your licenses, you should have received an email from “DoNotReply.ag.license-keys@3ds.com” which will resemble the image below. The email provides a walkthrough on how to configure the DS Managed DSLS. We have provided a more in-depth walkthrough of the portions marked 1. Access and 2. Managed Licensing Service Access.
Step 1 (Access): Navigate to < C:\ProgramData\DassaultSystemes> and create a new folder. Name this folder Licenses. If the ProgramData folder is hidden, you can show it by checking the box for Hidden Items located in the Show/hide section of the View tab of your Windows Explorer.
Step 2 (Access): Open the Licenses folder. Copy and paste the .LIC file provided in the email into this folder.
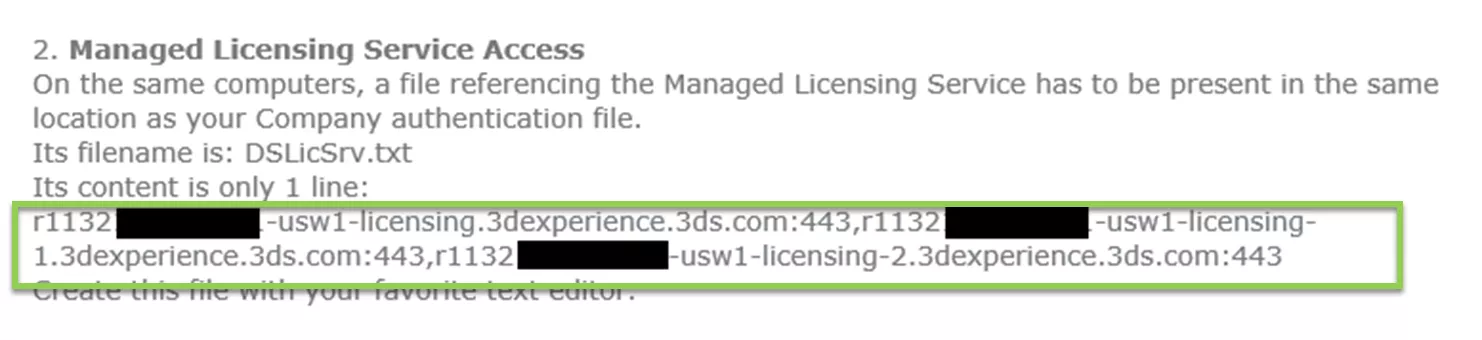
Step 3 (Managed Licensing Service Access): In the same folder (Licenses), create a new .txt file and name it “DSLicSrv”. Open this file to edit it. Input the string of text provided in the email. Ensure that it is all on one line and that there are no empty spaces or lines before or after the string. Save and close this file.
First Launch of CATIA
Step 1: Launch CATIA from either:
- The icon on your Desktop (if applicable)
- Or from < C:\Program Files\Dassault Systemes\B425\win_b64\code\bin\CATSTART.exe>. “B###” will coincide with the Release Version of CATIA you requested and downloaded. For example, B425 would coincide with the 2023 release year, B424 would coincide with the 2022 release year, and so on.
Step 2: Upon the first launch of 3DEXPERIENCE, you will be presented with a Platforms window. Using this window, we will define how to connect the 3DEXPERIENCE server our ENOVIA Team at GoEngineer has set up for you. In the Platforms window, select the “+” icon.

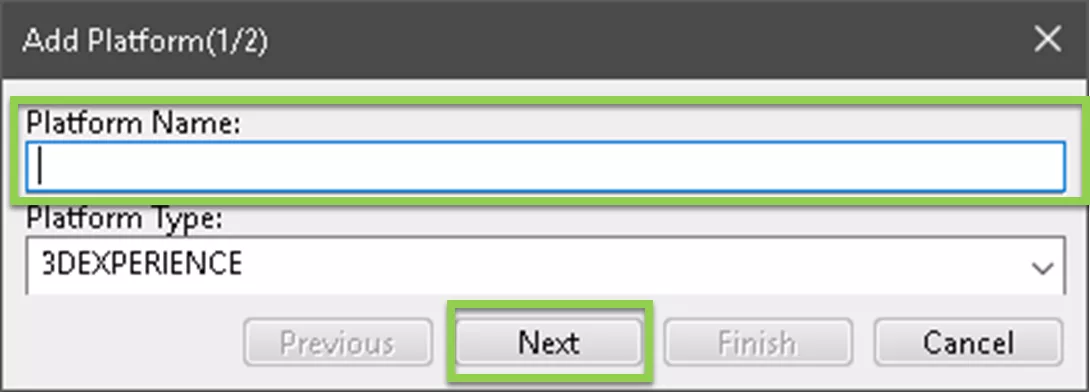
Step 3: Next, the Add Platform (1/2) window will appear. Here, you can choose any input for Platform Name. Once a name has been chosen, select Next.
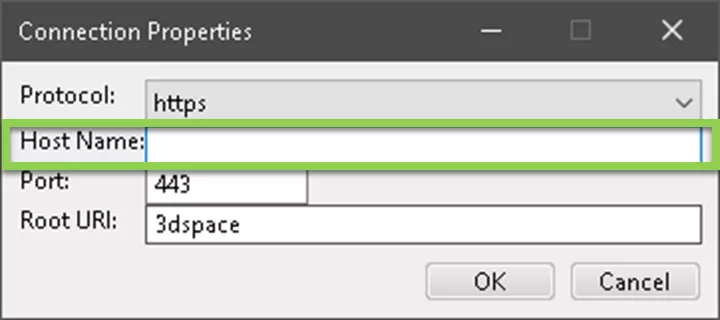
Step 4: Upon hitting Next from the “Add Platform (1/2)” window you will be directed to the Connection Properties window. Here you will fill in the field for Host Name: with the URL that you worked with your ENOVIA contact at GoEngineer to generate. If you do not have this information, please contact your Sales Representative.
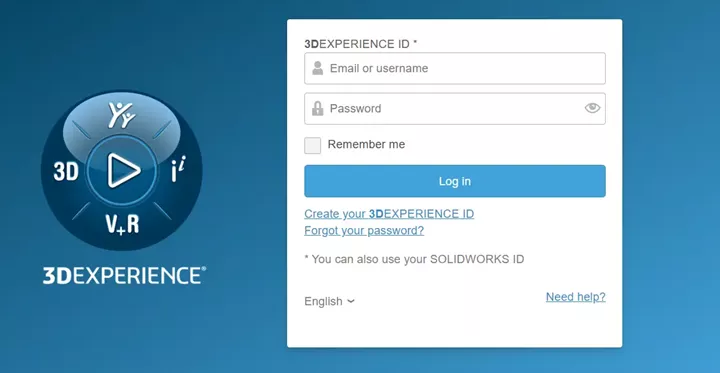
Next, you will be prompted to log in. If you are an administrator for your company, you should have set up your login information when you created your 3DS account during the section in the documentation labeled Retrieve Installation Files. You must use that same login information here. If you are a user, the administrator in your company should have set up a login and password for you to use. Please refer to them for this information.
Note: If your company uses an active directory to generate usernames and passwords DO NOT select the “Remember Me” option. Checking this option will save your password but will not allow you to change it when your company’s active directory generates a new one, thus locking you out of 3DEXPERIENCE.
This concludes how to install 3DEXPERIENCE CATIA. Check out more articles by following the links below.
Related Articles
Composites in 3DEXPERIENCE CATIA Overview
6 Design Struggles in SOLIDWORKS that are Easier in CATIA
How to Create User Groups on the 3DEXPERIENCE Platform
3DEXPERIENCE Platform 2023x FD02: Top Enhancements
CATIA V5 vs 3DEXPERIENCE CATIA: Interface, Licensing, Installation, & Setup

About Tim Ramos
Tim Ramos is a Senior Specialist with GoEngineer based out of Denver, Colorado. He graduated from Rensselaer Polytechnic Institute in 2014 with a degree in Mechanical Engineering and Material Science. After graduation, Tim worked with Honda R&D designing the body/frame structures of their vehicles. He designed sheet metal parts using advanced surface design and plastic injection molded parts using solid part design in CATIA V5. In 2018, Tim transferred over to his CATIA Specialist career path and has been focusing on all things related to CATIA V5-6 and 3DEXPERIENCE CATIA ever since.
Get our wide array of technical resources delivered right to your inbox.
Unsubscribe at any time.