SOLIDWORKS Face Curves Explained
In this tutorial, we show how to use the Face Curves command in SOLIDWORKS. Face Curves are sketch entities created in two perpendicular directions along the faces of a model to form a mesh.
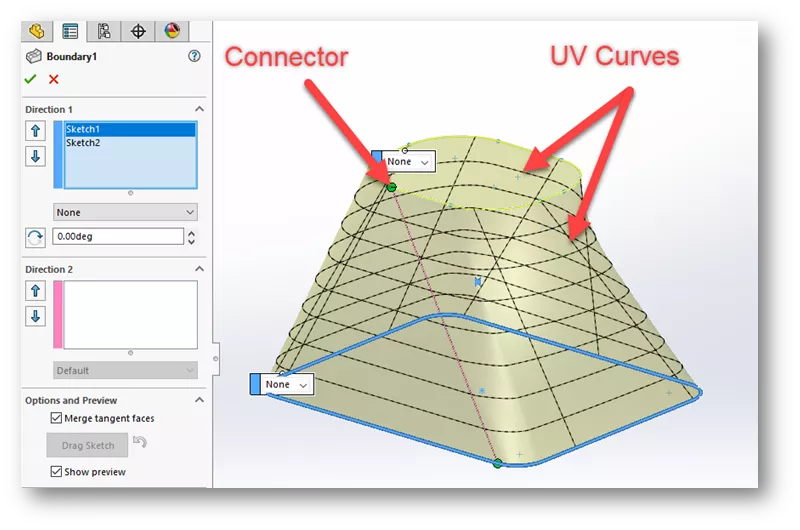
For example, when creating a loft feature, UV curves are overlayed on the model preview. (UV curves are the black lines shown in the image below.) These curves help visualize the shape and are the basis of the connectors that control the shape's behavior, especially the twisting that sometimes results. The SOLIDWORKS Face Curves command allows us to create these UV curves as sketch geometry.
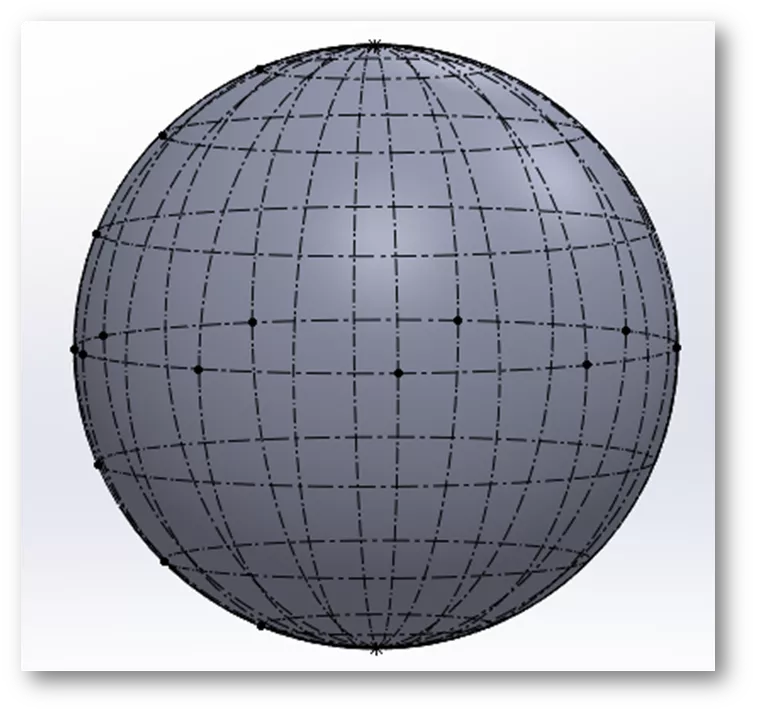
Another familiar set of UV curves is the latitude and longitude lines on a globe. The letters “U” and “V” are generalized analogs to the “X” and “Y” directions in 2D Cartesian space. In both cases, these directions are mutually perpendicular. These curves are useful in modeling freeform shapes.
How to Use Face Curves
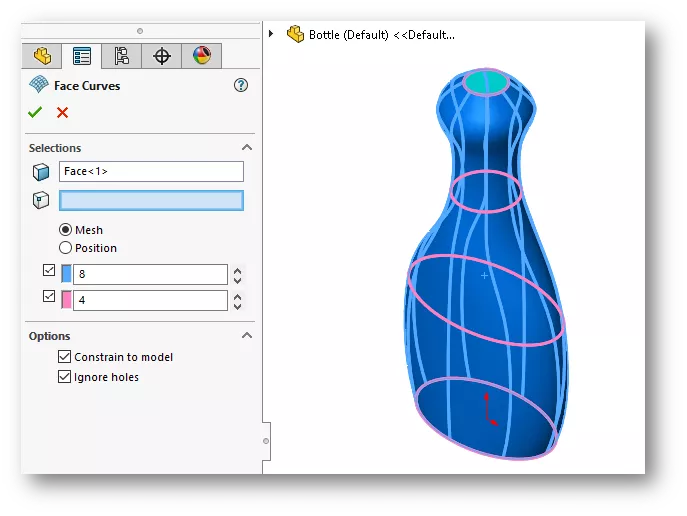
In this example, we will use Face Curves to examine the model of a container. Face Curves are 3D sketch entities, so we'll start a 3D Sketch from the Sketch Toolbar.
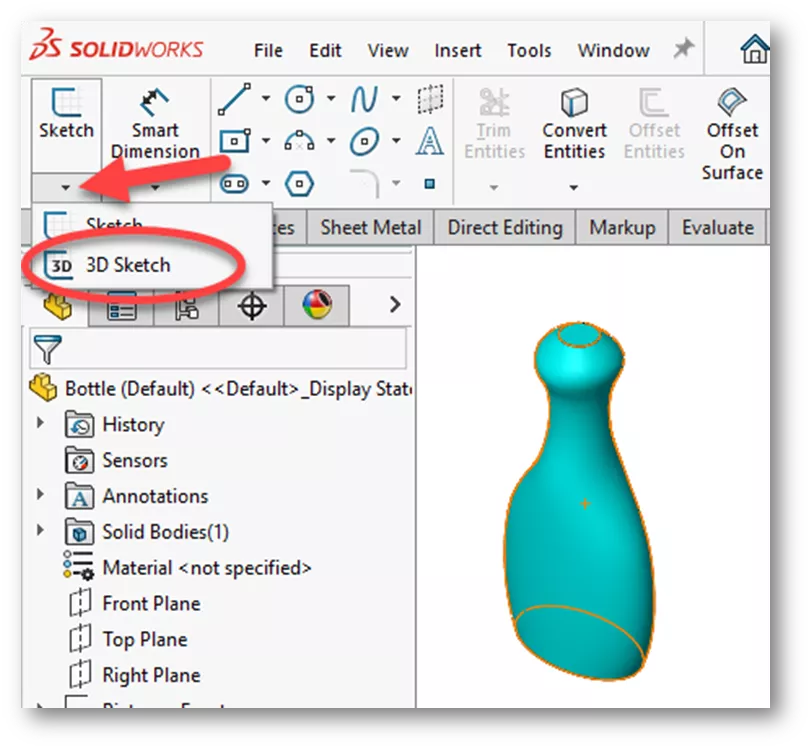
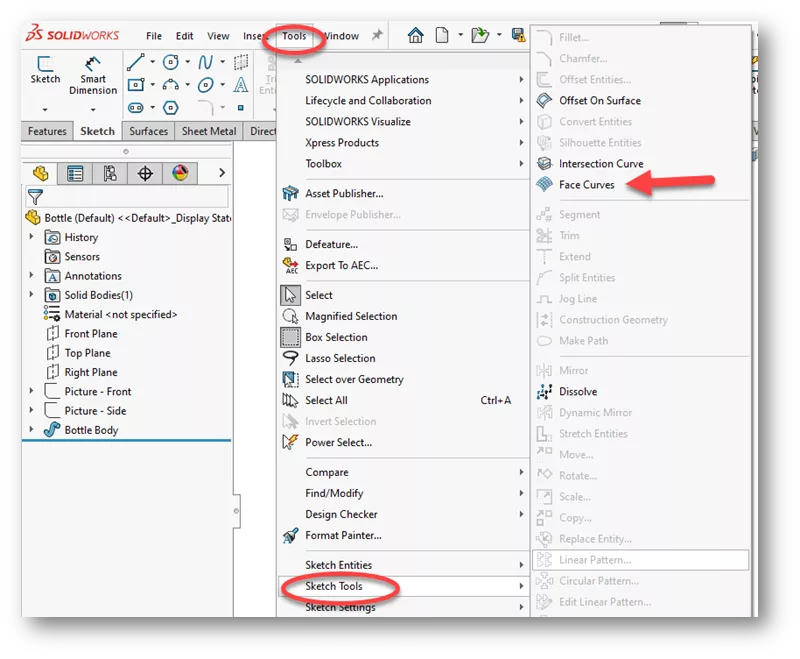
With the 3D Sketch started, access Face Curves from the Tools > Sketch Tools submenu.
In the Face Curves PropertyManager, select Mesh and specify how many curves to create in each direction (this is the “U” and “V” mentioned earlier). Next, choose the face on which the curves will be created, click OK, and then exit the sketch.
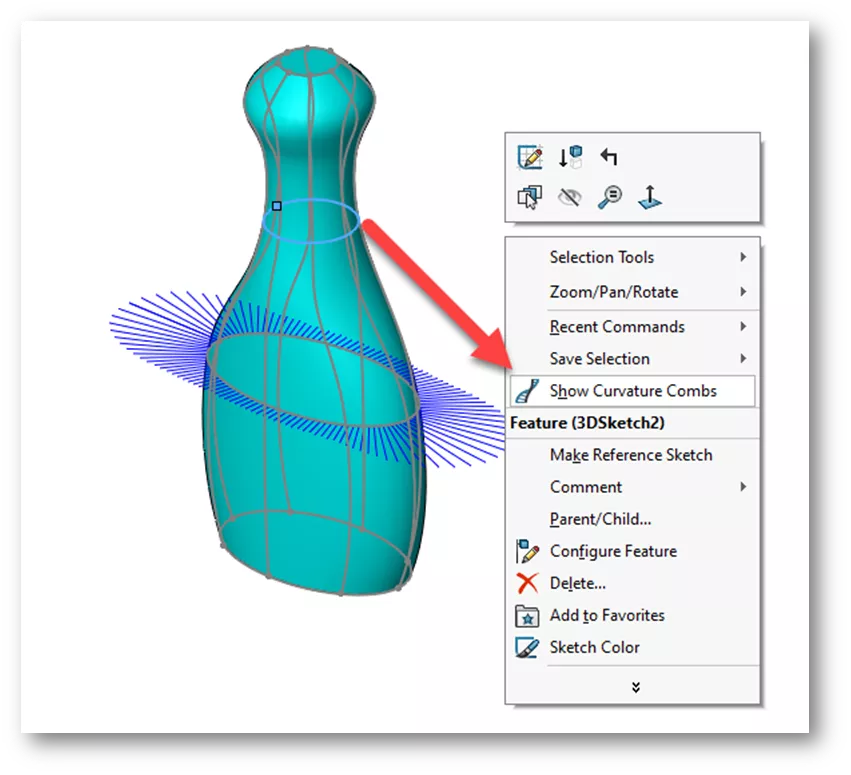
We can turn on Curvature Combs to examine the shape. To do this, right-click on one of the splines and choose Show Curvature Combs. To turn off Curvature Combs, right-click on the spline again and uncheck Show Curvature Combs.
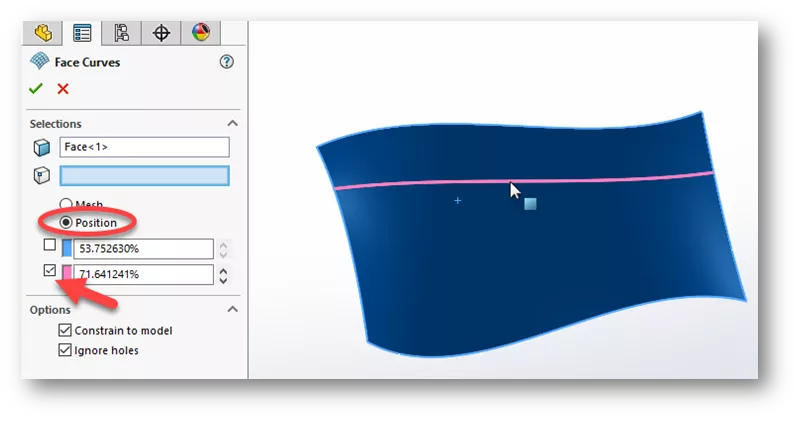
Face Curves can also be used to trim unusually shaped surfaces. For this example, we’ll start a 3D Sketch, select Face Curves from the Tools > Sketch Tools menu, and choose Position in the Face Curves PropertyManager.
We only want a curve in one direction, so we’ll uncheck the position 1 direction and use the mouse to freely locate the curve. We could also locate the curve precisely with a sketch point or vertex.
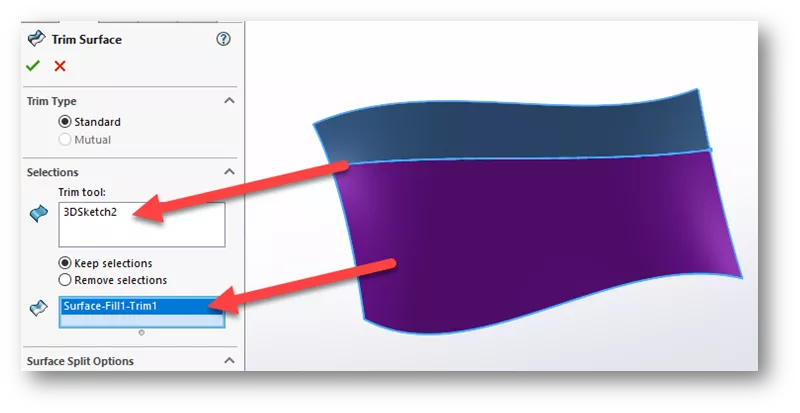
Click OK in the Face Curves PropertyManager and exit the sketch. Next, go to the Surfaces Toolbar and select Trim Surface. In the PropertyManager, select the curve for the Trim Tool, choose Keep selections, and choose the area of the surface to keep.
Face Curves can also be used to create shapes. In this example, we have already created Face Curves on the two surfaces, then used the Spline command to create splines tangent to the corresponding curves on each face. These will be the guide curves we’ll use for a Boundary Surface feature.

On the Surface Toolbar, choose the Boundary Surface command. Use the SelectionManager to choose the edges on each surface for Direction 1. Use the SelectionManager to select each connecting spline for Direction 2.
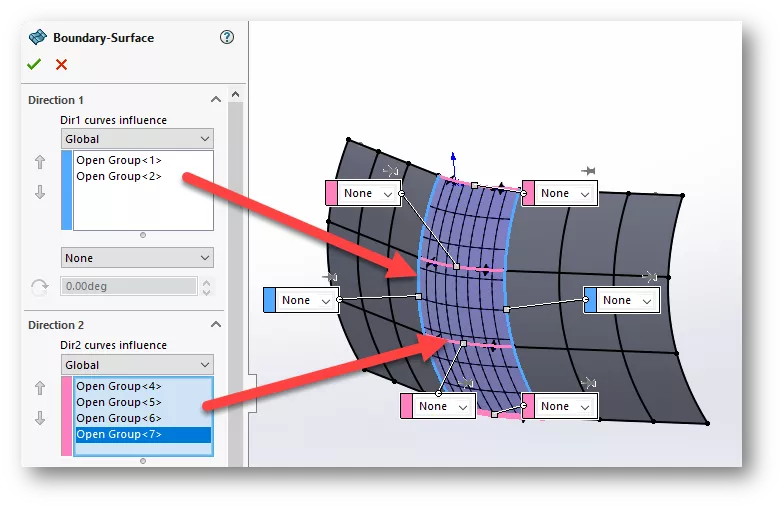
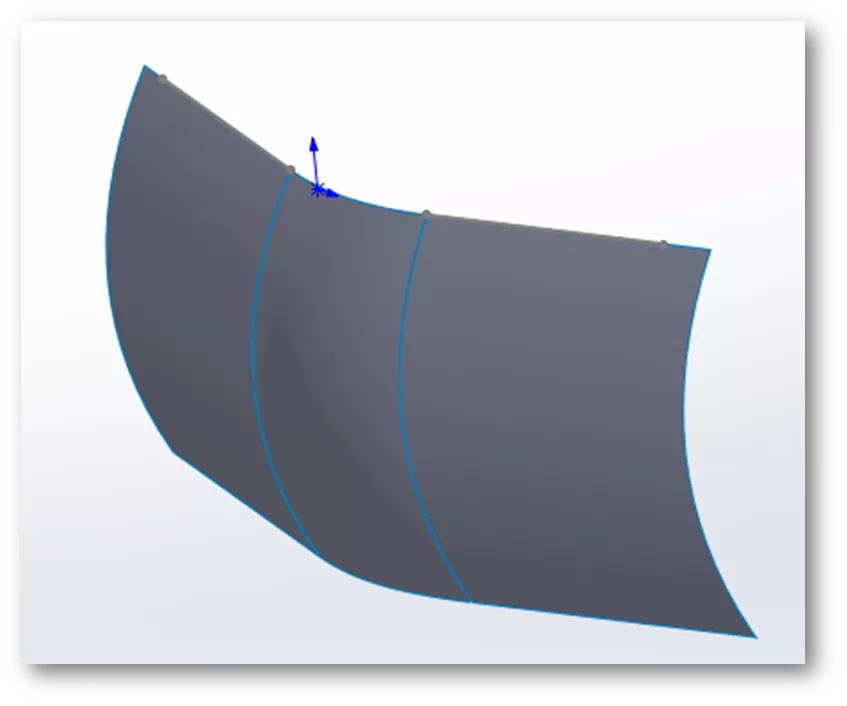
Click OK to get the following results.
As you can see, SOLIDWORKS Face Curves is a powerful tool for analyzing and creating geometry. Check out more SOLIDWORKS tutorials linked below.
More SOLIDWORKS Tutorials
SOLIDWORKS Dimensions Dialog Box Options
How to Change Orientation of an Existing SOLIDWORKS Part
7 Important Tips for New SOLIDWORKS Users
SOLIDWORKS: Creating a Derived Centerline in a Twisted Sweep

About Zach Brown
Zach Brown is a certified SOLIDWORKS Expert and a Technical Support Engineer. Prior to working at GoEngineer, he spent 15 years as a mechanical designer, CAD support tech, and instructor using SOLIDWORKS. His hobbies include playing guitar, riding motorcycles, and skiing.
Get our wide array of technical resources delivered right to your inbox.
Unsubscribe at any time.