GrabCAD Print Pro: Adding Labels to FDM Parts
With 3D printing, customization and personalization are essential. Whether you're a professional engineer, an artist, or a hobbyist, there's often a desire to add that extra touch to your 3D printed creations. GrabCAD Print Pro understands this need and offers a powerful feature to meet it – the Labels tool. In this article, we'll explore how you can use the labels feature to add custom text to the surface of FDM 3D printed parts, turning your designs into unique, standout creations.
GrabCAD Print Pro's Labels tool allows users to add custom text to the surface of 3D printed parts. It's important to note that this feature is available for the Stratasys H350 and for FDM users with GrabCAD Print Pro licenses.
Suggested Article >> Labeling Stratasys H350 Parts in GrabCAD Print
How to Add Basic Labels
- Open the Labels tool within GrabCAD Print Pro.
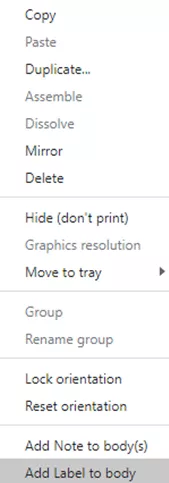
- Right-click on the 3D model to which you want to apply the label.
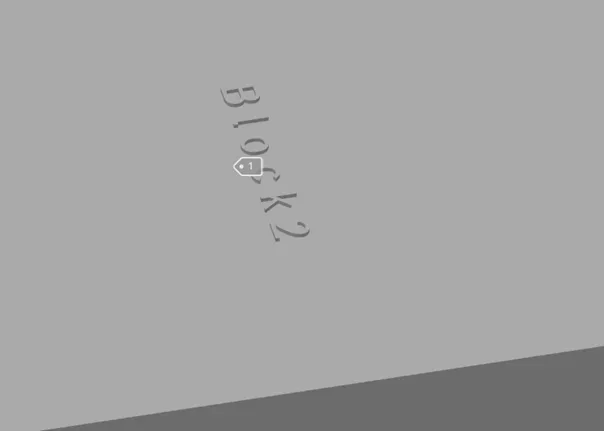
- Click the location on the model's surface where you want the label to be applied. Move the label around by clicking and dragging it or rotate it using the floating handle above the label.
- In the text box, enter the desired text. Choose whether you want the text to be embossed (sticking up from the surface) or debossed (etched into the surface). Additionally, you can adjust the text size to suit your preferences.
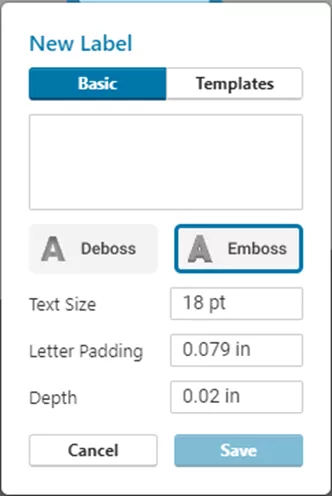
- Once you've customized your label, click Save.
- A warning message will appear allowing you to update the geometry and see the label text on the model surface. Click this later if you plan to add more labels.
Note: A basic label can be applied only once within a project. If you intend to apply the same or similar labels to multiple parts, consider using a template label (described below).
Template Labels
- After placing the label as described in the basic labels section, switch the label editor to Templates.
- Click New Template. A template label can include automatic text, such as the file name or a custom serial number.
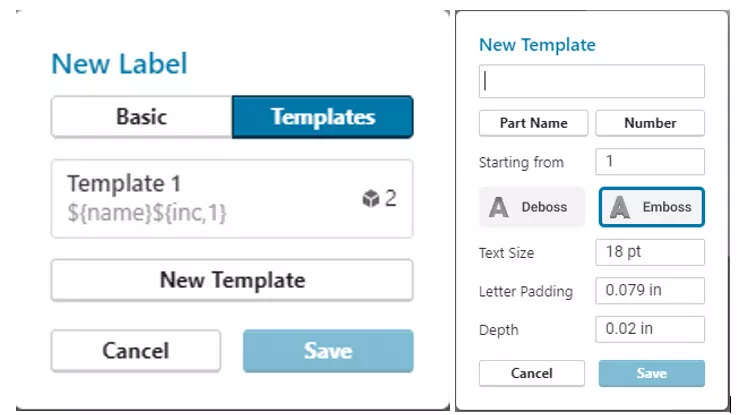
- After defining the template, save it. It will appear as an option under Templates in the label editor.
- Now, we can apply the same template label to other parts on the print tray. If a number is included in the template label, it will increment each time the label is applied. This is particularly useful when there are multiple identical parts.
Managing Labels
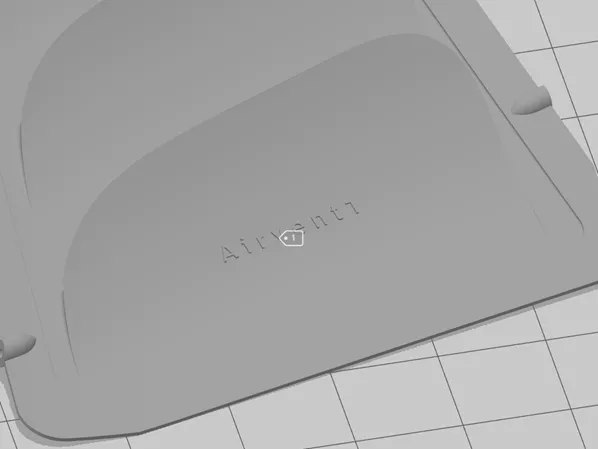
Once a label has been applied to a model, a tag will appear over the location of the model, where you can click to review the text. These tags are visible while the label tool is open unless the Hide Tags checkbox has been selected.
To make changes, click on a tag and use the edit icon to open the label editor or the delete icon to remove the label.
To edit a template, click the edit icon under the Templates section of the label tool. Any changes made to the template will apply to every instance of it in the project.
GrabCAD Print Pro's Labels tool is a versatile feature that lets users add a personal touch to their 3D prints. Whether you're branding prototypes, adding serial numbers for tracking, or simply expressing your creativity, labels enhance the overall appeal and utility of your 3D printed objects. By following the steps outlined in this guide, you can easily incorporate labels into your 3D printing workflow and make your creations unique and distinctive.
I hope you found this tutorial helpful. Check out more 3D printing articles below, or view our 3D printing playlist featuring thousands of video tutorials, recorded webinars, and more from our team of experts.
More 3D Printing News
FDM 3D Printed Tool Organizers & Assembly Aids
Intro to Vapor Smoothing: FDM 3D Printed Parts
GrabCAD Print Pro: Enhance Efficiency & Streamline Workflows
Insight Tutorial: Reuse Custom Groups
![]()
About Jeremy Marvin
Jeremy Marvin is a Senior Digital Manufacturing Application Engineer at GoEngineer.
Get our wide array of technical resources delivered right to your inbox.
Unsubscribe at any time.