SOLIDWORKS Sketch Text Tool Overview
In this guide, see what you can do with the SOLIDWORKS Sketch text tool and how to format the text to best suit your needs.
Adding Text
When adding text to a part, the first thing to do is make sure there are some sketch entities to use to place the text.
In this example, we will add a horizontal line, a vertical line, and a circle (starting with a horizontal line) and will make the three entities construction lines.

Figure 1. Sketch entities
Launch the Sketch text tool.
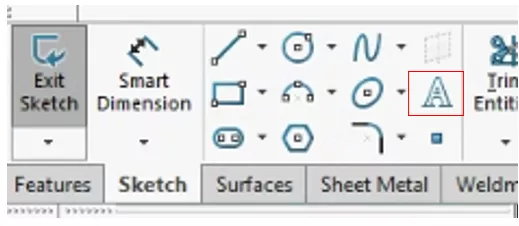
Fibgure 2. Sketch text tool
Select the horizontal line and then insert some text.
From there, center or left/right justify the text.
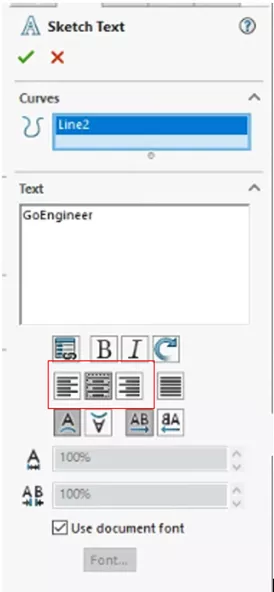
Figure 3. Left/Right/Center Justified
If the text is not the desired size, uncheck Use document font.
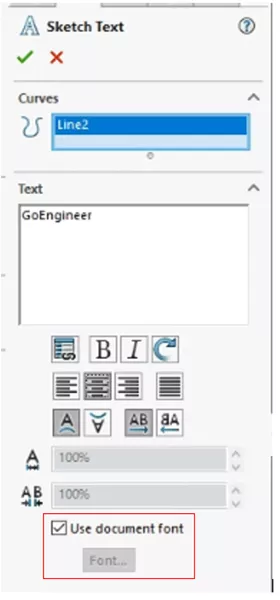
Figure 4. Use document font
Select a different font by selecting the font button. This will launch the font pop-up to select a Font, Font Style, and Height.
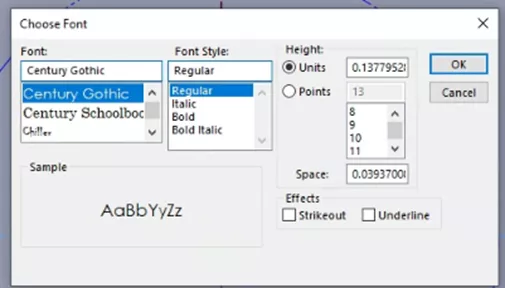
Figure 5. Choose Font
To choose a vertical alignment instead, from the Sketch menu, clear the line selection, and select the vertical line. After doing so, the text will appear rotated 90 degrees. This may be appropriate in some instances, but in this case, the text should be going vertically down the page. To change it, select all of the text and hit the rotate button.
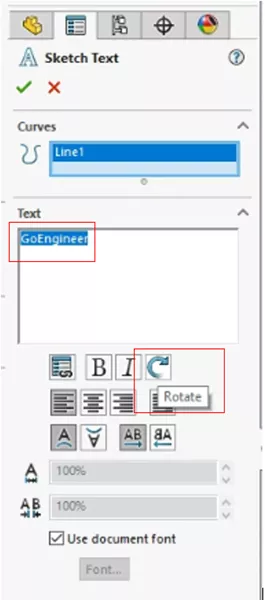
Figure 6. Select all tgextg and hit the rotate button
Alternatively, you can type in the syntax for rotate, which is “<r30>” followed by “</r>” at the end of the text.
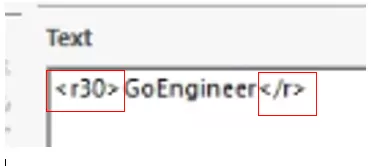
Figure 7. Rotate syntax
When the 30 is changed to a 90, the text will rotate 90 degrees, but will result in some overlap. Back in the Sketch text menu are two options; one for the width of the text and one for the spacing of the text.
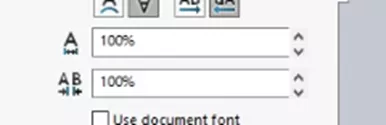
Figure 8. Width Factor, and Spacing
In this instance, we want to modify the spacing between the text. We will see that the text increases in distance from each other.
Lastly, let’s look at the text on the circle we created. Like before, we will remove the vertical line from the curves selection box and select the circle.
Because a circle does not have a start or end, we cannot justify the text as left or right. To do this, we would either need to create an arc using the arc tool or use split entities to break up this circle.
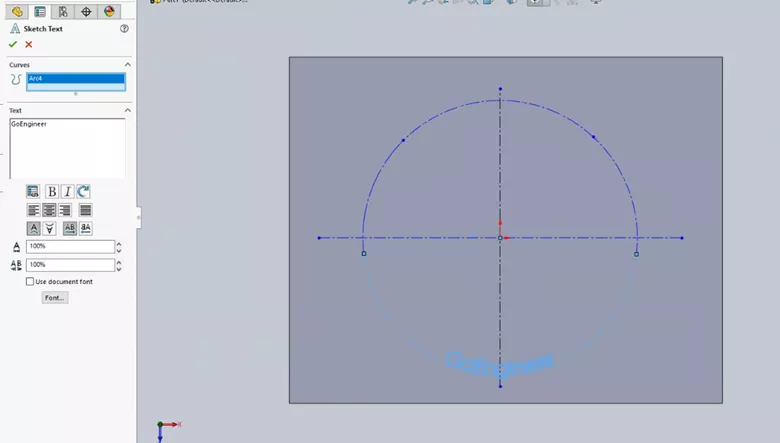
Figure 9. Arc tool or split entities
For this example, we will use the split entities tool, and once complete, we can go back in and edit the text. We can then select our arc and adjust the text to meet our needs.
To see the SOLIDWORKS Sketch Text Tool in action, check out the video below.

SOLIDWORKS CAD Cheat Sheet
Our SOLIDWORKS CAD Cheat Sheet, featuring over 90 tips and tricks, will help speed up your process.
More SOLIDWORKS Tutorials
Link Sketch Text to File Properties in SOLIDWORKS
How to Install and Troubleshoot Fonts in SOLIDWORKS
SOLIDWORKS Pack and Go vs. Copy Tree
![]()
About Nathen Blas
Nathen Blas is a SOLIDWORKS Technical Support Engineer based out of our Headquarters in Salt Lake City, Utah. He earned his Bachelor’s degree in Mechanical Engineering at the University of Utah in 2018 and joined the GoEngineer family that same year.
Get our wide array of technical resources delivered right to your inbox.
Unsubscribe at any time.